
- Gifts & Goods
-
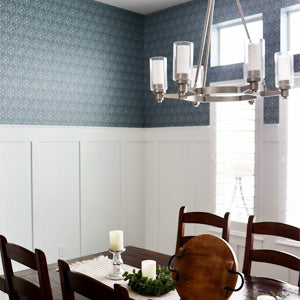
Wallpaper
Luxury Peel and Stick Wallpaper
![]()
- Gift Card
- Gifts & Goods
- Gift Card
Luxury Peel and Stick Wallpaper


Hi! I’m Teronia from Sew Haute blog and today I’m showing you just how easy it is to order your own custom print from Raspberry Creek Fabrics plus some tips on what to look for in a file. The process for ordering is pretty simple and straightforward.
So, the first thing I did was choose my print. I went to Etsy, but you can look anywhere online. You’re looking for a seamless file, this means that the pattern will automatically repeat seamlessly. I would also look for a minimum of 300DPI. This determines how sharp and detailed your print will come out. Be sure to take note of the types of files that are accepted by the RCF uploader. Currently, they are: JPG, PNG, GIF, SVG.
Now, RCF has a page of the different fabric types or bases that are available. If you’re not sure what each base is like you can order fabric swatches here.
There’s also a recommendation chart for what types of images do well on what types of fabric bases.


This is located in the Fabric Printing Best Practices and Policies. I HIGHLY recommend reading it thoroughly to ensure you have the best custom print experience and results. Also, you have to agree to them in order to complete your order.
So, here’s a walk through of the process:


You can see that I played around with the scale some here. I kept it in multiples of 8. It comes automatically set to 16 and although the DPI shown changes when you scale, it will print fine as long as your original file DPI is 300.
Another thing to note, if you’re mobile, turning your phone sideways will allow you to see the full description of the fabric types. DO NOT forget to choose your fabric type. The default is set at cotton jersey spandex. Prices are displayed next to each type by the HALF yard.


My fabric came out absolutely gorgeous! I preshrunk it of course and then sewed myself up a pair of Miss Tamarack Tights from Sofiona Designs. I like this pattern because you can customize the sizing all the way down to your ankle. For example, I went from 12 at the top to 10 thighs to a 6 calf and a 0 ankle. I also, hacked the waistband to be a crossover, but that’s another post.


These fit like a dream! Anyway, I hope that this helps ease any anxiety about taking the plunge with your own custom prints! Personally, I want to order all the things. I’ve already roped my extended family into custom pjs for next Christmas.
Comments will be approved before showing up.

Read along as Maggie talks about one of our newest fabrics- Taslan! She made the cutest set of coordinating Anoraks for her four children.

Maggie joins us today to show us how she used a couple of border prints to create new dresses for her daughter.

Elizabeth is here to show a couple of things she has recently made with our boardshort and swim knit. At the end of the post she adds inspiration for other uses for this versatile fabric!


Patricia Yepez
July 10, 2022
Thank you for taking the time to explain the process. It is very well written and easy too follow. I do have 1 question, how do you determine the scale? I know it has something to do with the repeat, but what if the print is polka dots, gingham, or a marbled look? Good luck on the family pj’s and please post a picture.