Estimated Turn Around Time: 4-5 Business Days, most orders are shipping under TAT
August 18, 2022 1 Comment
Custom printing is an exciting feature at Raspberry Creek Fabrics! You can turn your special art projects into a fabric, as Summer discussed in her blog post last week. Personally, it has given me a window into designing prints. I’ve previously used Photoshop and Illustrator to create fun prints and “one-of-the-kind” gifts for my loved ones. Today I wanted to explore a tool that’s easily accessible and free to use. Read along if you’re curious about creating your own seamless design file using the free version of Canva!
Recently, I have been on a floral kick! I found this print on Pinterest that caught my eye. But I wanted to make them in fall colors. So, I found another dress with colors I liked, and used Adobe Color to extract a color scheme out of it. Choosing complementary/ contrasting colors doesn’t come naturally to me, so I heavily rely on Adobe color in my sewing and other art projects - I can pick 3-5 colors from the color wheel or extract colors from an image I like. For this project, I chose two color schemes - one bright and another dark!
Image Caption: Inspiration dresses from Pinterest.
Image Caption: Color themes extracted from the Pinterest dress. Bright scheme (top) and Dark scheme (bottom).
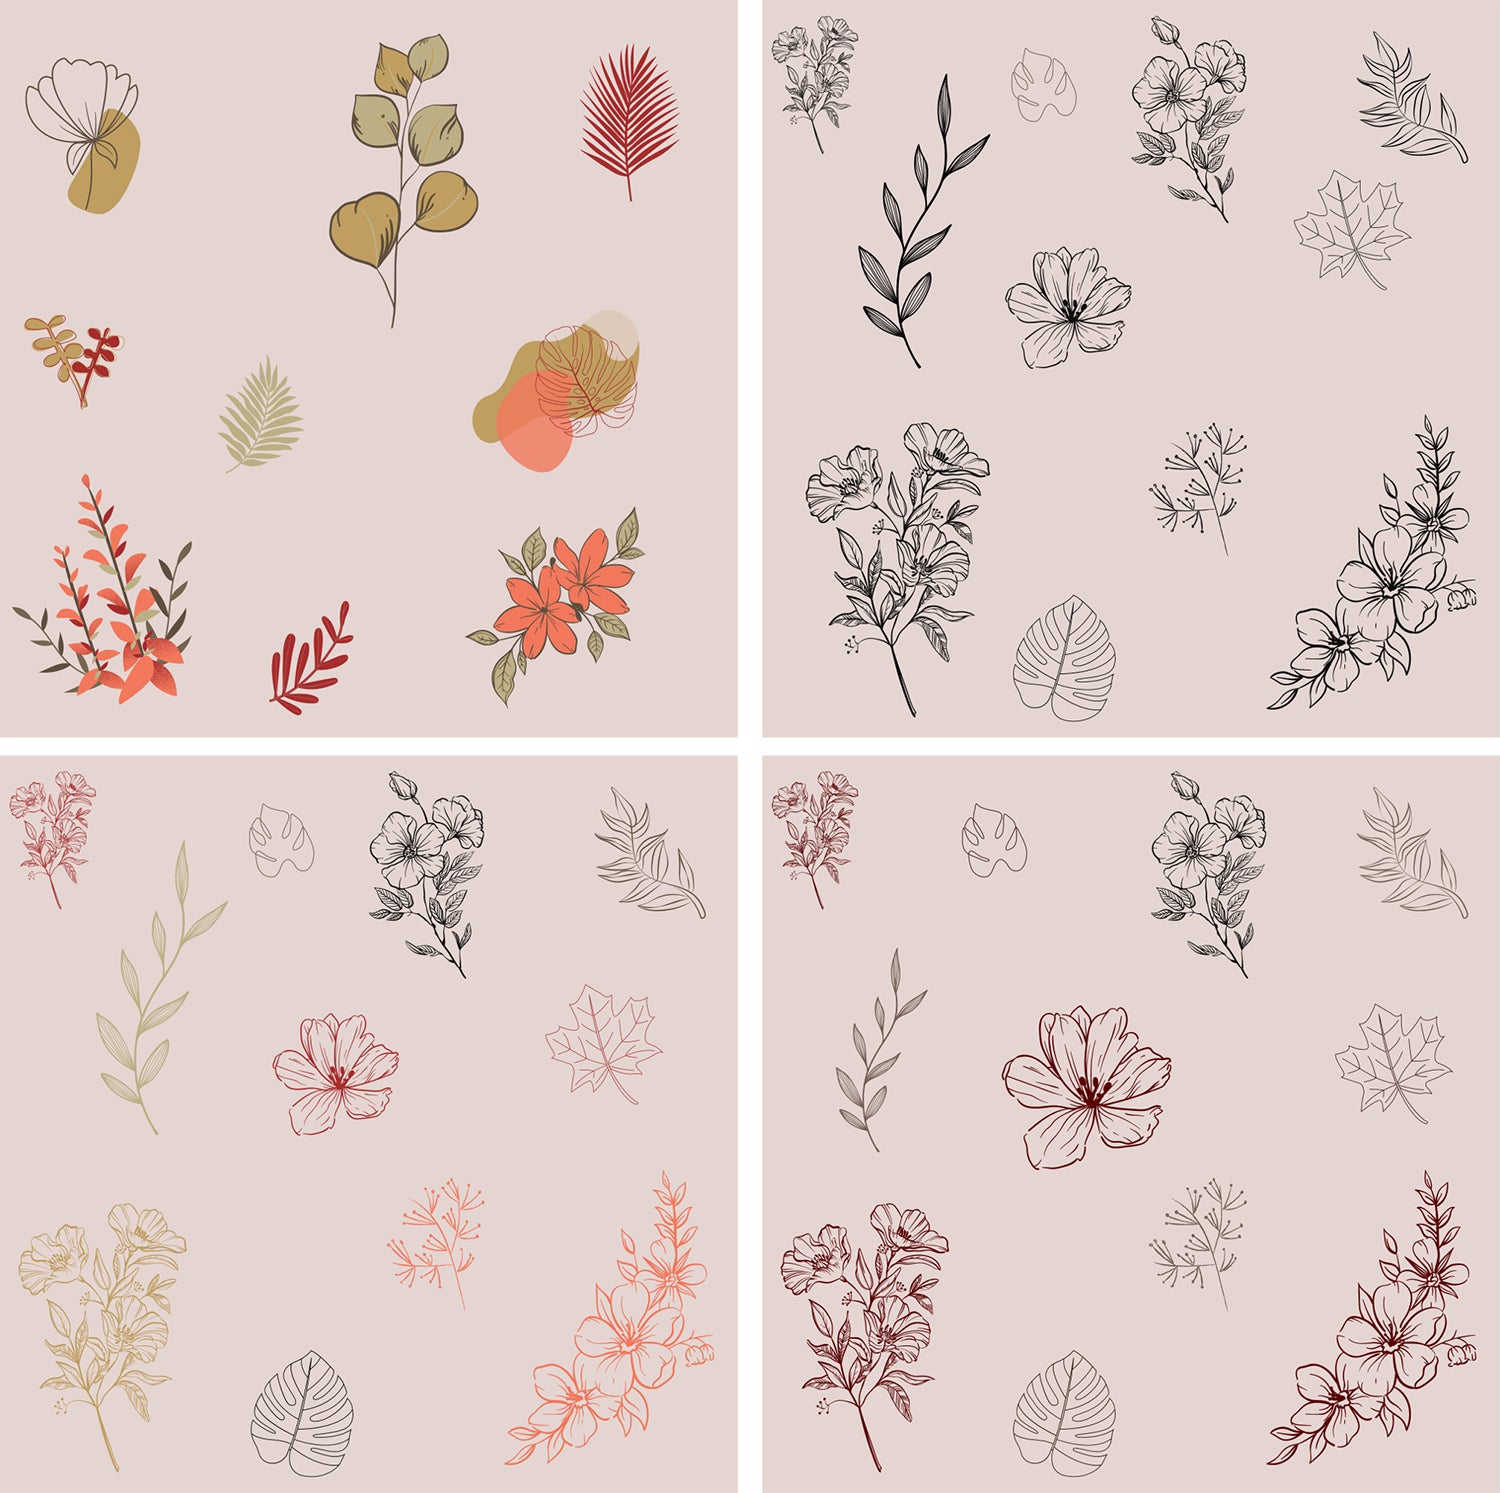
I started with a new design with a 12” x 12” custom size in Canva. Then, I searched for keywords “leaf” and “flower” in the elements tab on the left. I inserted multiple objects and after some trial and error, I settled on the line drawings. Line drawings also allowed me to change colors, and that was helpful as I got to play around with my color schemes. I ended up settling on the dark color scheme. Once done, I saved it in png format. In the free version, Canva saves the image only in 2000 x 2000 px resolution - which leads to 167 DPI when printed as 12” x 12”. I believe RCF custom printing supports a minimum of 72 DPI, so you could use Canva to create a 24” x 24” file as well.
Image Caption: Multiple tries at the design files and color schemes. All objects are available in the Canva library.
Creating a Seamless FileOne way to ensure a seamless file is to have no objects on the edges. Unless the objects are placed very carefully, the file can look wonky as there can be uneven gaps. Instead, I started with adding objects to the borders and then filling the rest of the file. To make it seamless, the left edge of the file should match the right edge (and top matches the bottom). I did by putting half my object on the left edge and the rest half on the right edge, aligning them horizontally. It was easy to do that in canva as it shows purple guidelines when you move the object (to help align the image center). Here’s a video tutorial to visualize that. Next, I placed half an object on the top edge and the other half on the bottom. I added the rest of my objects and moved them around till the final configuration looked good. To double check that it was a seamless file, I copied the file in paint 4 times next to each other. - I saw no errors or issues so I uploaded it to print. Here’s a tutorial by Justin on uploading files for print.
Image Caption: Left - final design. Center - Design made seamless, Right - 4 seamless files stitched together.
The Printed Fabric
I chose double brushed poly (DBP) for the print - RCF custom print guidelines suggest synthetic bases for full coverage prints and my design had a pastel pink background. And RCF’s DBP is absolutely dreamy - it’s so soft to touch and lightweight - it makes a perfect flowy dress. The printed fabric came out really well - the colors looked bright and there were no issues!
Image Caption: Design printed on DBP. Left - full width, Right - half width
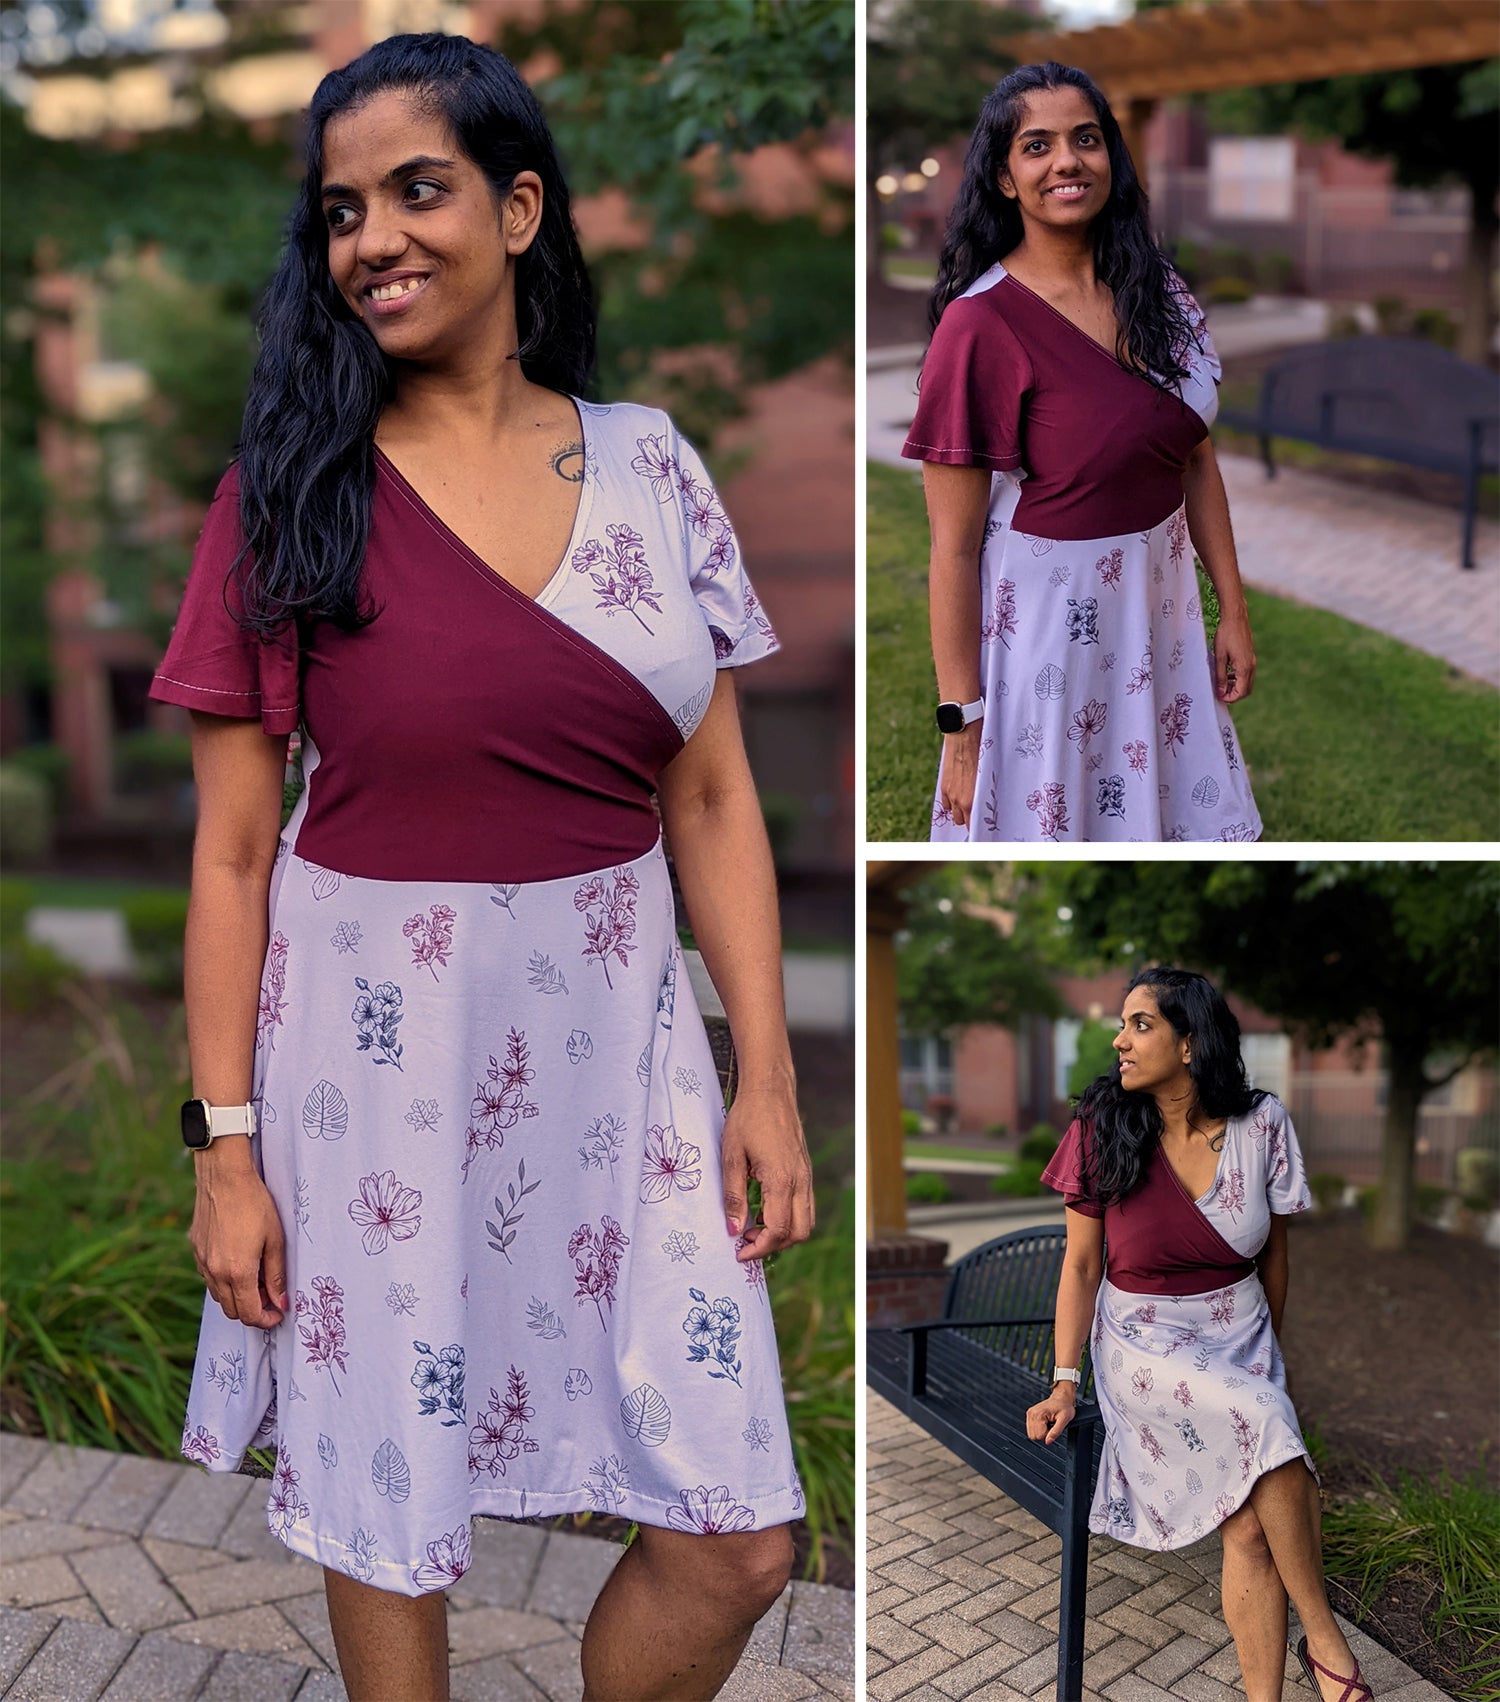
I used it to make the Love Notions Willow Wrap and I think I have a beautiful dress that will be perfect for the summer to fall transition. And it’s extra special because it is truly “one-in-a-kind”!
Image Caption: Love Notions Willow Wrap made with the custom printed DBP, colorblocked with solid burgundy DBP.
I hope this helps if you’ve thought about printing your own designs. If you have any questions or would like to chat, I lurk around in the comments of the Raspberry Creek facebook group or you can message me on Instagram at MeowrantineSews. Happy sewing! And here are a few other projects that I’ve used RCF custom printing for - with me-made designs. I am happy that I will never run out of “handmade” sewing tags now!!!
Image Caption: Left top - Custom designed sewing tags printed on Swim fabric, Left bottom - Custom designed DNA science print on stretch crepe, Middle - Custom tag added to willow wrap dress. Right - Top made with custom DNA fabric.
Disclaimer: The only affiliate links in the post are the ones to the Love Notions website. If you click them and shop from the store, it adds a little to my fabric stash fund, and gives me some joy to know that I inspired you. Thank you, and happy sewing!
Comments will be approved before showing up.
December 16, 2024
October 01, 2024
Julia M
August 23, 2022
Thank you for taking the time to put this together. I am hopeful I will be able to design a custom fabric.