- Gifts & Goods
-
Wallpaper
Luxury Peel and Stick Wallpaper
![]()
- Gift Card
- Gifts & Goods
- Gift Card
Luxury Peel and Stick Wallpaper


Today, we’re going to talk panels!

First of all, what are panels? Panels are pieces of fabric sized and printed with the intent to be used for the front of a shirt. While they can, of course, be used in whatever way you want, it may take a little more thought and planning to use them for something other than a shirt.
Raspberry Creek has an amazing variety of panels. You can find a collection of current and former Club collection panels here. Today’s post will deal specifically with Club panels. (There are also many panels to choose from in the Designer Studios, but sizing and scaling for those will vary based on designer.)
Raspberry Creek’s Club panels come in two different sizes: child and adult. The total size of a child panel is 19” wide x 27” long. This will fit most children’s shirt patterns, but make sure to check the size of your pattern piece beforehand! The graphic printed on a child panel is approximately 5” x 7”. Adult size panels are a total of 28” wide x 36” long, fitting most adult t-shirt patterns. The graphic is approximately 8” x 10”. Club panels are available on cotton-spandex jersey and cotton-spandex French terry.
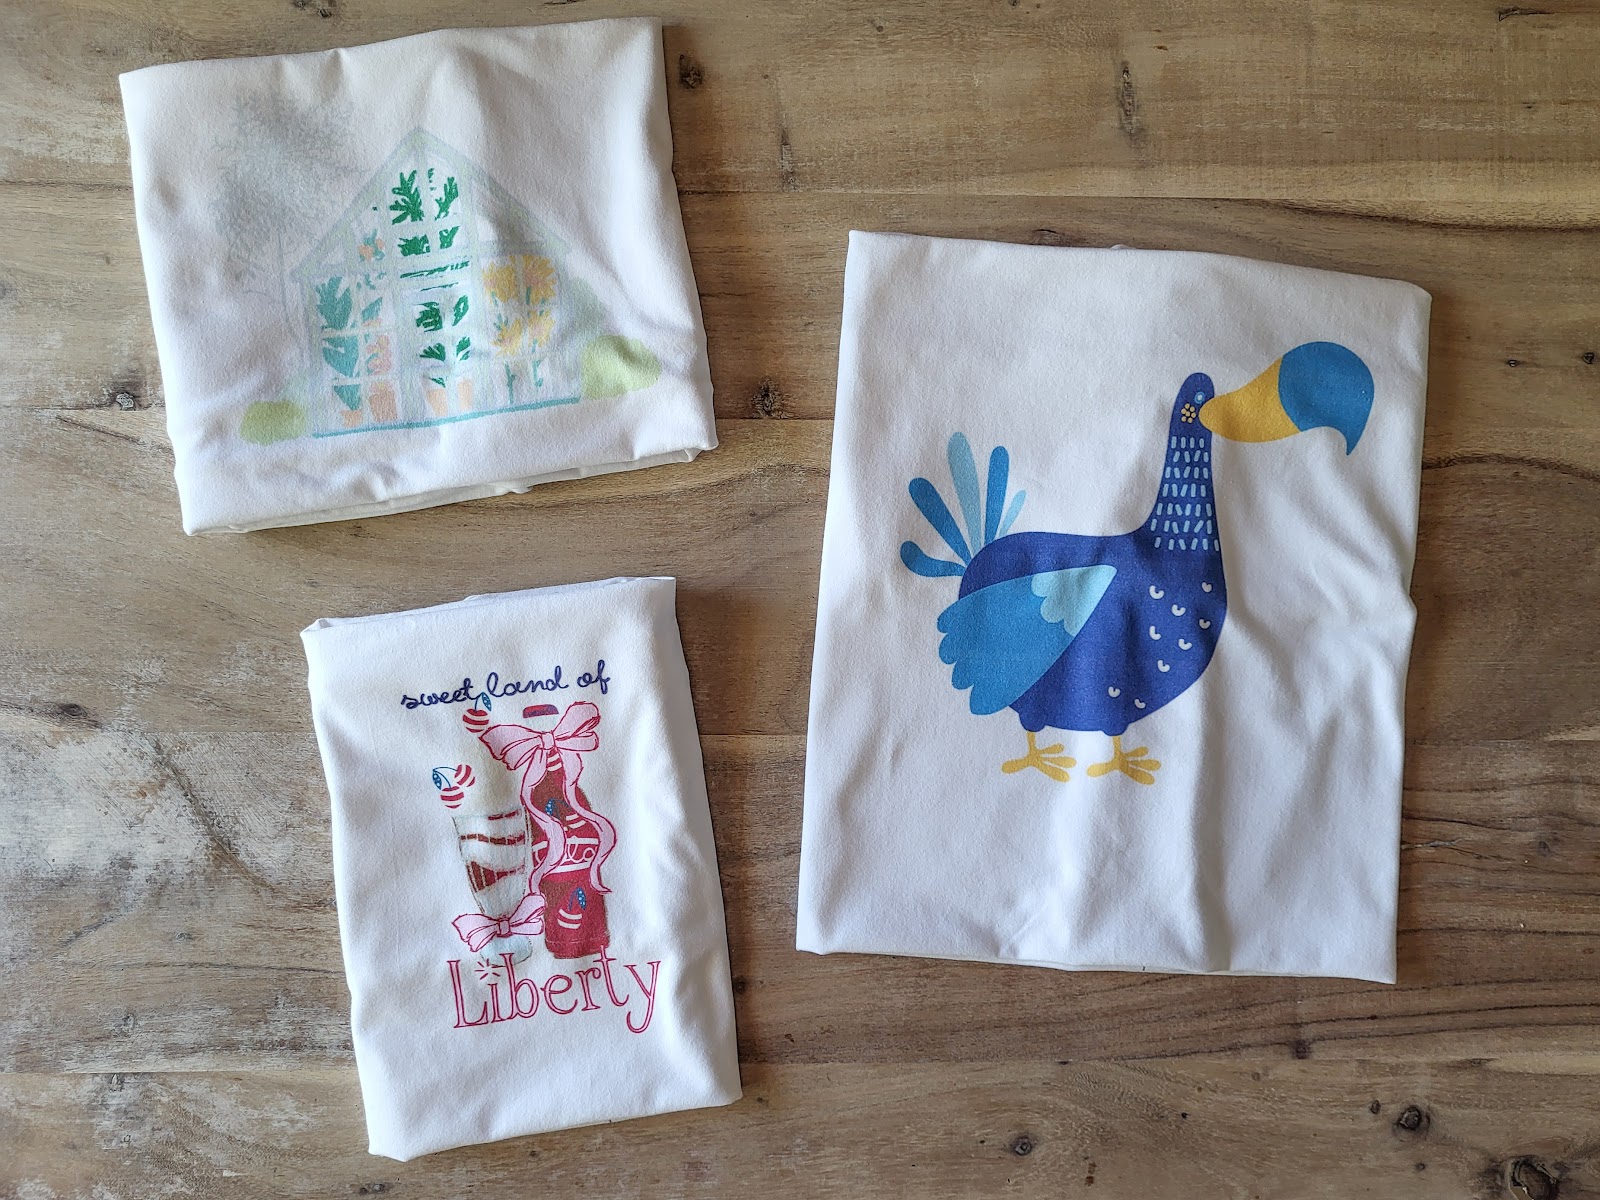
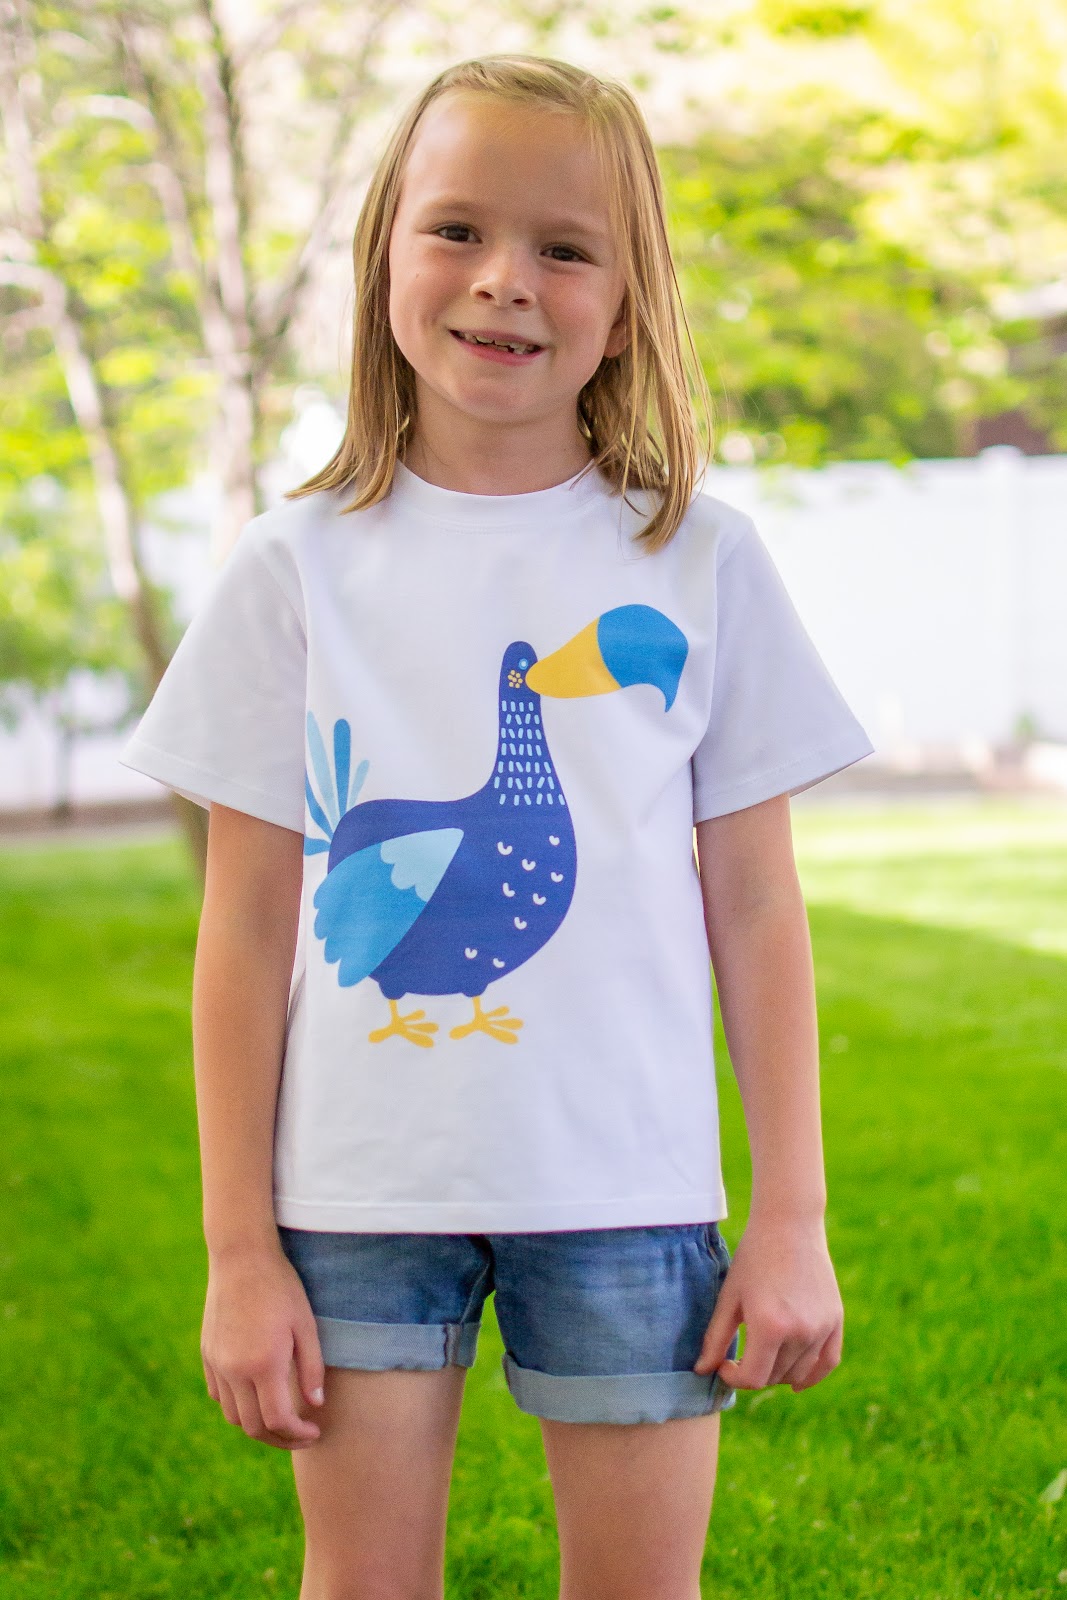
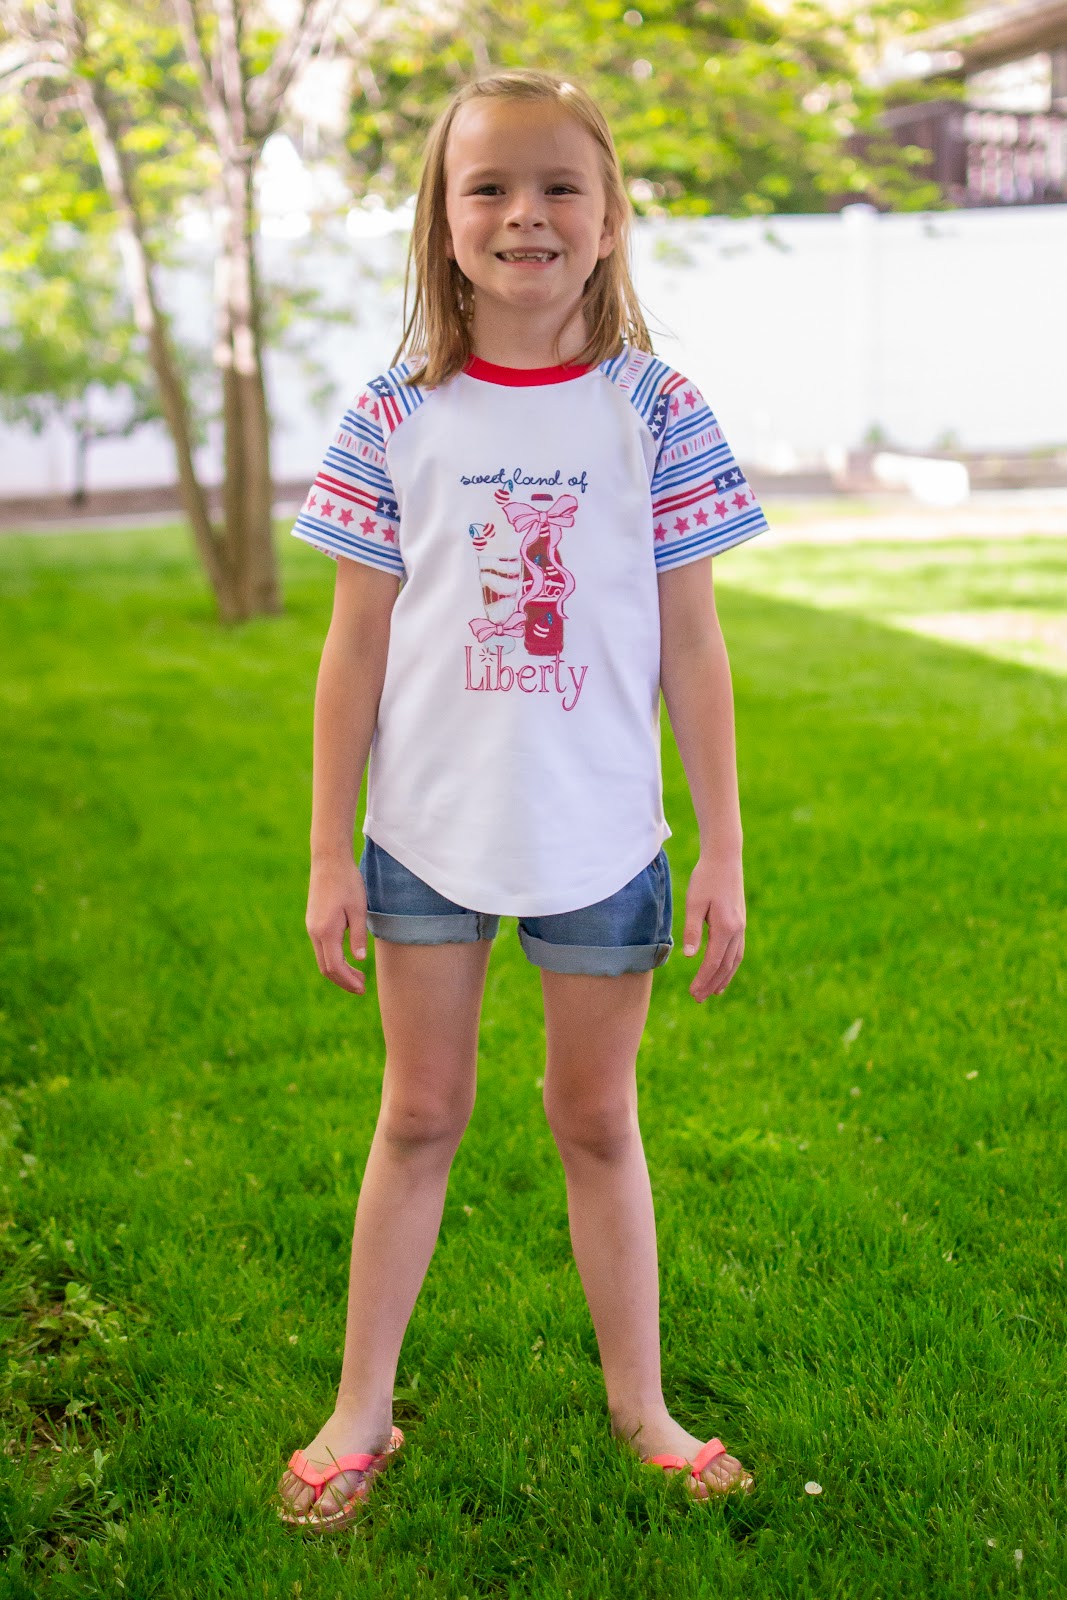
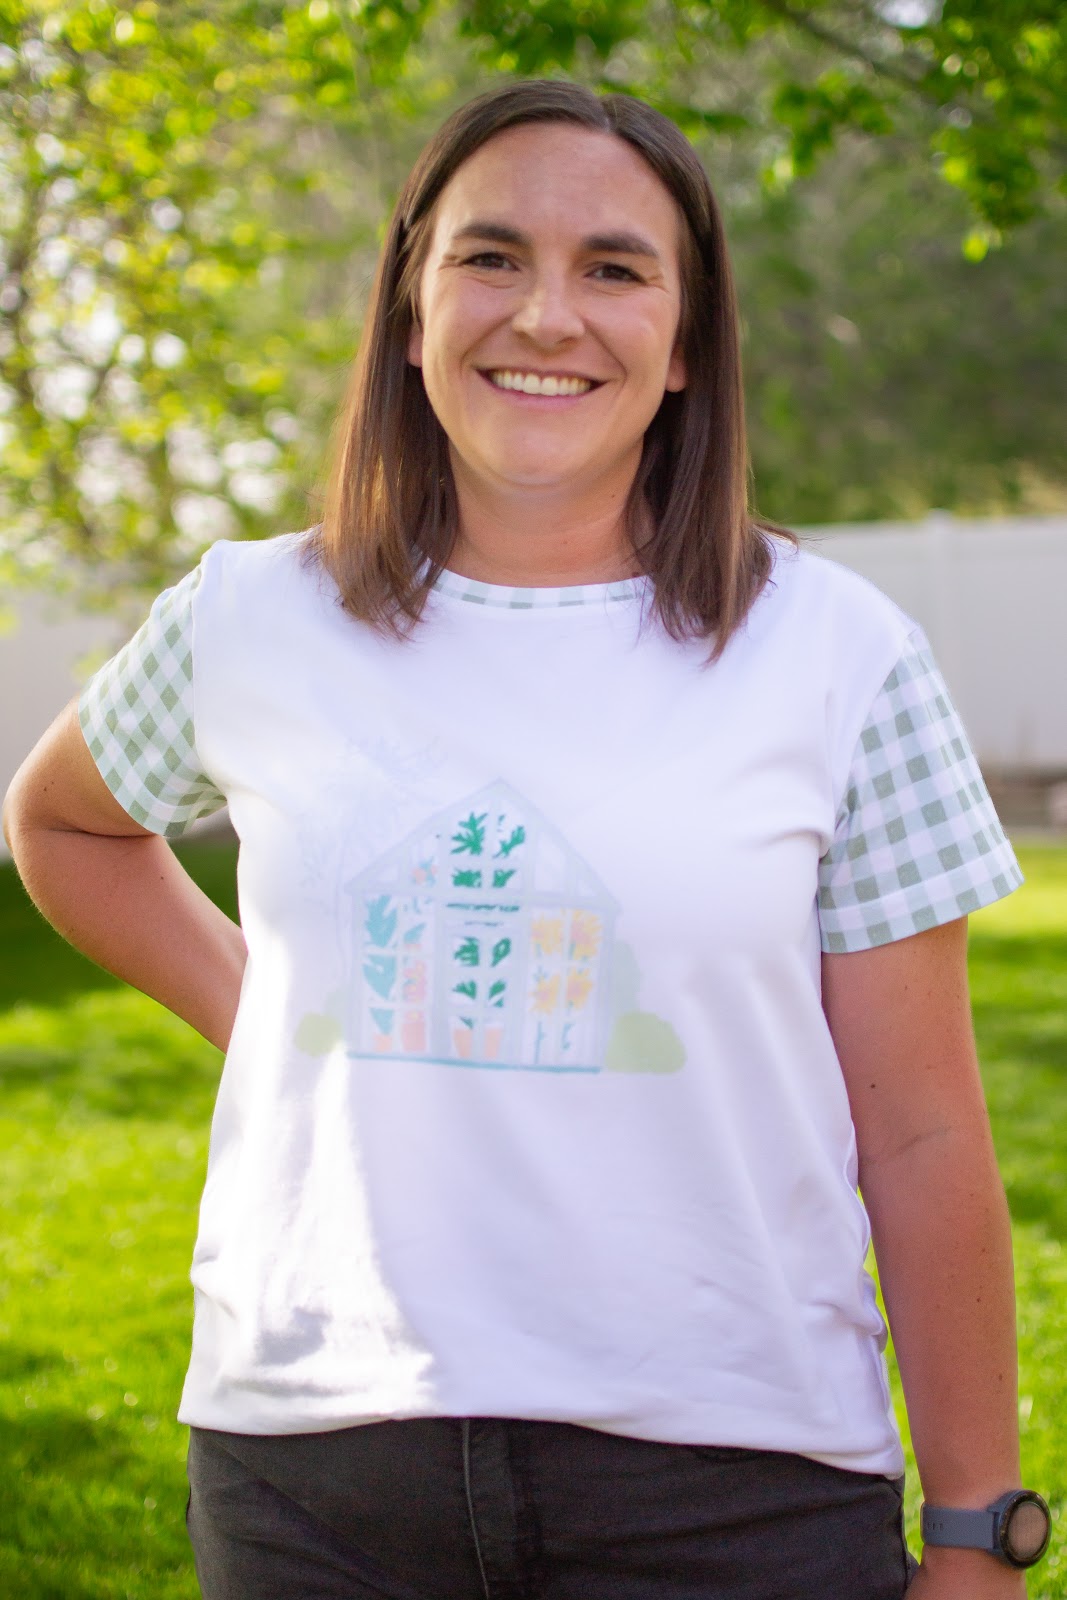
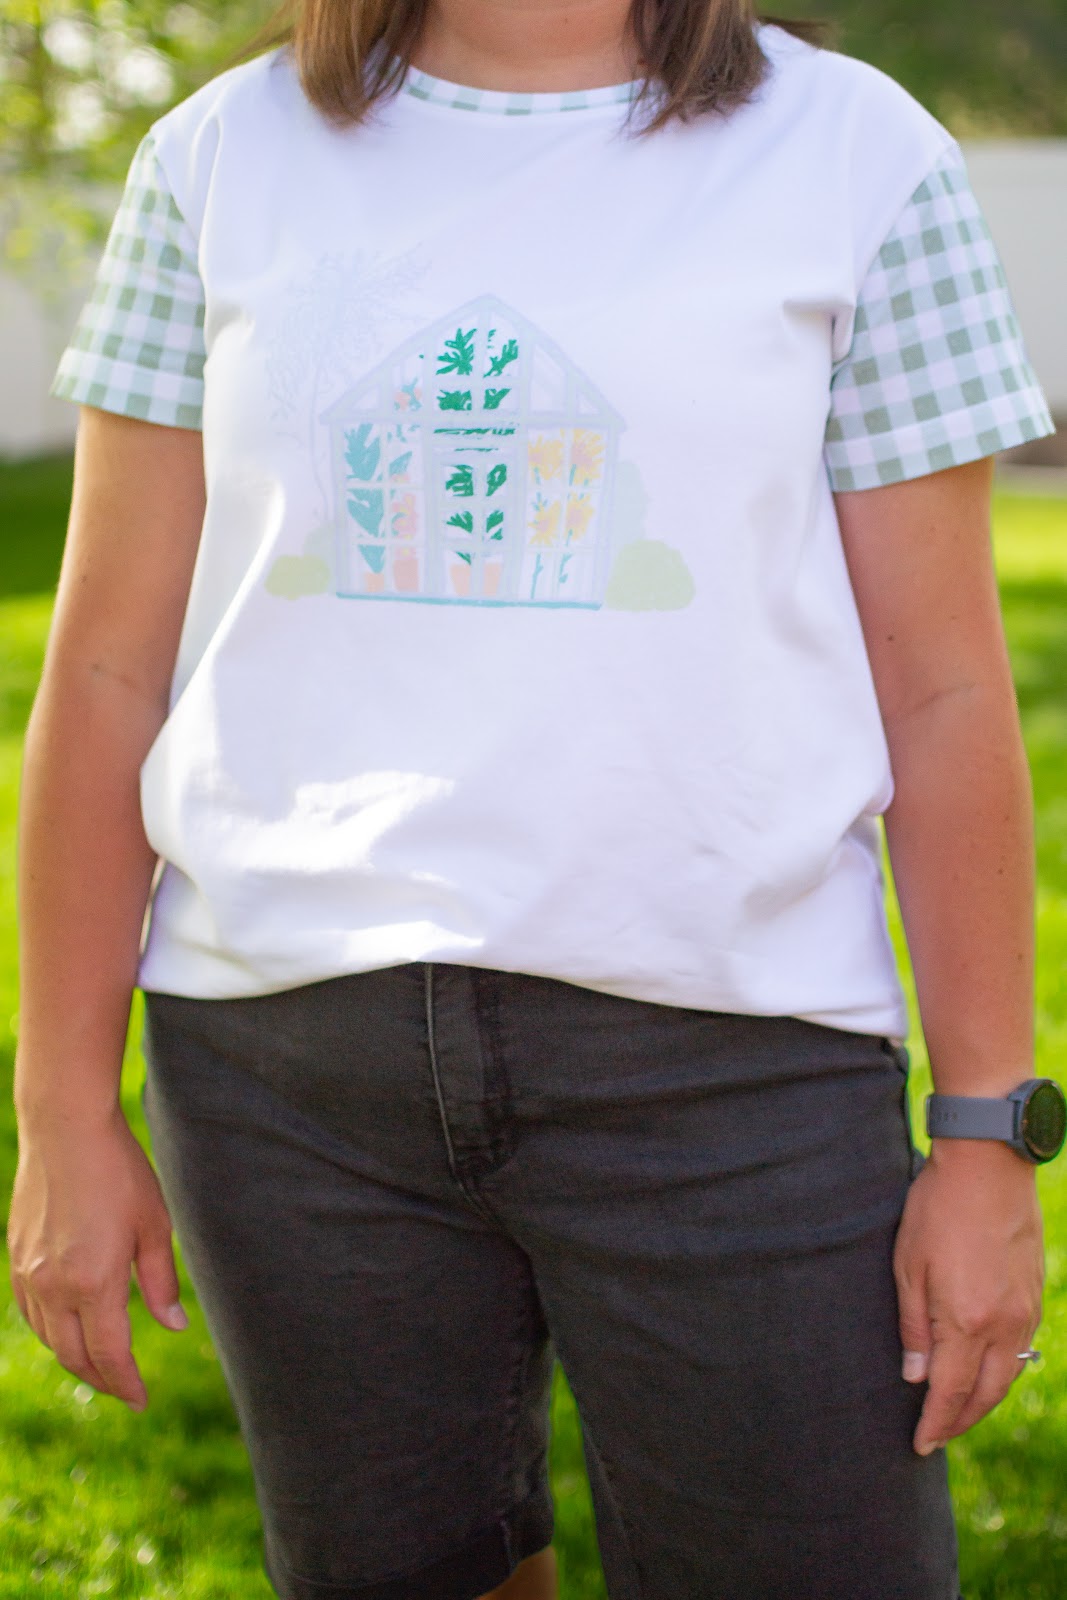
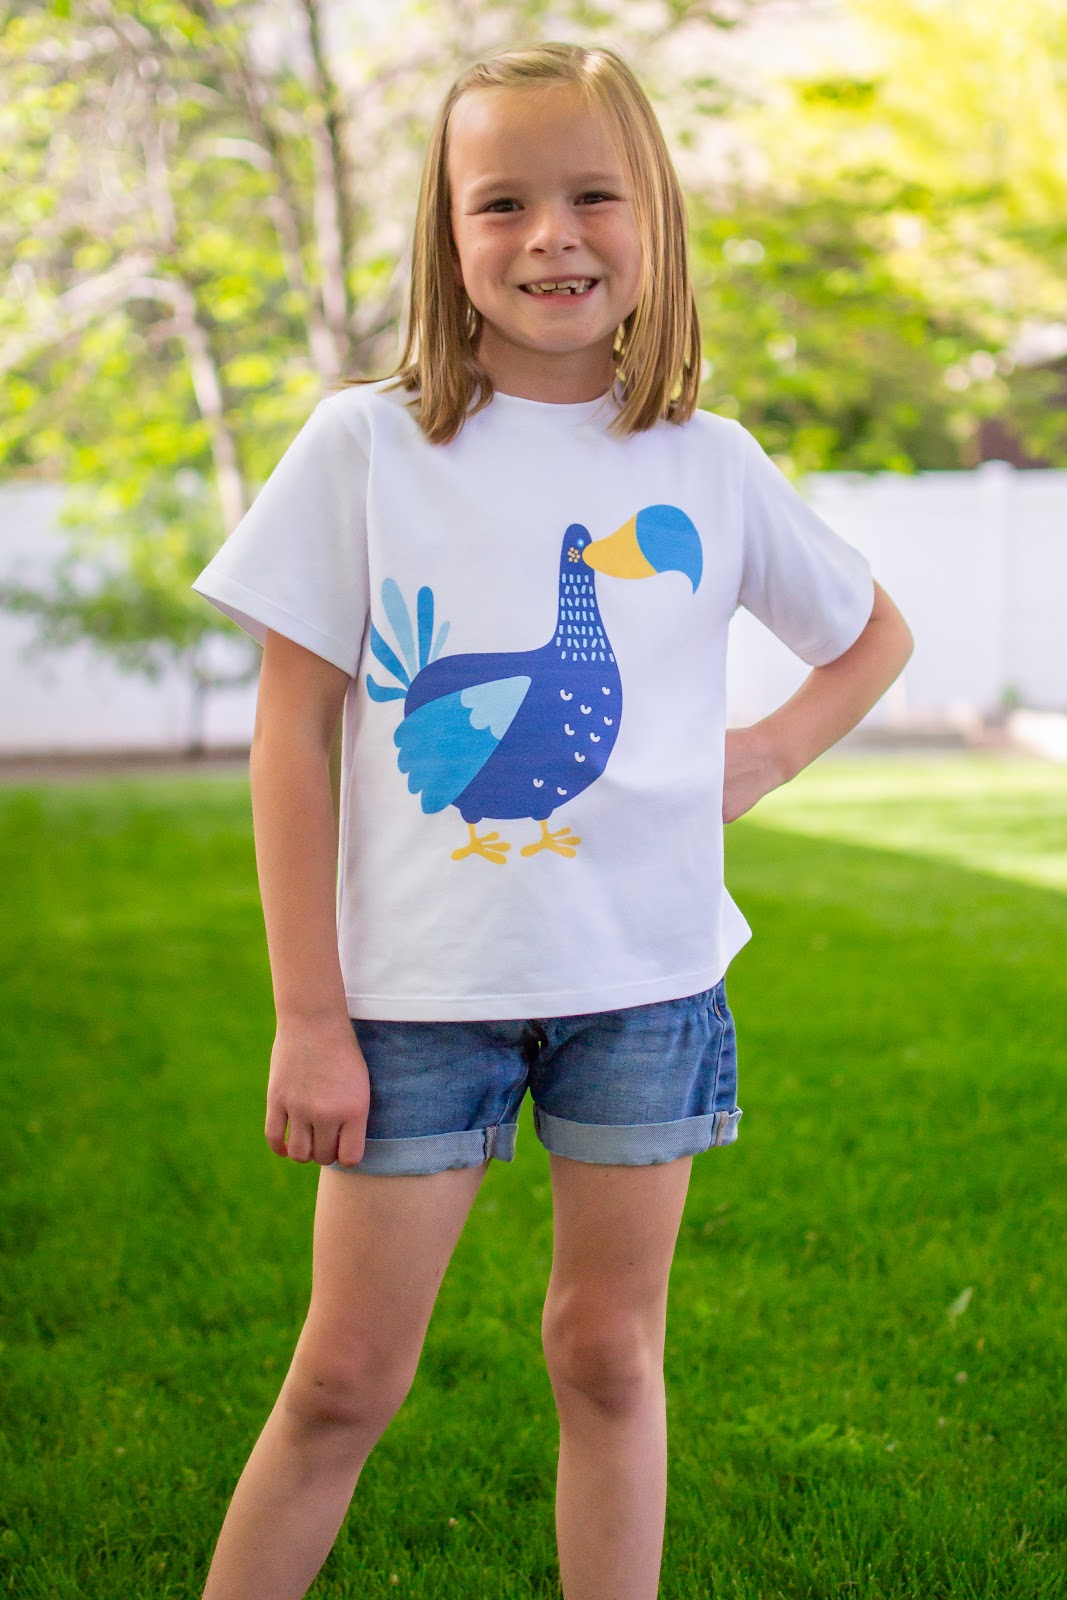
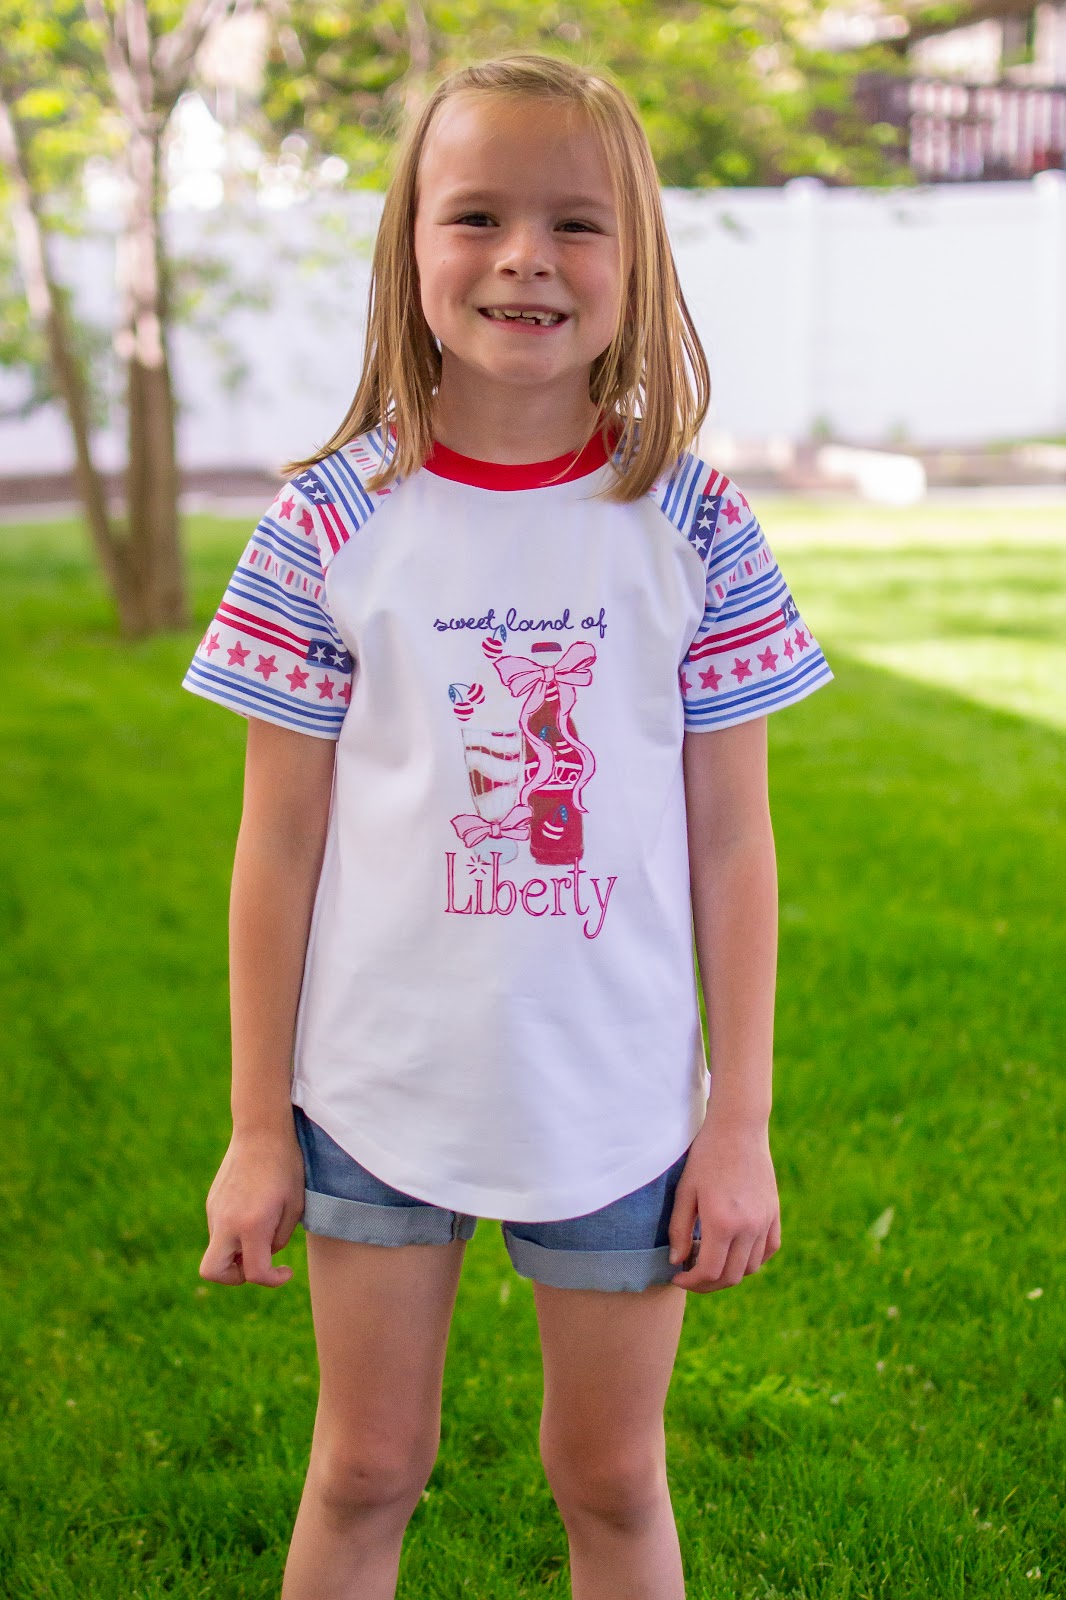
For this post, I sewed up three different panels as examples of panels on simple t-shirts. The greenhouse and dodo bird panels are both adult size, and the Sweet Land of Liberty panel is child size.
When using a panel, your first step will be to find the center of the graphic by measuring its width. When I find my center, I make a little mark at the middle top and middle bottom of the graphic with a heat-erase pen, just a tiny dot that won’t be difficult to remove later.
I like to use my projector for panels because it gives me a better picture of how the front of the shirt will look once cut. However, you definitely do not need a projector!
As a general rule, you want to place a graphic of a panel 3-5” inches below the middle of the neckline. For a child size shirt, you’ll want the graphic more around the 3” mark and farther down for an adult size shirt. Feel free to play around with placement to get just the look you’re going for.
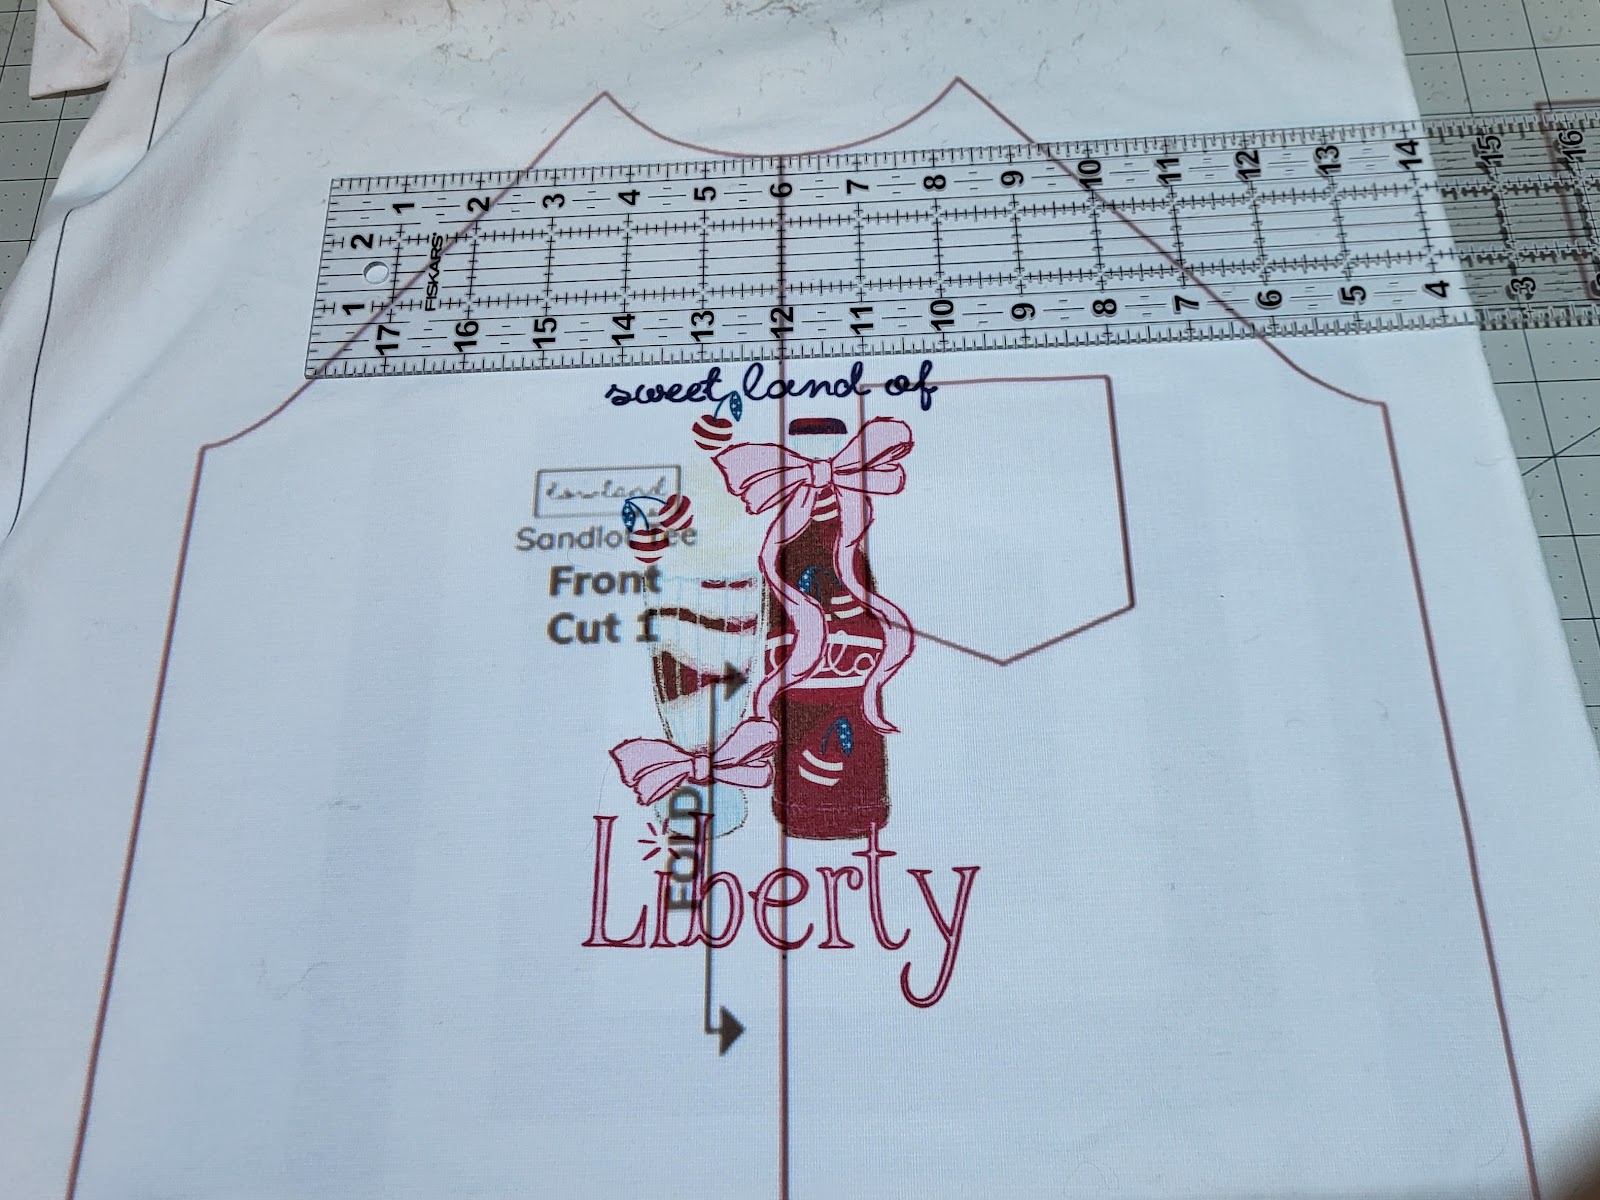
Here’s what it looks like from my projector while I placed my child size panel on a kids’ Sandlot Tee from Lowland Kids. There are 3” from the neckline to the top of the graphic.
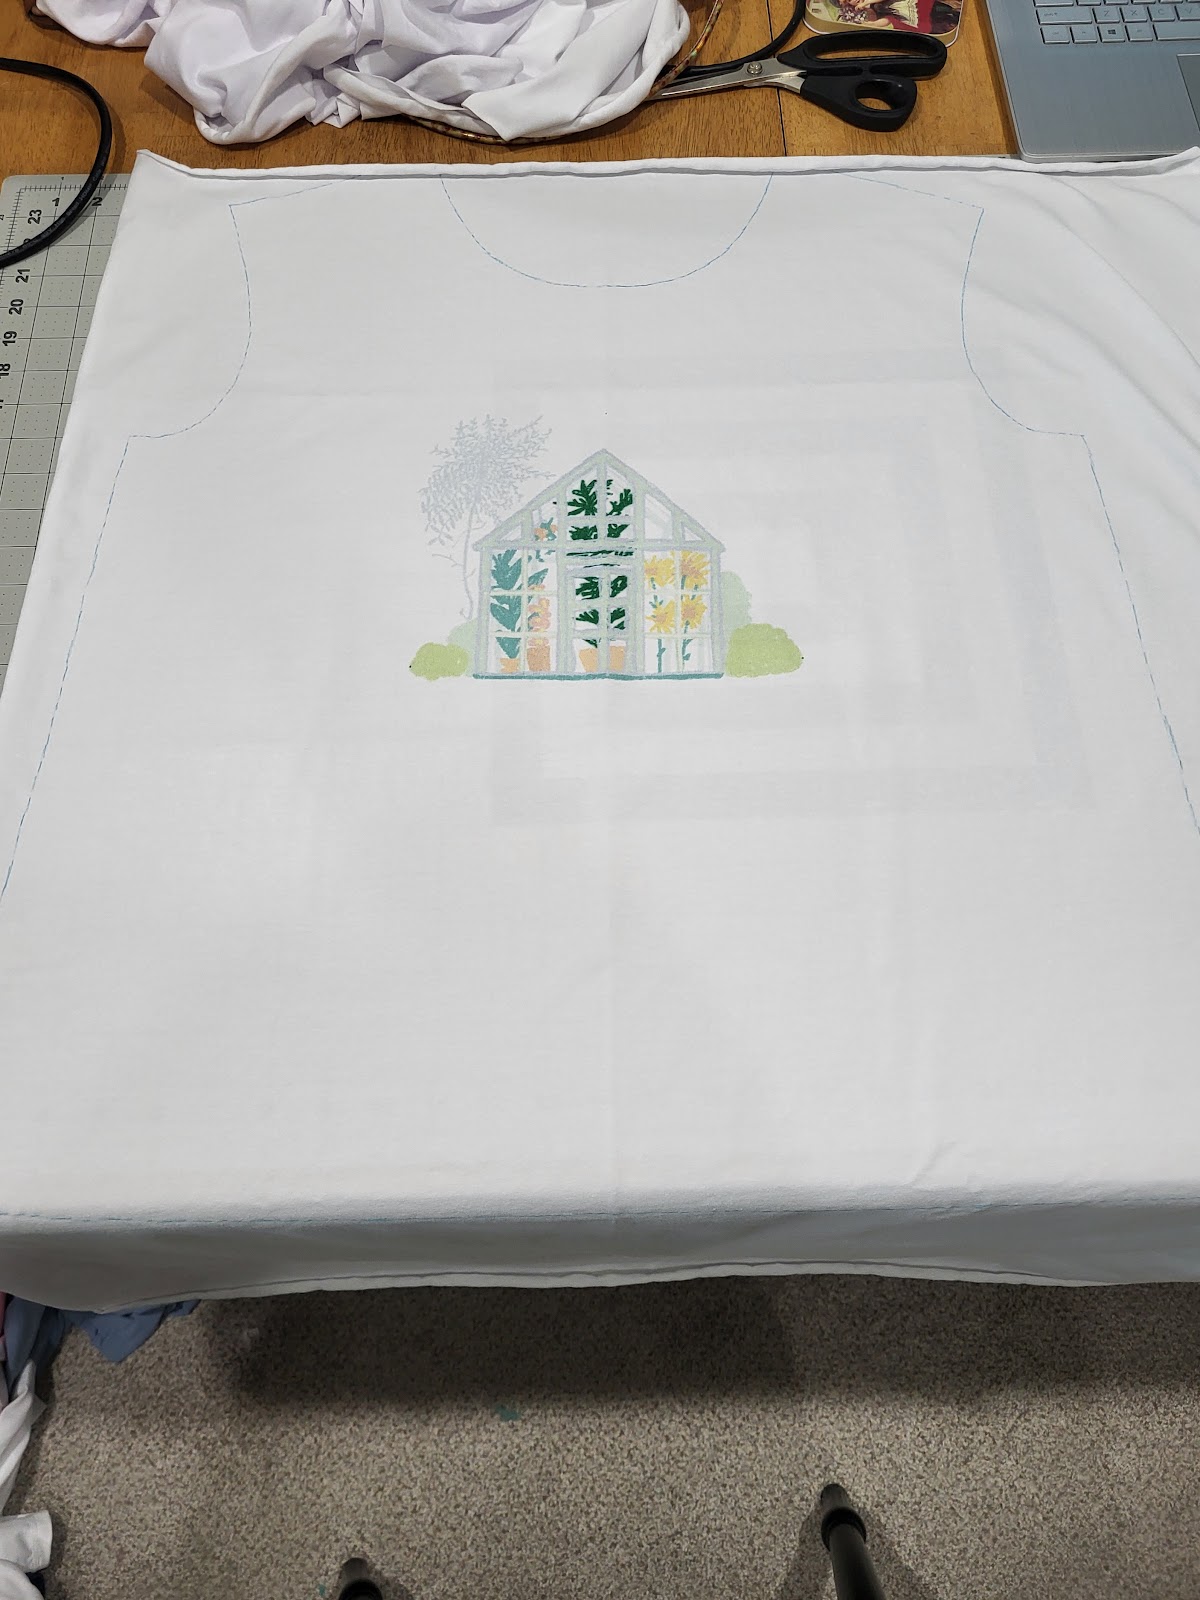
And here is an adult panel on a Pixie Tee from Chalk and Notch. I was using the A0 file on my projector which doesn’t have unfolded pieces, so this gives a little better idea what the process is like with a printed pattern piece. There are 5” from the middle of the neckline here to the top of the graphic.
Since I am a very visual person and a firm believer in measure twice cut once, I traced (with my heat-erase pen) one side of the shirt and then flipped the image to trace the other side so I could see what the final front of the shirt would look like. And I liked what I saw!
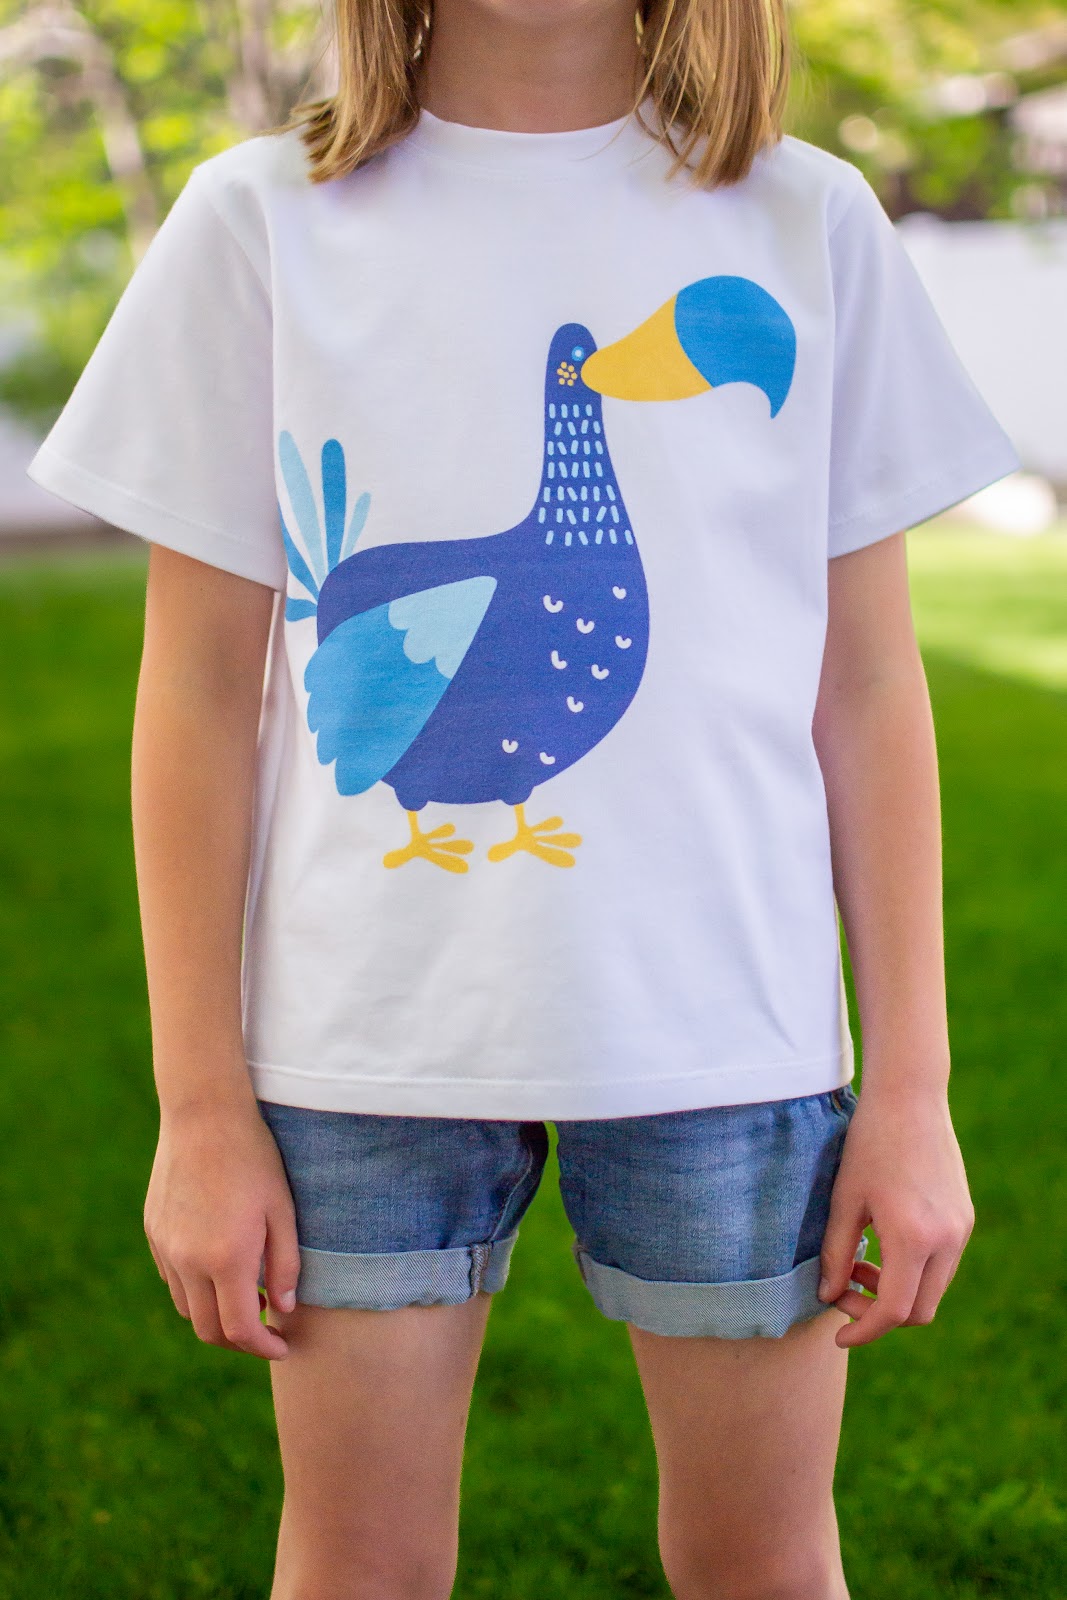
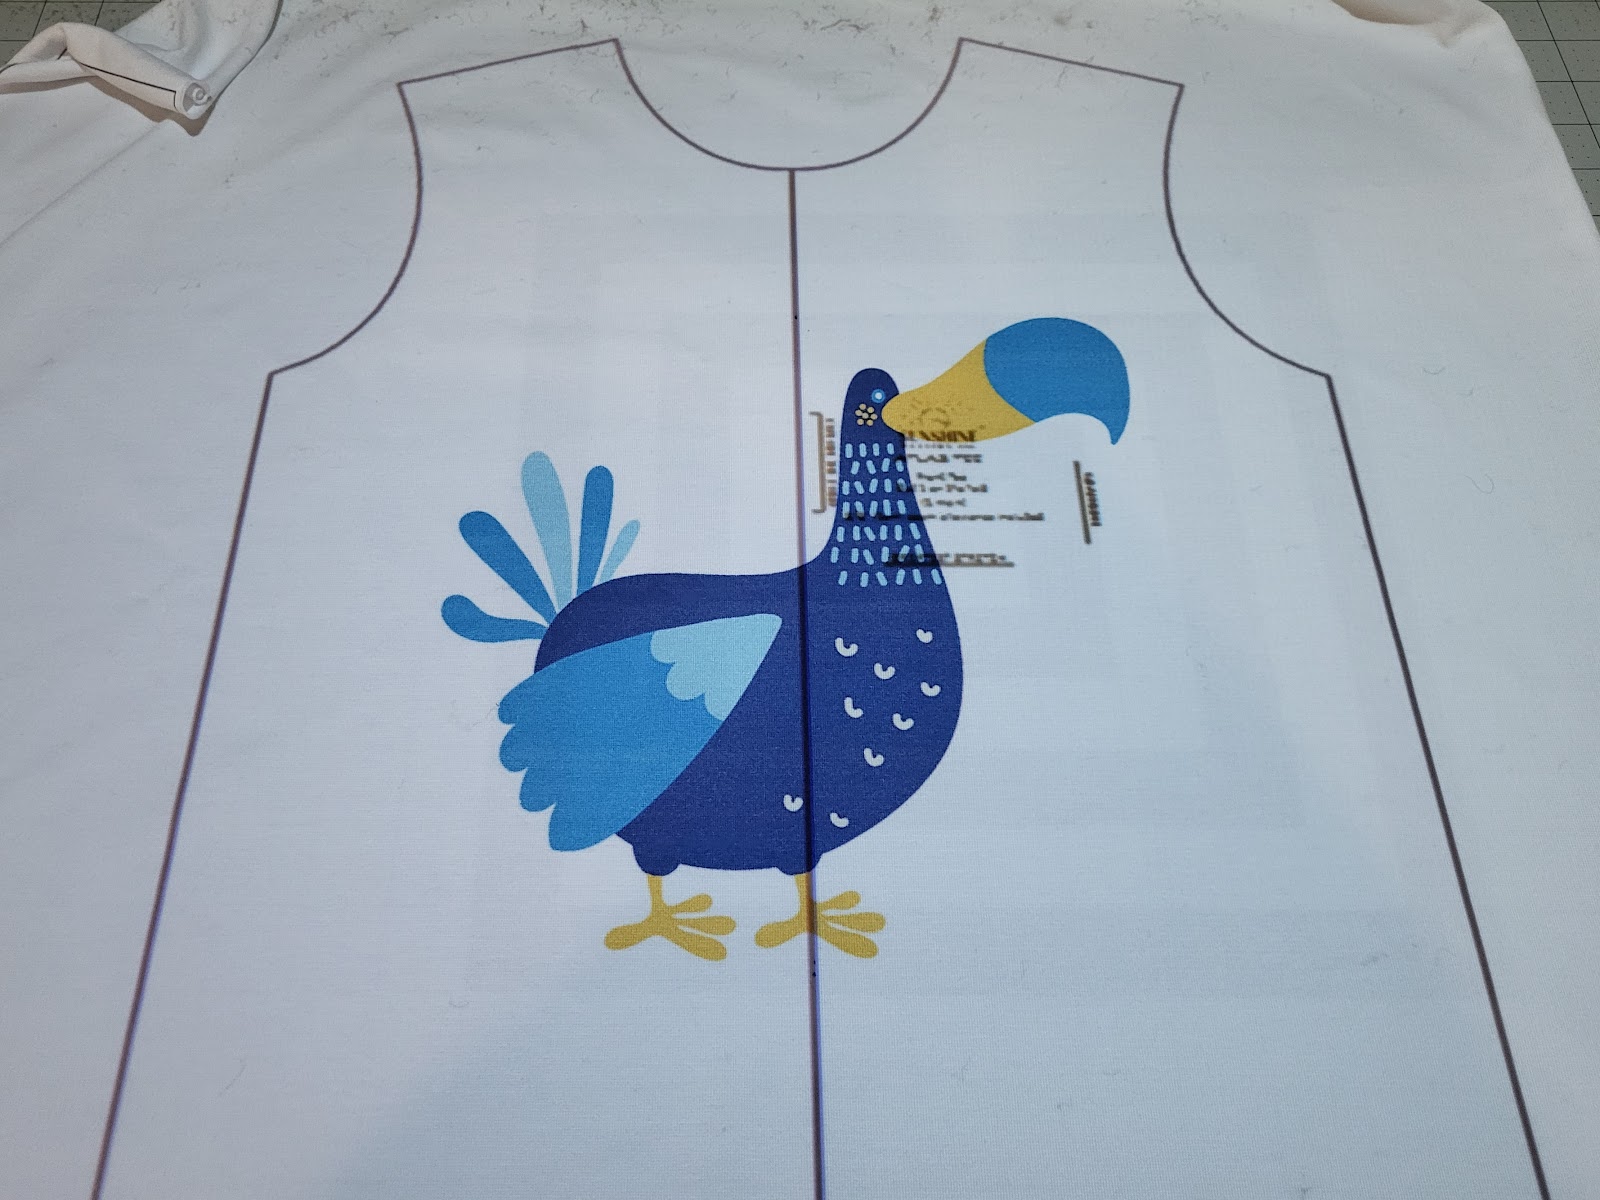
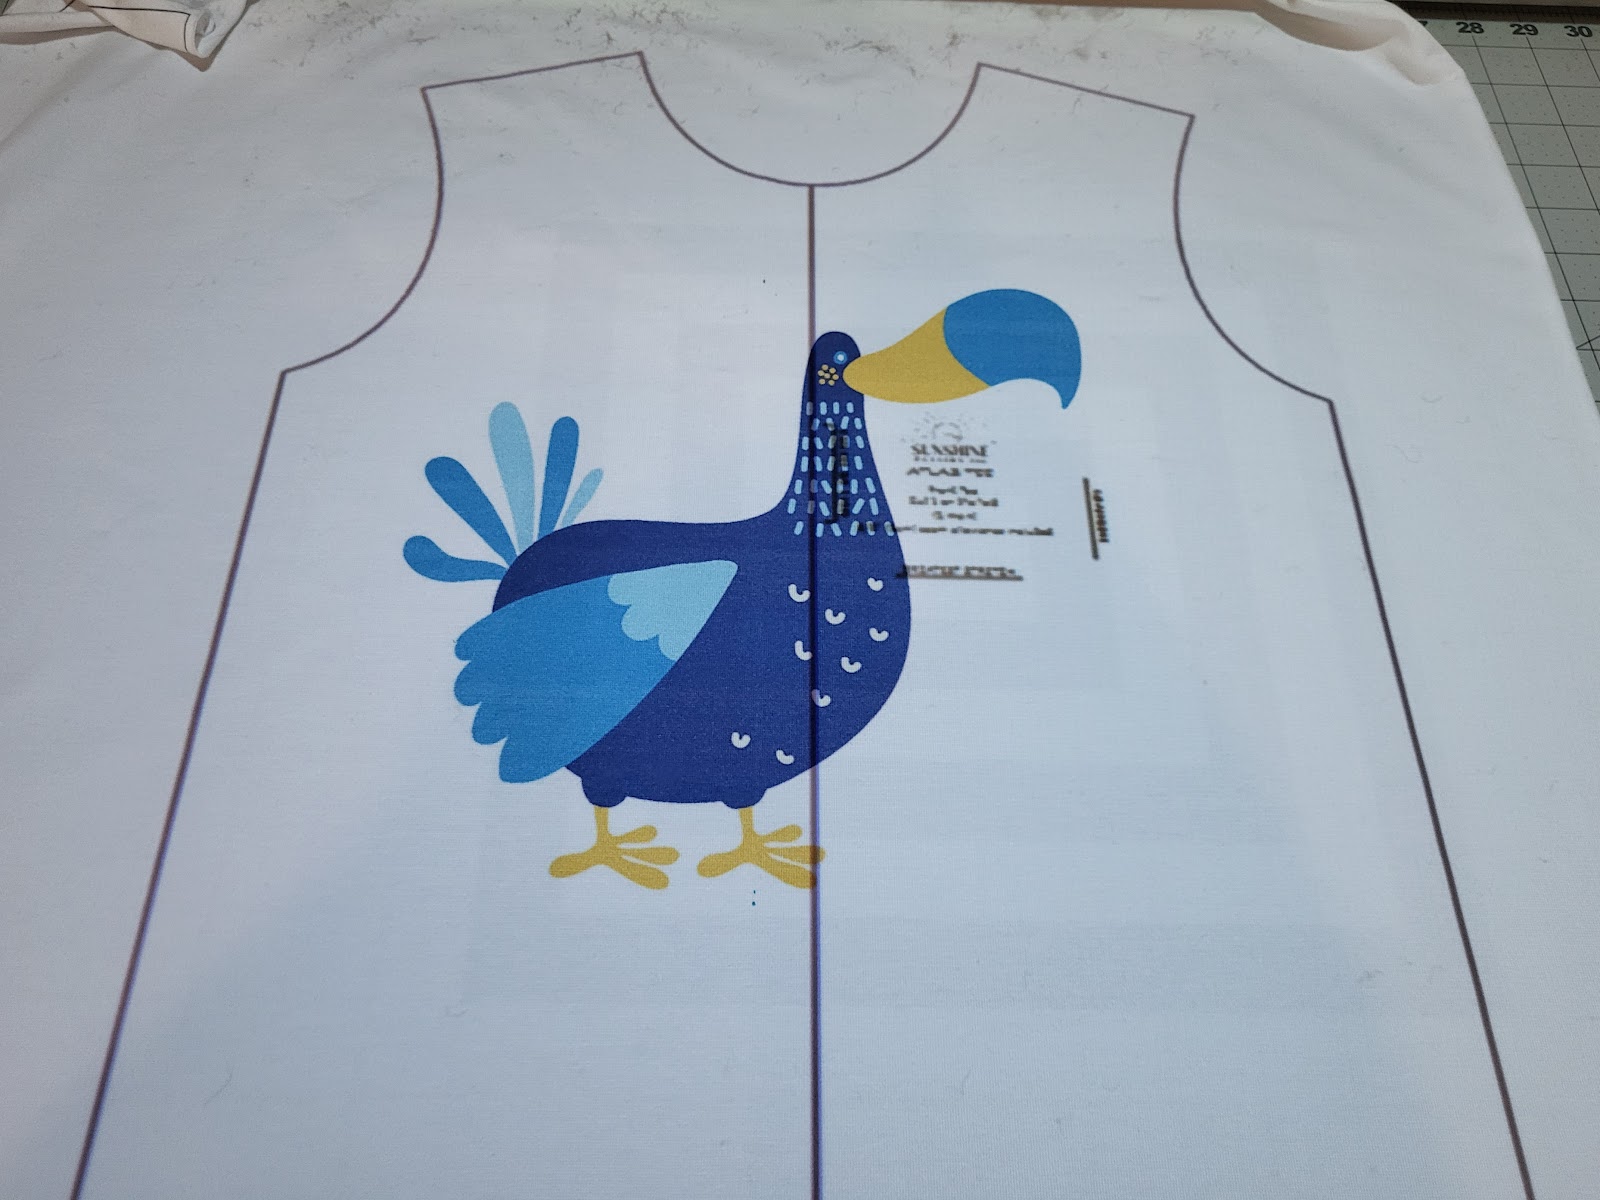
Because this dodo bird is so much fun, for my final shirt I decided to use an adult-size panel for extra wow factor on a child-size (free!) Atlas Tee from Sunshine Pattern Co. Placement for this one was a little trickier because the graphic is very asymmetrical. I first tried centering the image, like below, but the height of the graphic made the beak closer to the armscye than I wanted.
I shifted the image and ended up with this as my final decision. Much better. If I didn’t have a projector, I probably would have traced this out a couple times to get it how I wanted.
Once your panels are all situated and cut, it’s sewing as usual! Follow your pattern to complete your shirt, and enjoy the result! Here’s how my panel projects turned out:

I hope you enjoy Raspberry Creek panels as much as I do!
Comments will be approved before showing up.

Read along as Maggie talks about one of our newest fabrics- Taslan! She made the cutest set of coordinating Anoraks for her four children.

Maggie joins us today to show us how she used a couple of border prints to create new dresses for her daughter.

Elizabeth is here to show a couple of things she has recently made with our boardshort and swim knit. At the end of the post she adds inspiration for other uses for this versatile fabric!