Estimated Turn Around Time: 4-5 Business Days, most orders are shipping under TAT
July 18, 2023 2 Comments
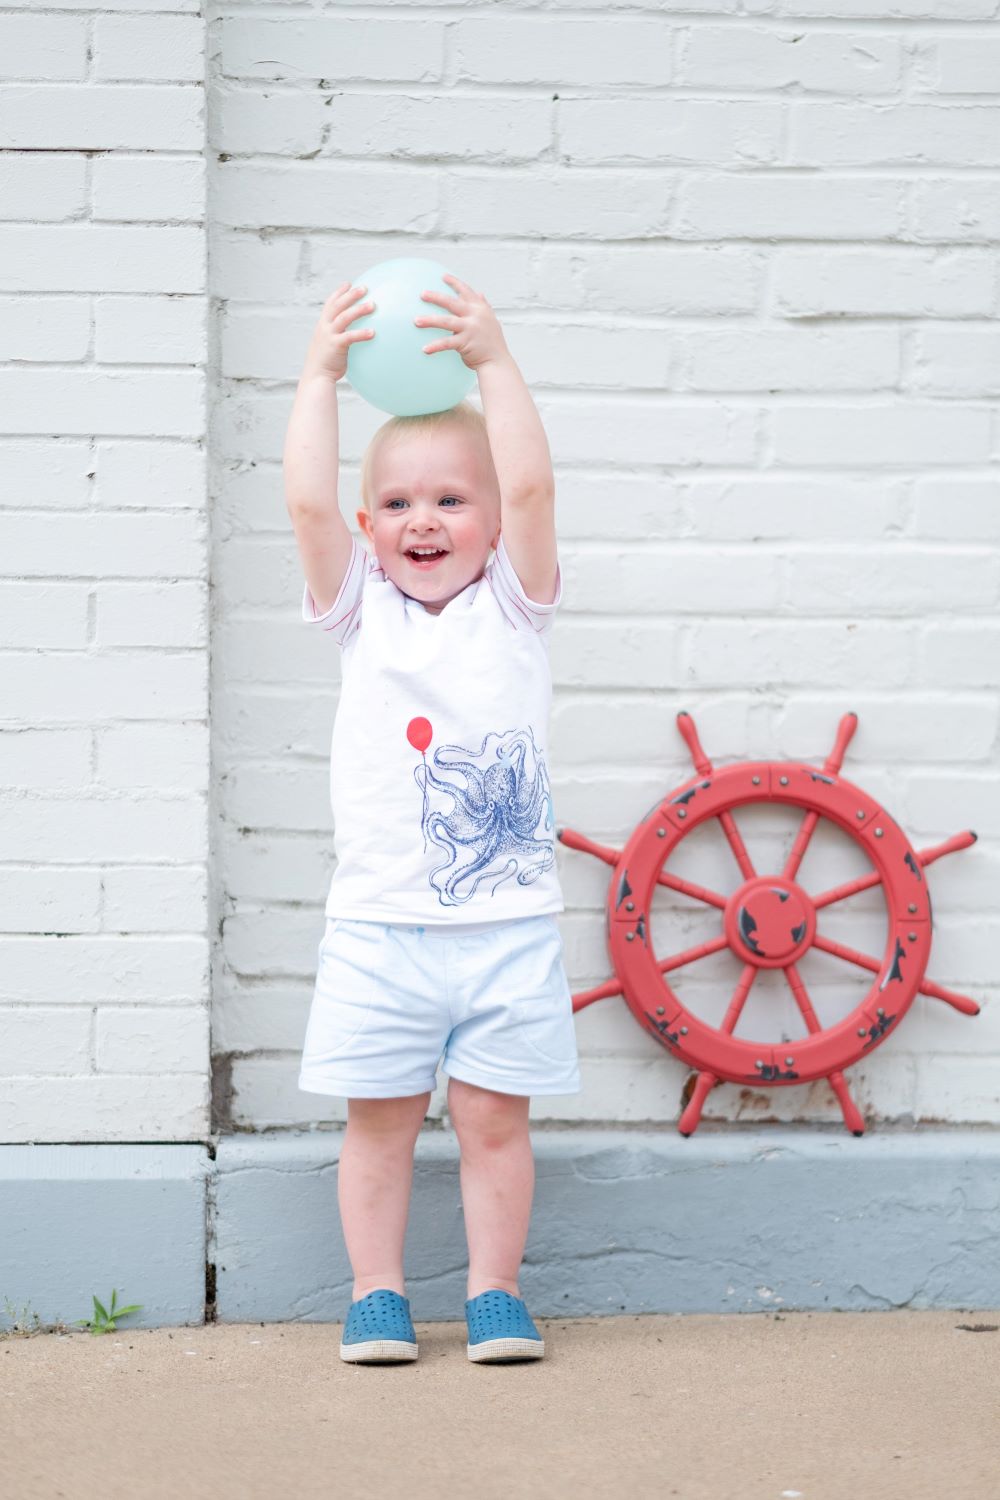
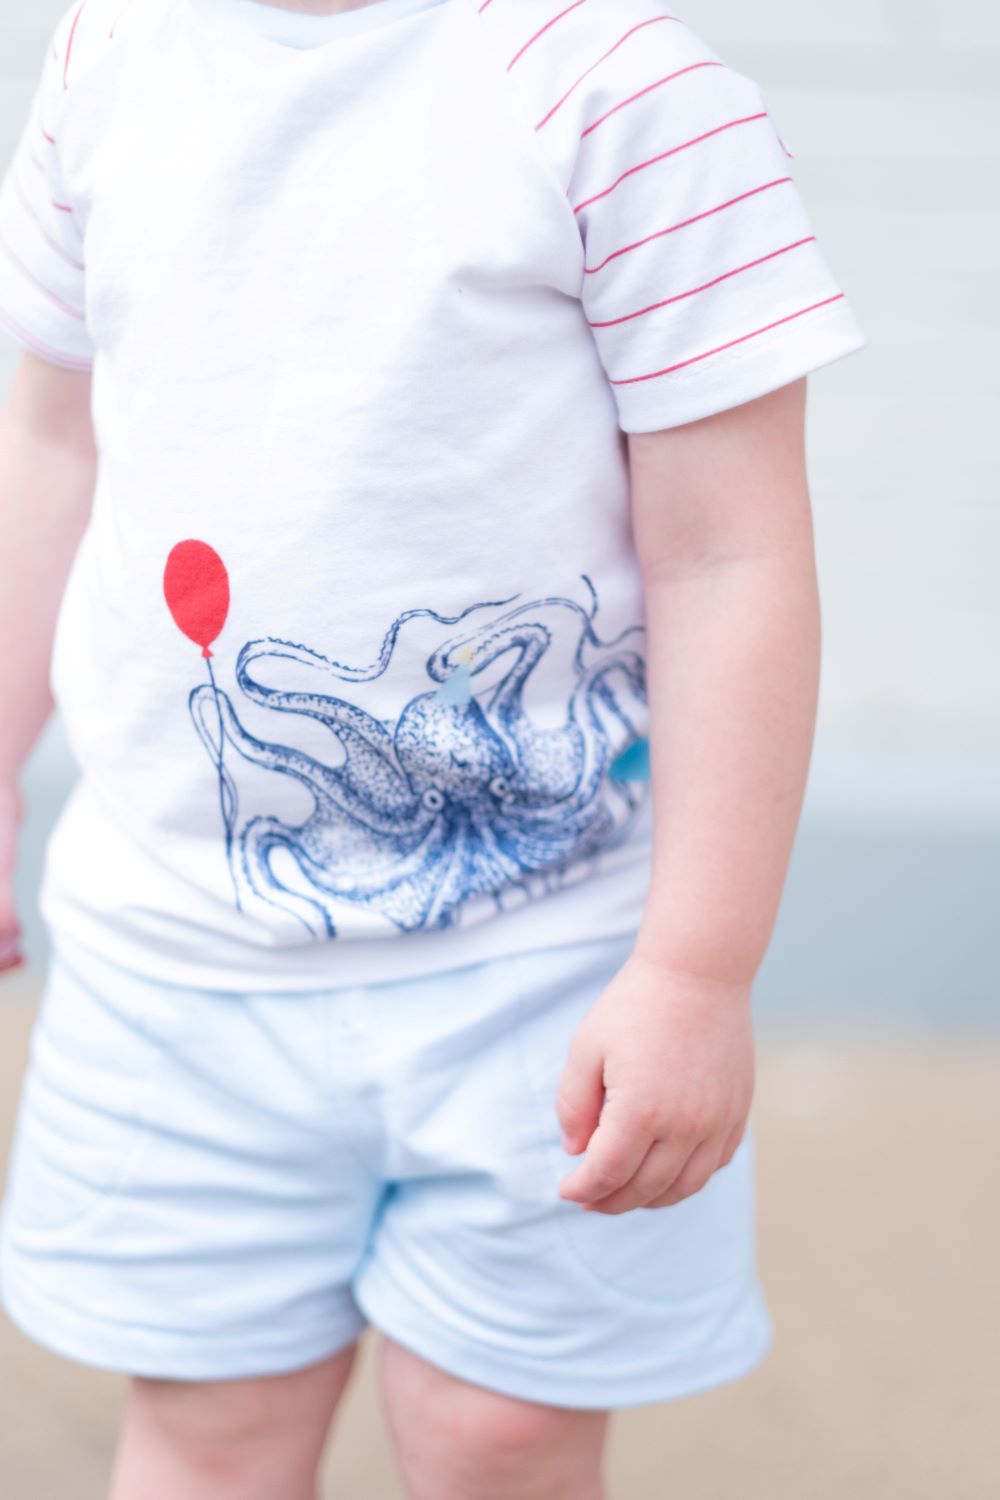
Have you ever wondered about printing custom panels at Raspberry Creek?? Today we are diving deep into all the things you didn’t realize you wanted to know about the process of printing custom panels. I used the custom printing feature to print a full yard panel with several different prints, and made this adorable birthday outfit for my little firecracker baby!
Before we get down to all the technical stuff, a few helpful FAQs about custom printing and panels:
Why can’t I just order one panel from the Designer Studios like I do from Club Fabrics?
When RCF prints Club fabric panels, they are printed in bulk and then cut to size and sold. This leaves an inventory of panels in the warehouse. You may notice panels still available in the back of the Club fabrics section from previous collections!
When you order something from the Designer Studios, the process is completely automated, to improve processing time. All custom fabrics are set to print at half yard intervals, regardless of the design uploaded. This means that if you order a panel from the Designer Studios, you need to order a full yard, so that you have the needed length of the panel, and you will end up with three panels in one continuous yard. The added processing time it would take to have employees cut individual panels, and then the extra panels that may or may not sell, makes selling individual pre-cut panels in the Design Studio not a viable option.
So what can I do If I want to order a custom panel, but I don’t want three of the same thing?
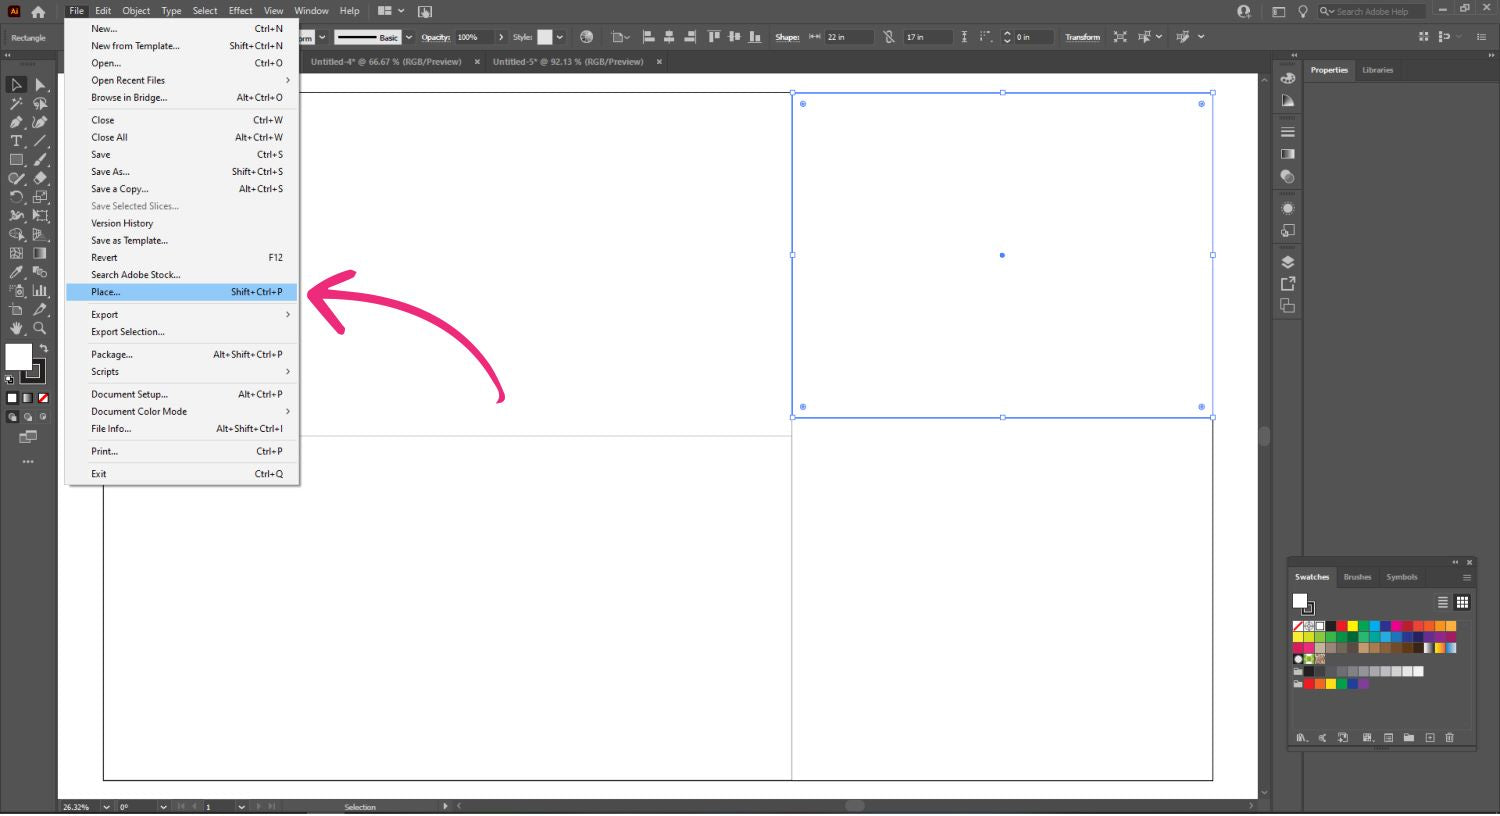
I’m so glad you asked! I have a tutorial to walk you through designing any size panels using Adobe Illustrator. You can probably use the same principles in other design software, but Adobe Illustrator is definitely the best for graphic design.
How to create a custom panel in Adobe Illustrator
First open a new document. Set your artboard to the dimensions of one yard, noting what fabric base you are going to order your print on. Make sure your project is set to inches, so you can easily determine the size of your design.
You can find the fabric width information on the Fabric Types page of the Website, or in the dropdown menu of any Designer Studio print.
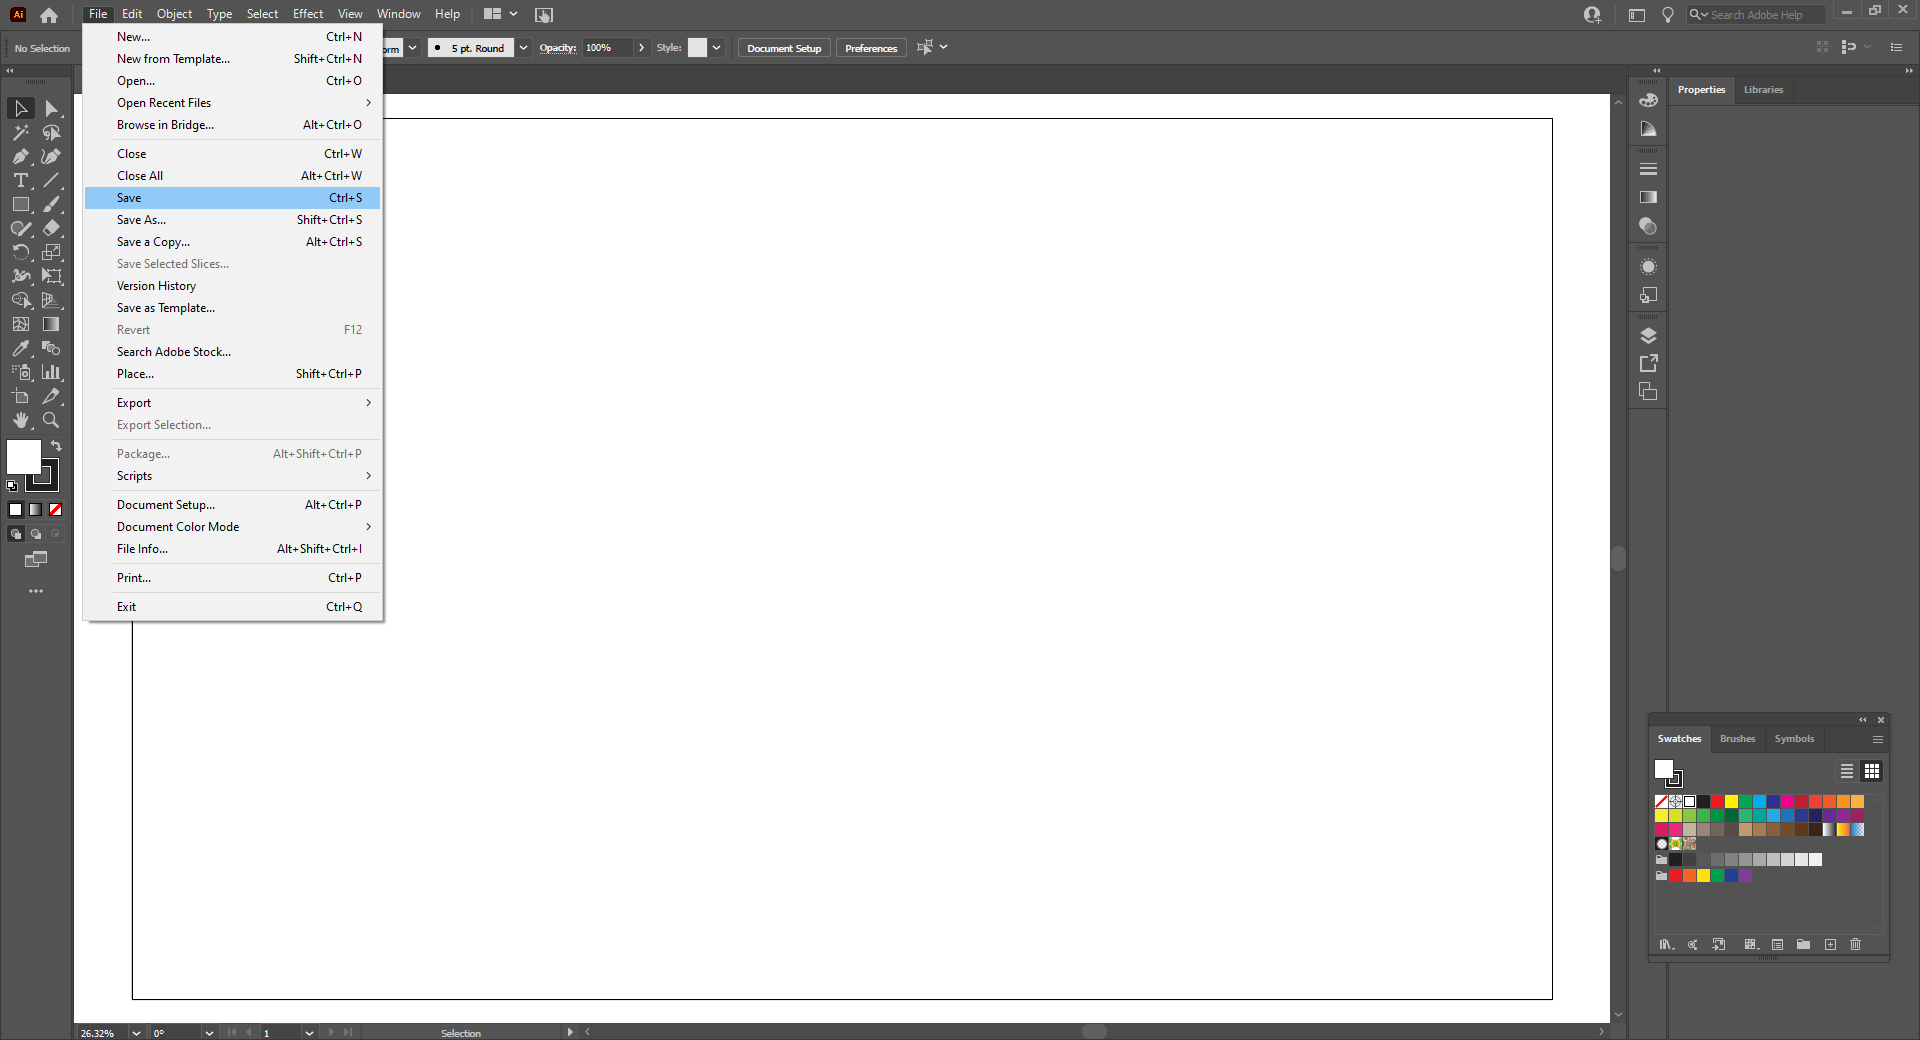
Your document should open like this. When starting a new project, I always save it right away, in case I need to recover it later.
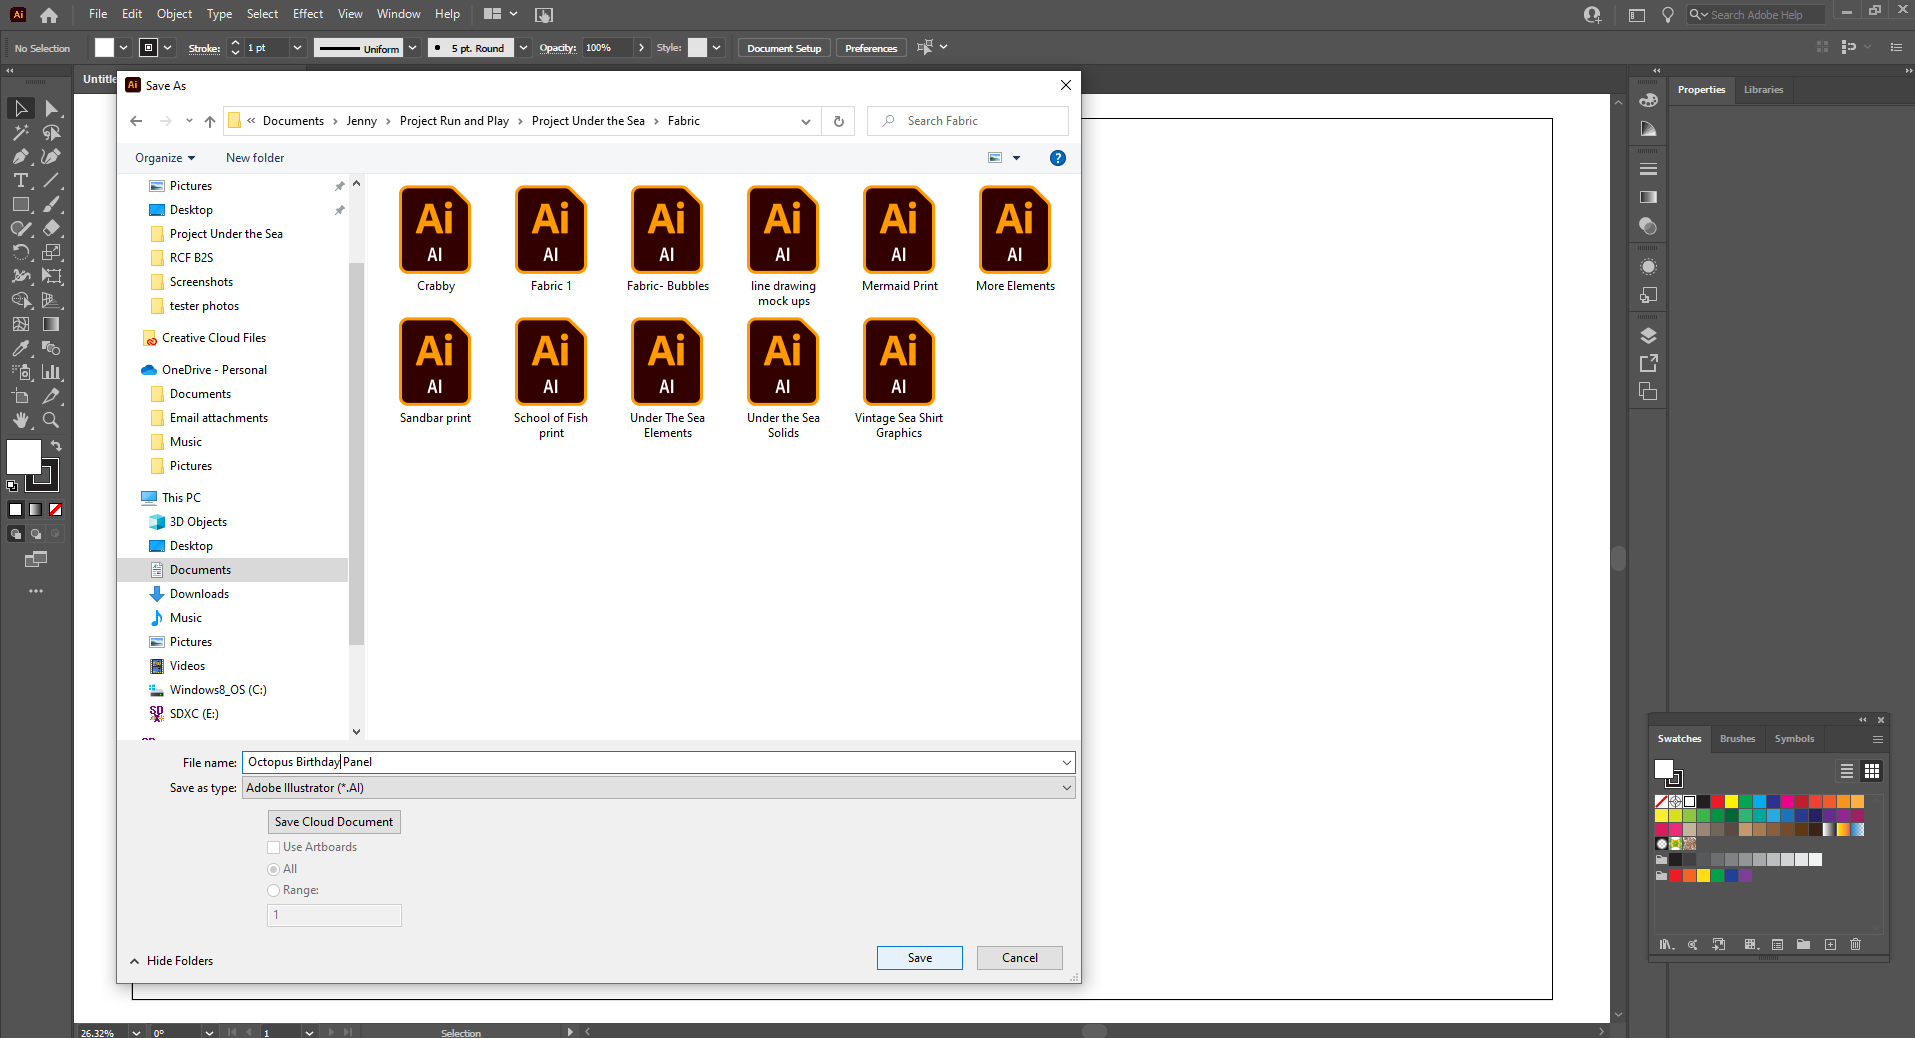
How to Save
Creating Sections for Your Panel
I find it helpful to draw boxes on how large I need each element of my design to be. Depending on what I am making, I may even measure individual pattern pieces to make sure I have things the correct size. Choose the “Rectangle Tool” from the sidebar, and draw as many rectangles as you want different designs.
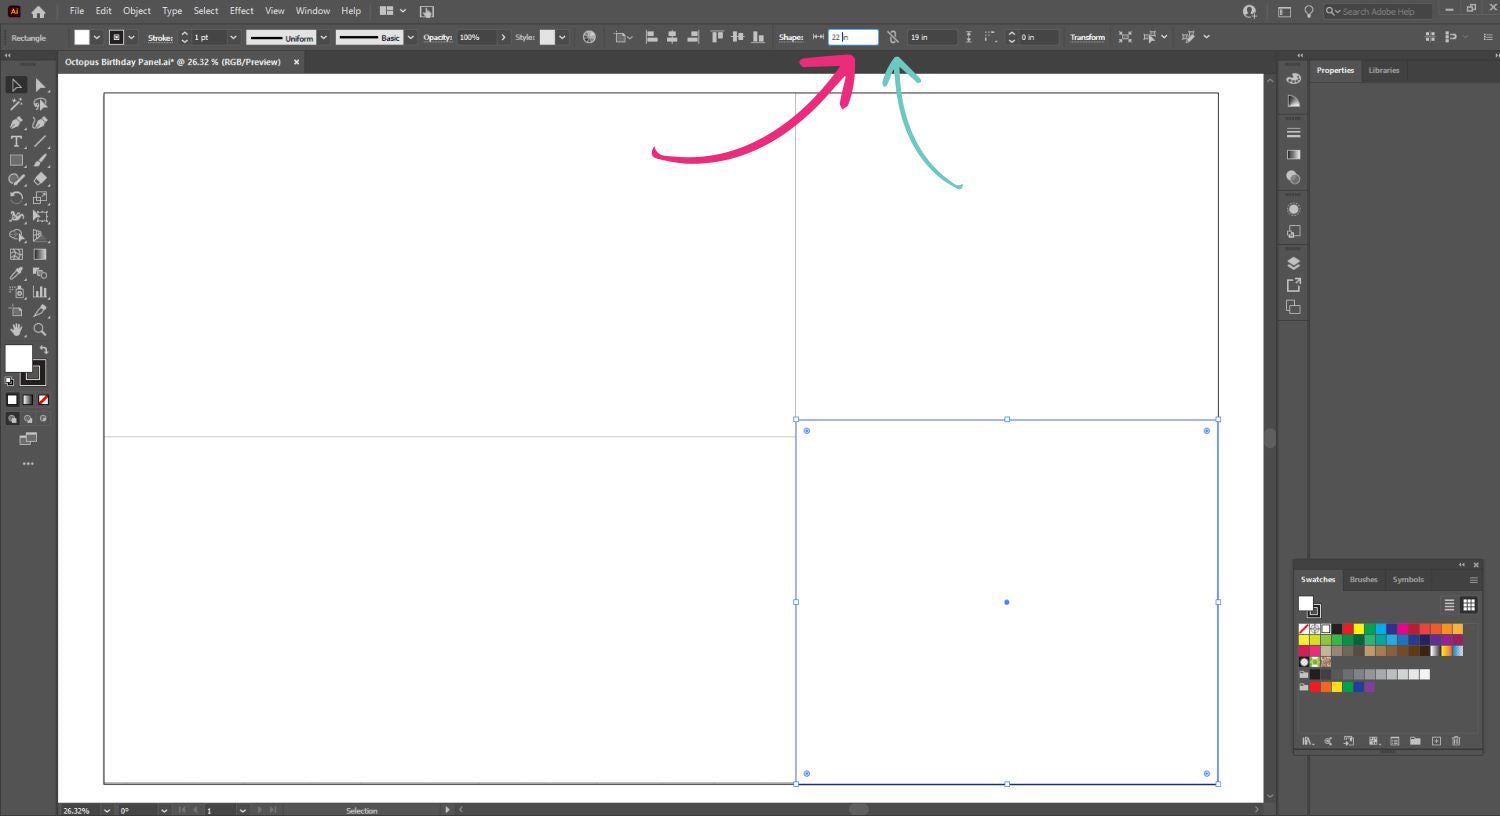
Next, specify the exact size of the rectangles by selecting a rectangle, and entering in your desired dimensions into the boxes along the top toolbar.Make sure the proportions are NOT locked (indicated by green arrow) so that you can freely edit both length and width.I am going to use this panel to make a birthday tee and shorts set for my two-year-old, so I measured each pattern piece to calculate how large I need each section of fabric to be.
Now comes the fun part!
Placing the Designs
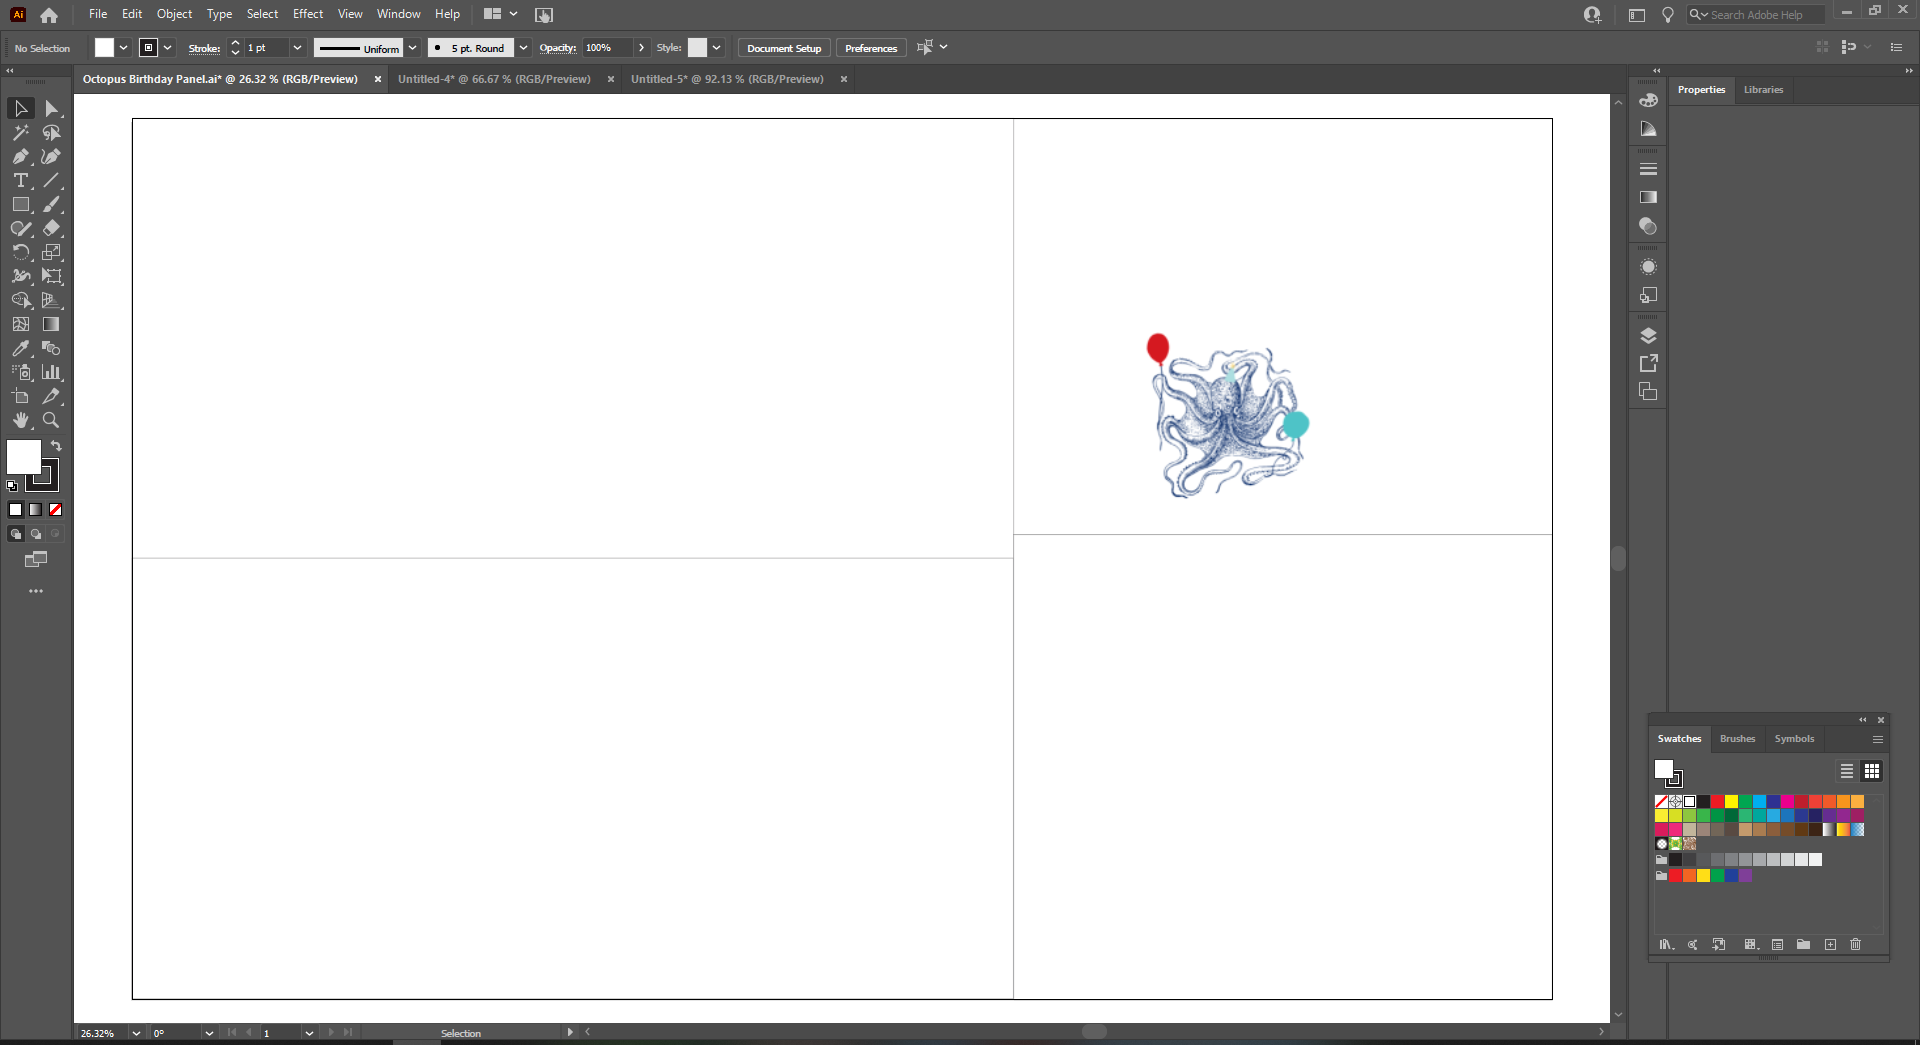
Depending on how you created your repeating patterns or panel designs, you can go about this part a few different ways. For panels, simply “place” your image in the appropriate box, and size it to the exact measurements you would like it to print. Don’t forget that if you are using the corner to re-size your image, you have to hold down the shift key to lock the dimensions in place!
For this little shirt, I wanted the graphic to be oversized, and on the bottom front of the shirt but wrapping around the side. So I traced both my front and back pattern pieces onto tracing paper, taped them together at the side seam (overlapping seam allowance!) and then measured how big I needed the rectangle to be! I also printed the graphic out on paper to determine the exact size I needed it to be, then cut it out and taped it to my two-year-old to make sure I got the placement right. If you are doing a pillow cover, bag, or quilt panel, it’s very easy to use the alignment tools to get your image exactly centered on the fabric!
For my other boxes, I decided to use a red stripe, bubble pattern and a solid coordinate. Keep in mind RCF’s Best Printing practices when choosing designs! I printed this on French Terry, knowing that my solid section would be a touch stiffer than the others, as well as a little faded looking. Since that was my desired look, I was ok with that. You also don’t get as crisp lines on the natural bases as you do on some of the smoother synthetic bases, like the swim knit and double brushed poly.
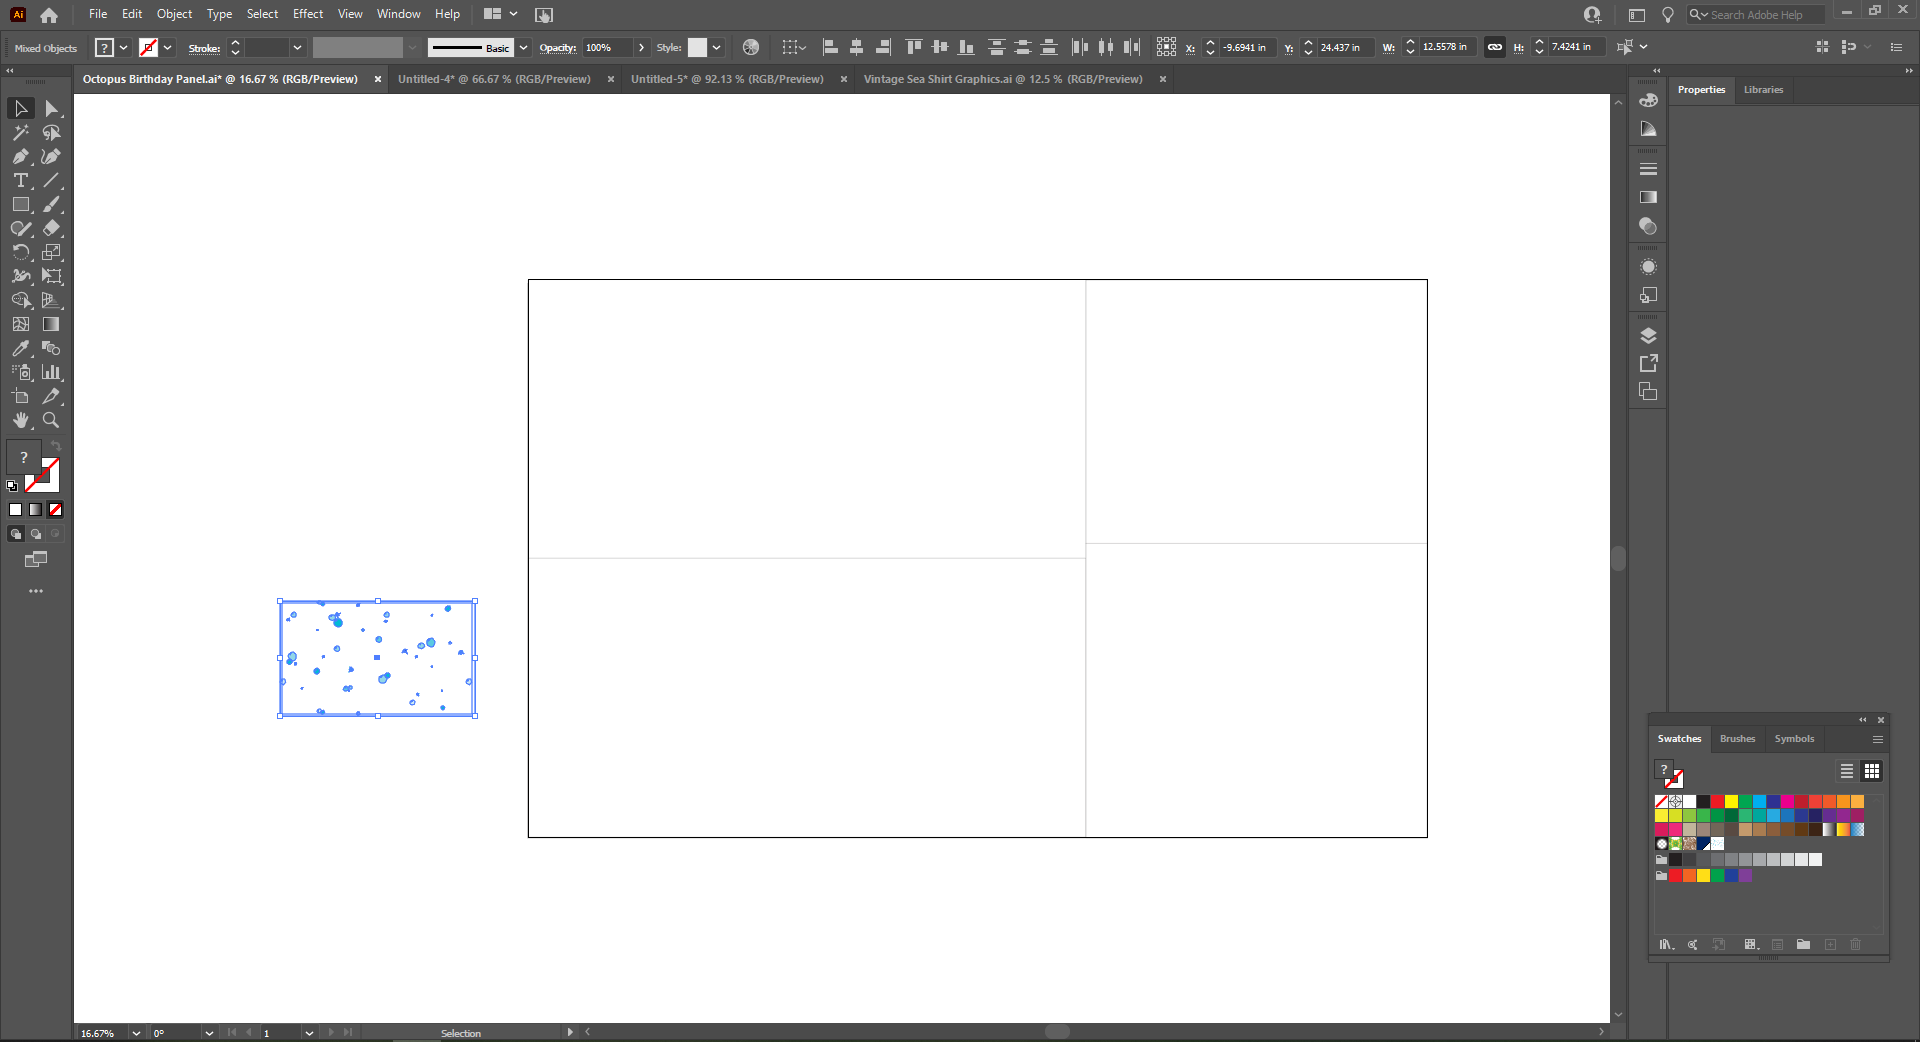
Now, there are a few ways to add the repeating patterns. The simplest is to create a swatch of your pattern, then just fill in the rectangle! I did this by opening the document where I created my repeating pattern, selecting all of it, and then pasting it to the side of my artboard where I am creating my panel.
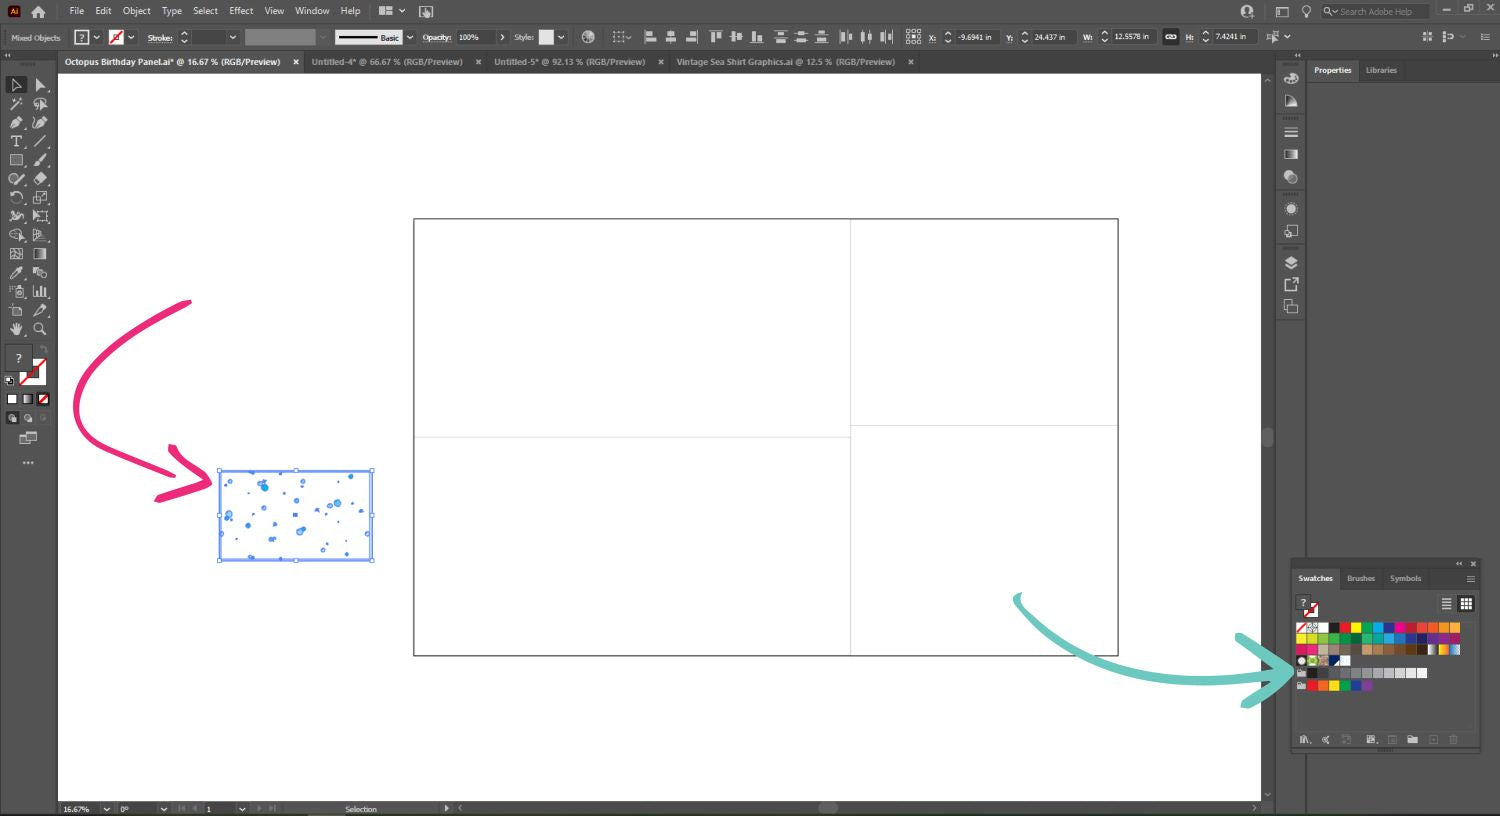
Then, with all layers of the repeat selected, I drag it over to the swatch box, and release!
I’m sure there is a way to create the swatch from the original document, and then importing the swatch into your new project, but I have not figured out how to do that yet.
Once you have your swatch, just select the rectangle you would like to fill with it!
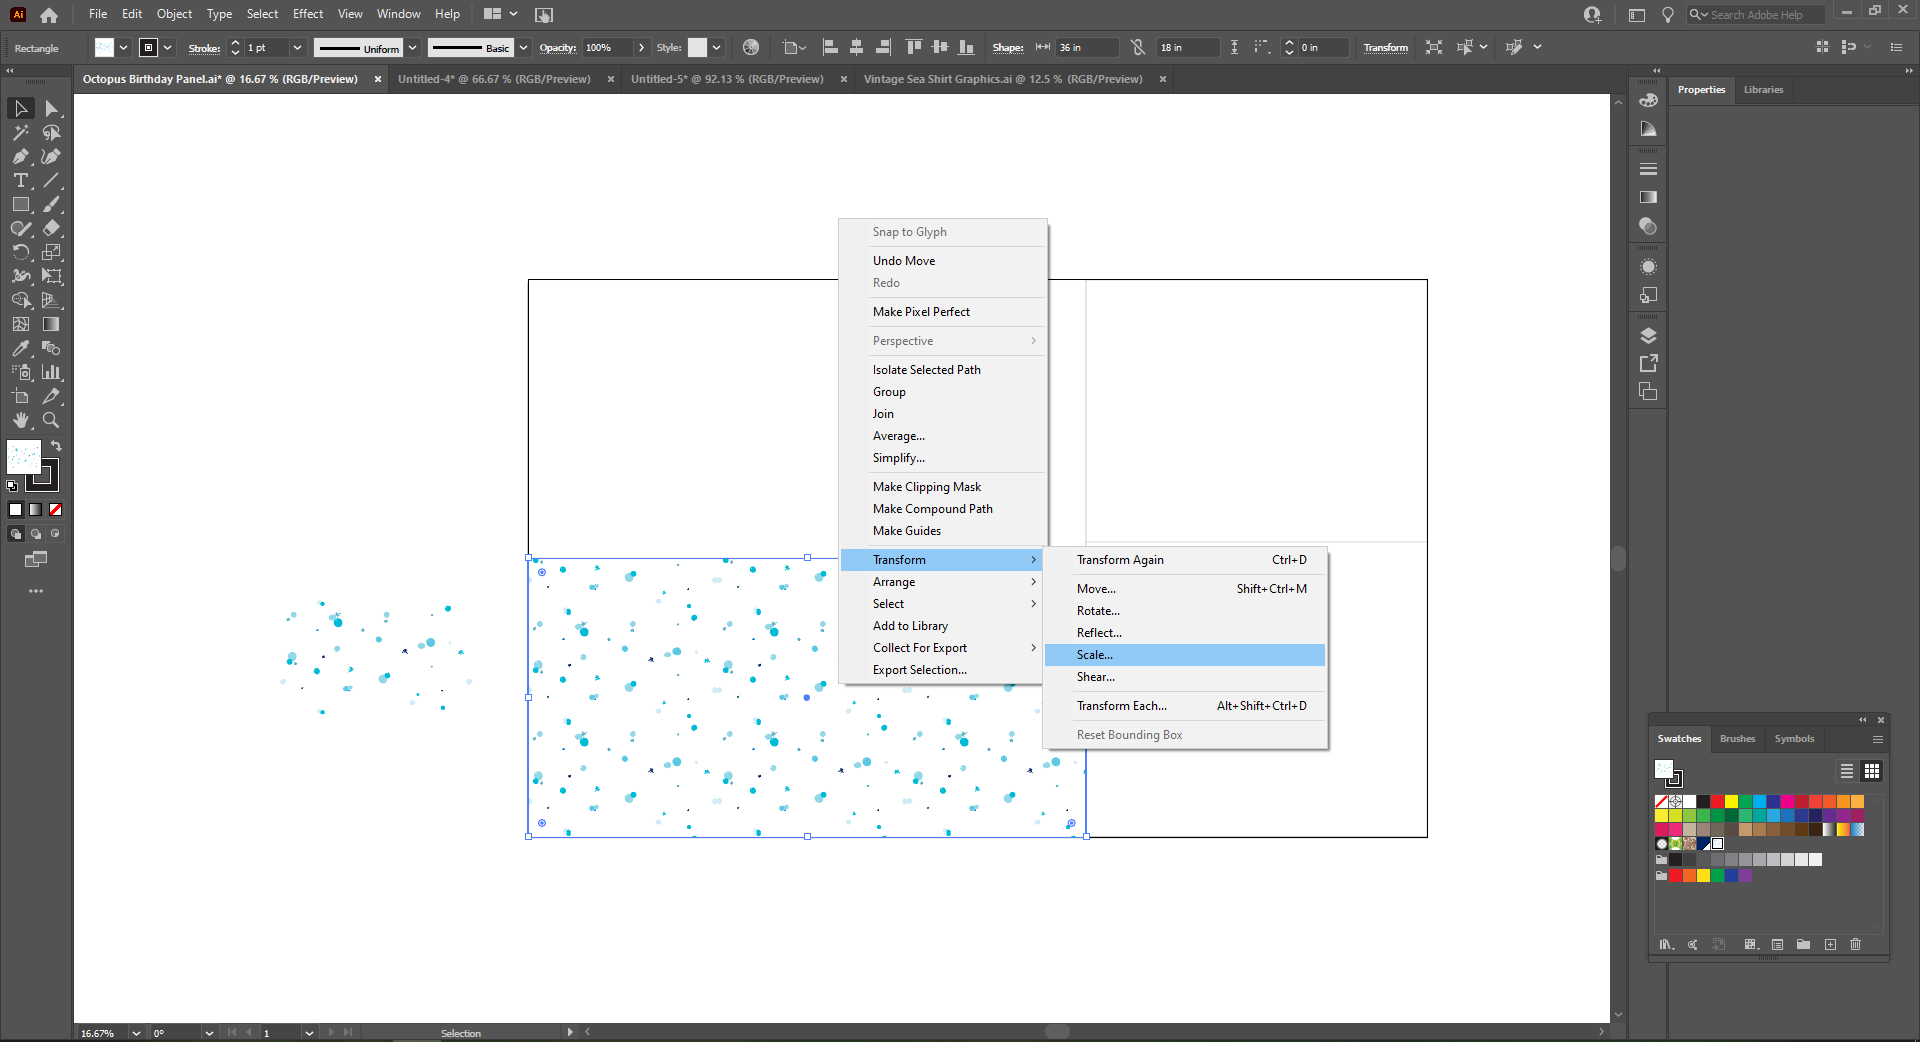
You can easily adjust the scale of your repeating pattern this way as well. Right click on the rectangle, select Transform - Scale.
Then decide how much larger or smaller you would like your pattern to be! I went smaller, as I wanted tiny bubbles for this outfit. As you adjust the scale, make sure to UNCHECK the box labeled “Transform Object”. Otherwise, you will change the dimensions of your original rectangle!
If you don’t want to make a swatch, probably because you created your repeat in another program and only have a jpeg to work with, you can just tile the original repeating image across your rectangle, and then crop it to fit. The chances of having white lines between the repeat is a little higher using this technique, but as long as you zoom in, you should be able to catch any errors.
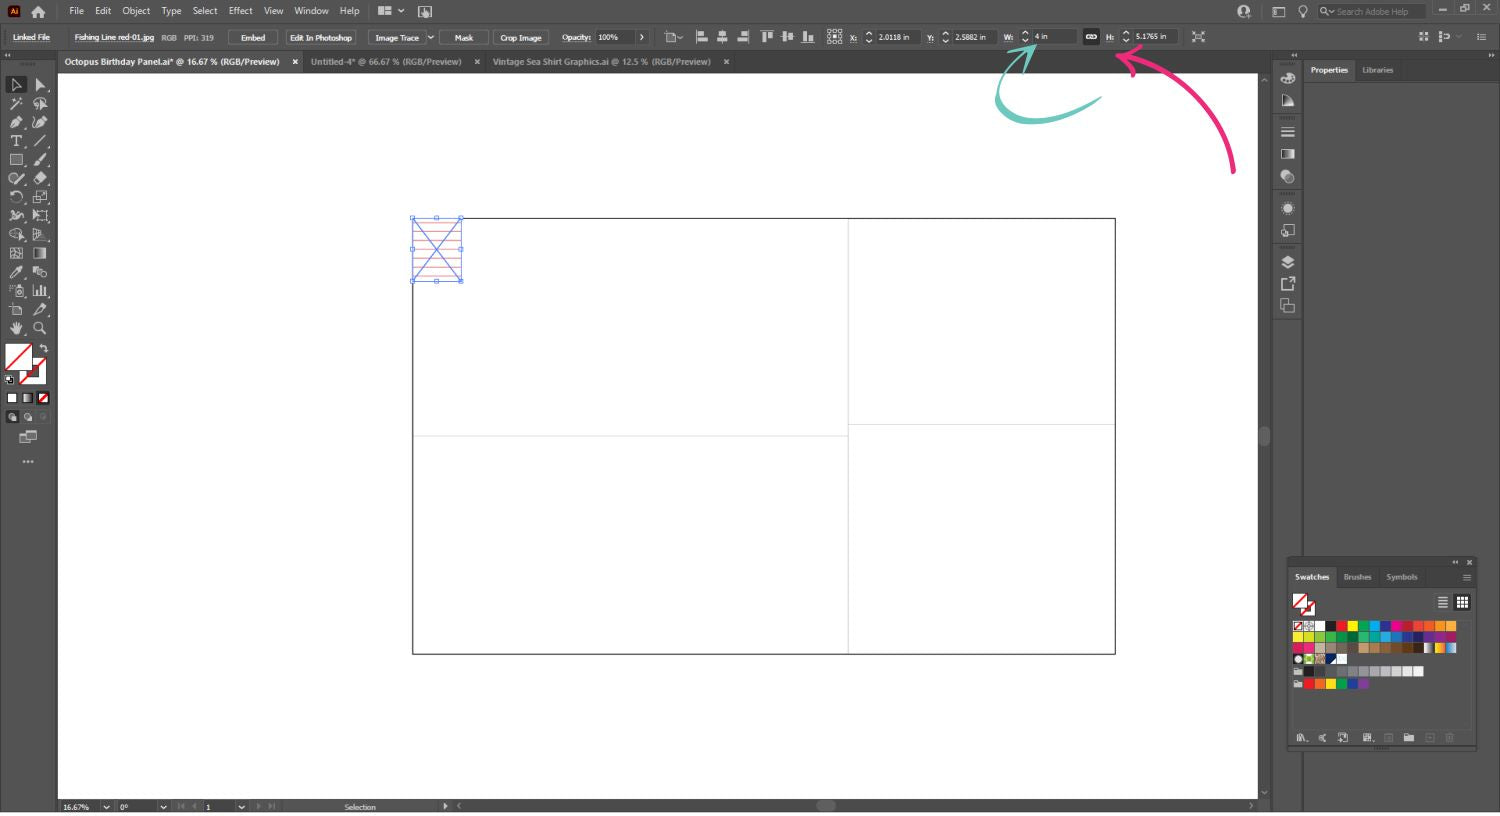
To do this, first place your image in the top left corner of your rectangle. Make sure that it is set to lock the object dimensions (unlike when we were drawing rectangles!) so that the image remains the same proportions. Then adjust the size until you are happy with the scale. This is much easier to do before tiling! It is also helpful to choose whole numbers if possible. You will see why in a minute!
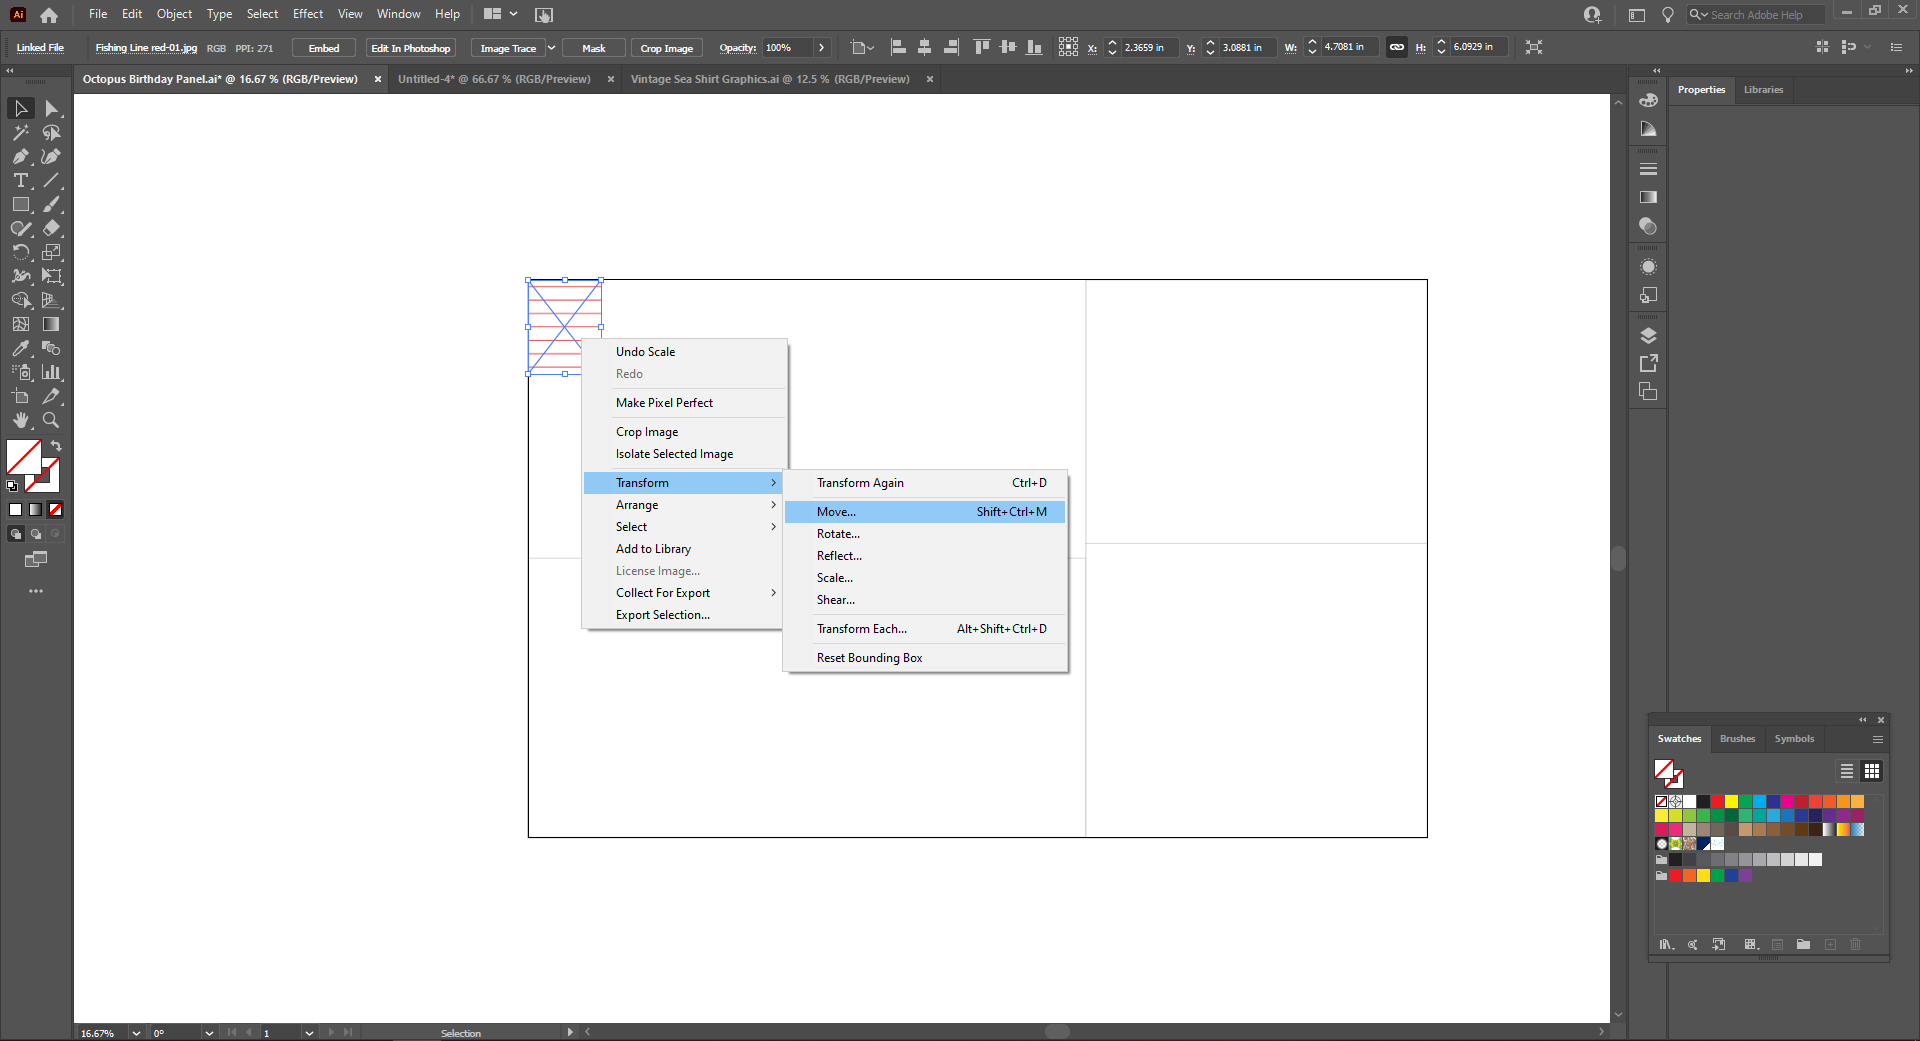
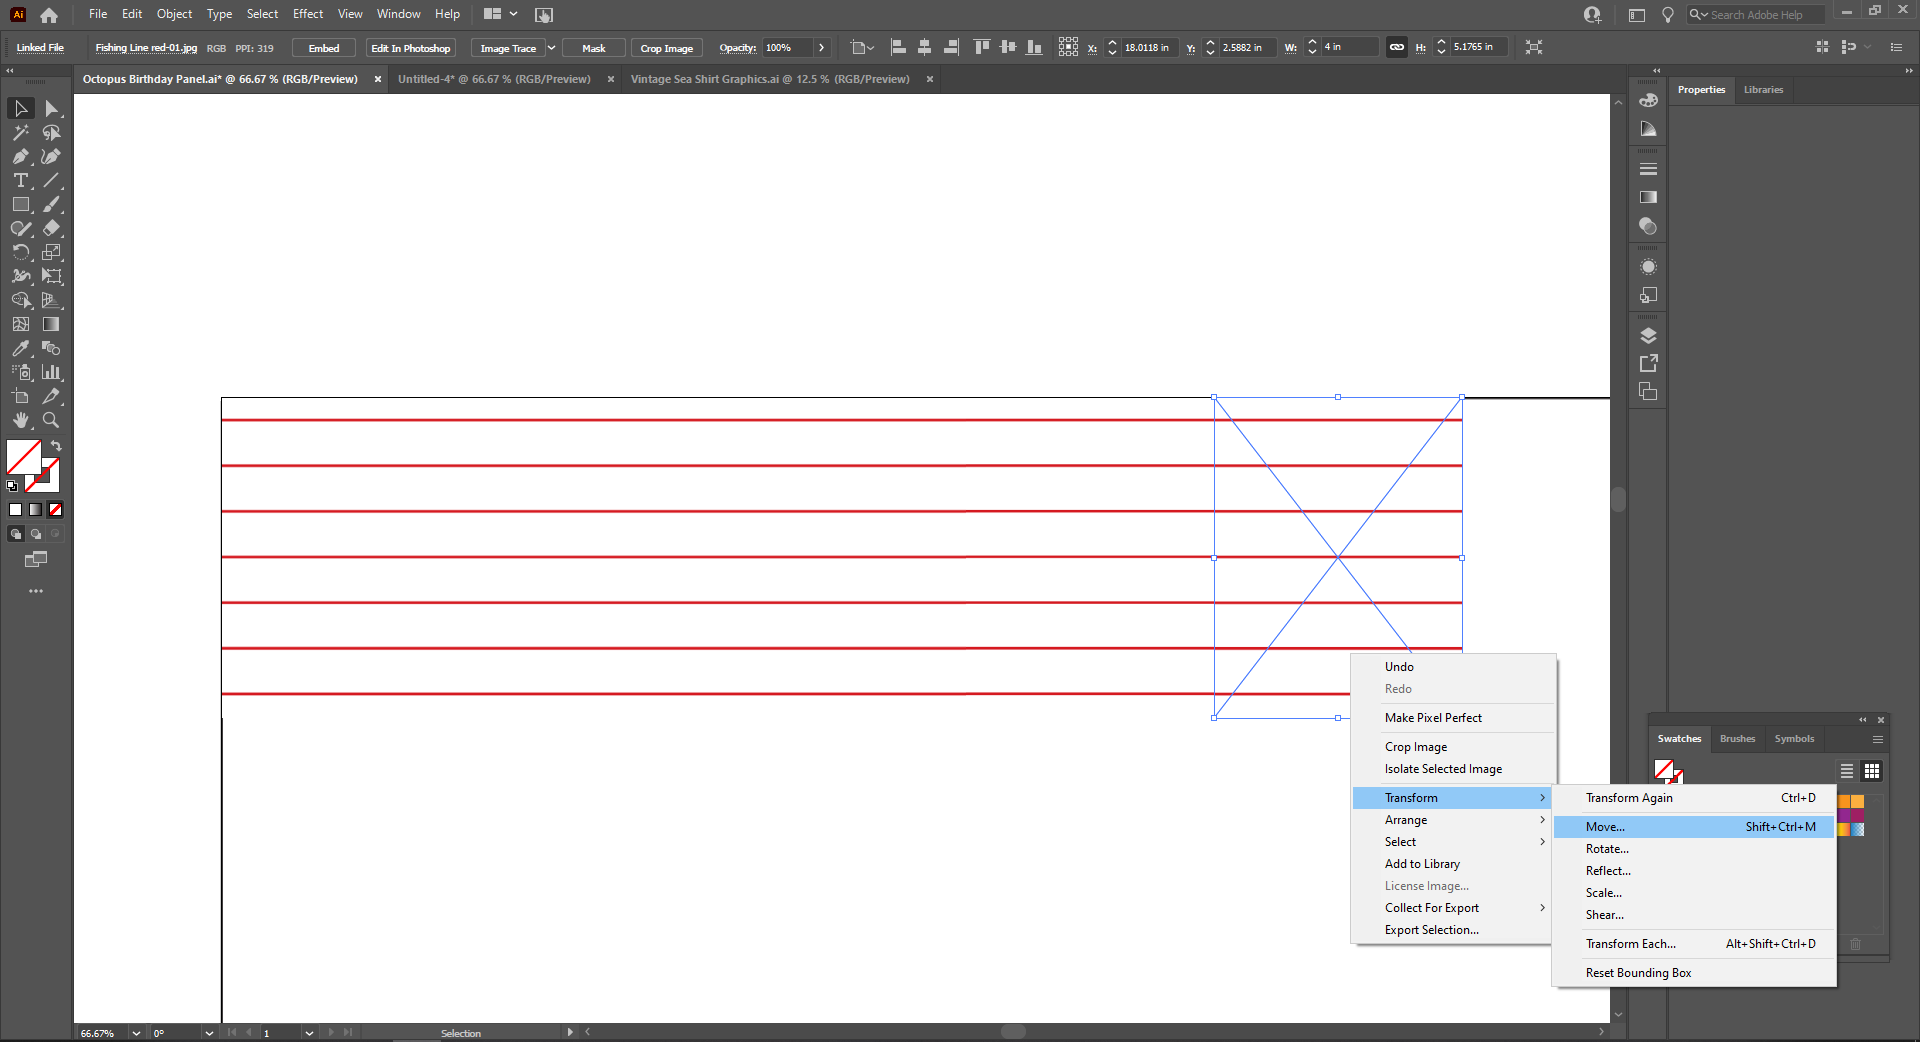
Next, right click on the image, select Transform - Move from the drop down menu.
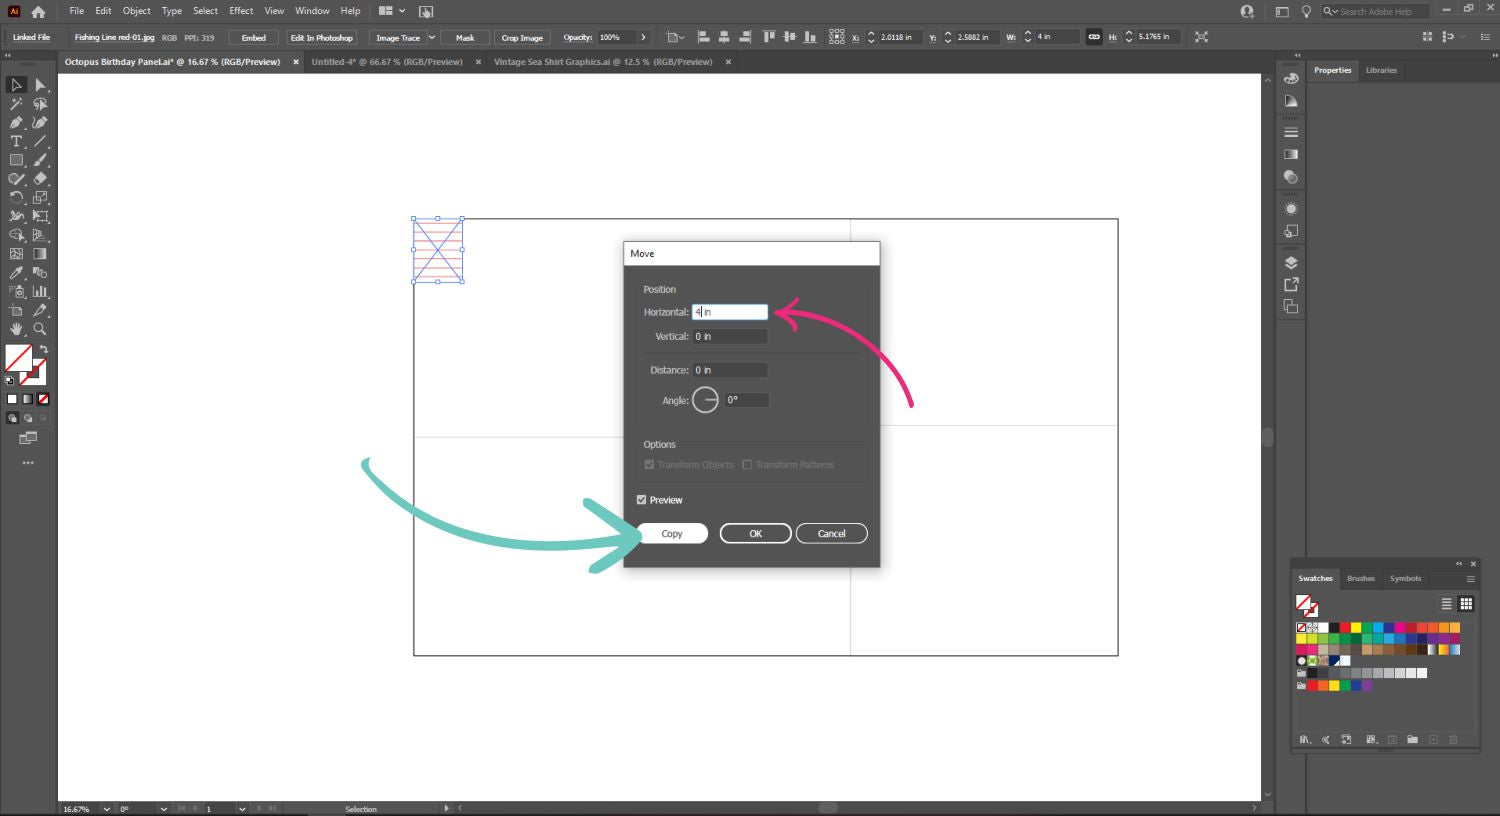
Here is where you need to know the exact dimensions of your object! Change the vertical drop to 0, and the Horizontal drop to however large your image is; in this case 4 in. Then click Copy.
You should have a repeat placed exactly next to your original! Make sure you zoom in to check that there is no white space between images. Keep repeating the same steps until you have tiled all the way across your original rectangle.
Once you have a full row, select all the images in the row, and group them together by right clicking and choosing Group from the drop down menu. Then, you are going to right click a second time, choose Transform - Move. This time, change Horizontal to 0 and Vertical to the size of your image. Repeat those steps until the entire rectangle is covered.
And there you have it! A full yard, with multiple prints and a panel! Last step is to export your design as a jpeg to be able to upload it for custom printing!
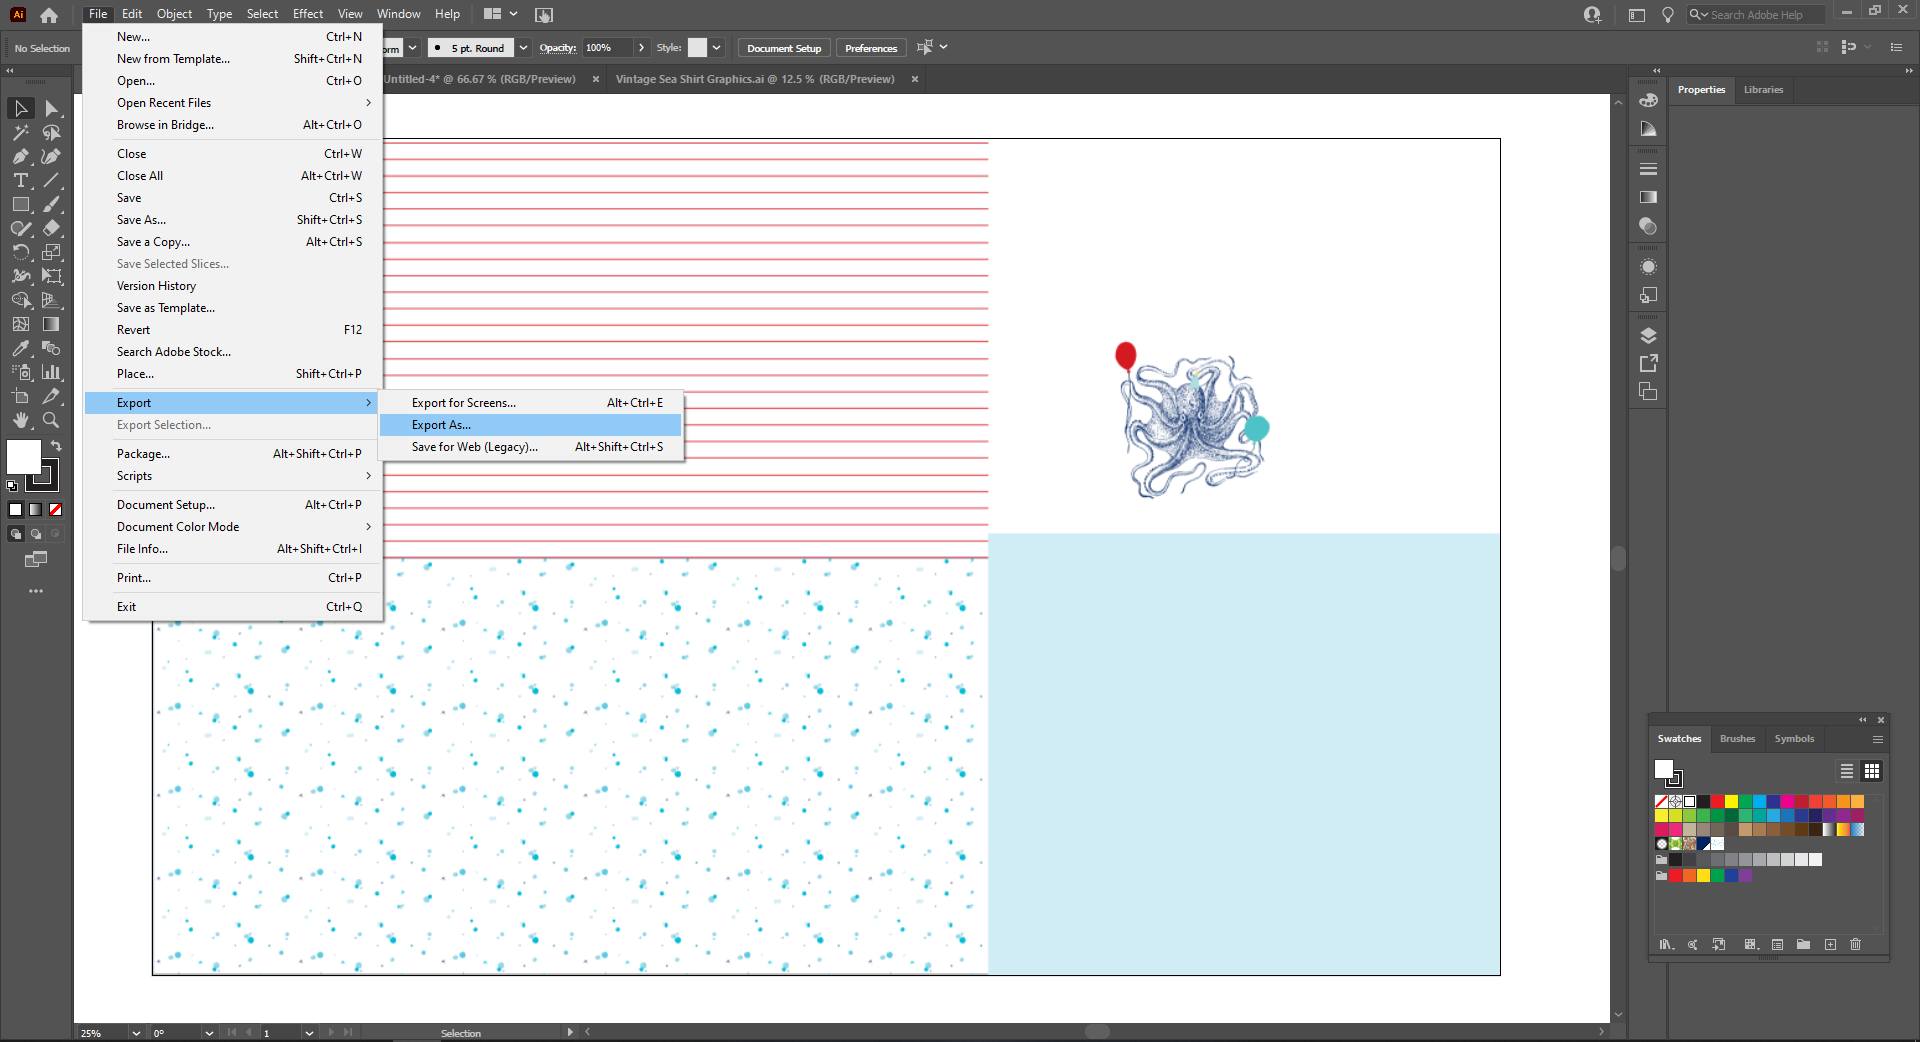
To change it into a file you can upload, you need to export it as a jpeg.
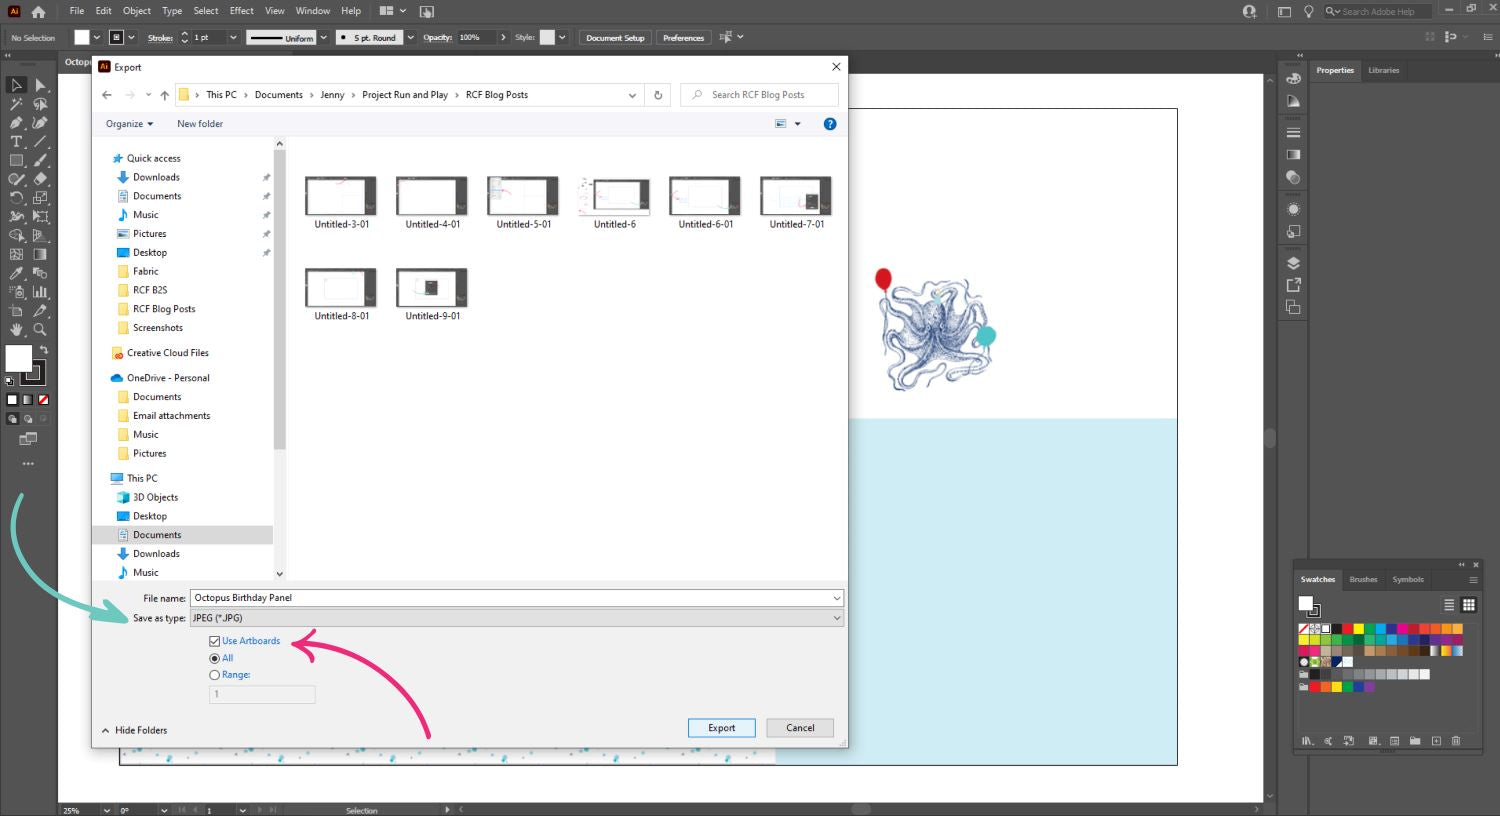
Make sure to change the file type to JPEG, and check the “Use Artboard” box, to make sure you only save what is inside the black outline. Your final image will NOT have a black outline around the entire edge.
For fabric, make sure to choose these settings when exporting! It is VERY important that you choose RGB colorspace, high quality image (but not too high so that your file is too large to upload to Raspberry Creek) and select the correct dpi for your project. Fabric should be at 150 dpi, and Wallpaper needs to be at 300 dpi.
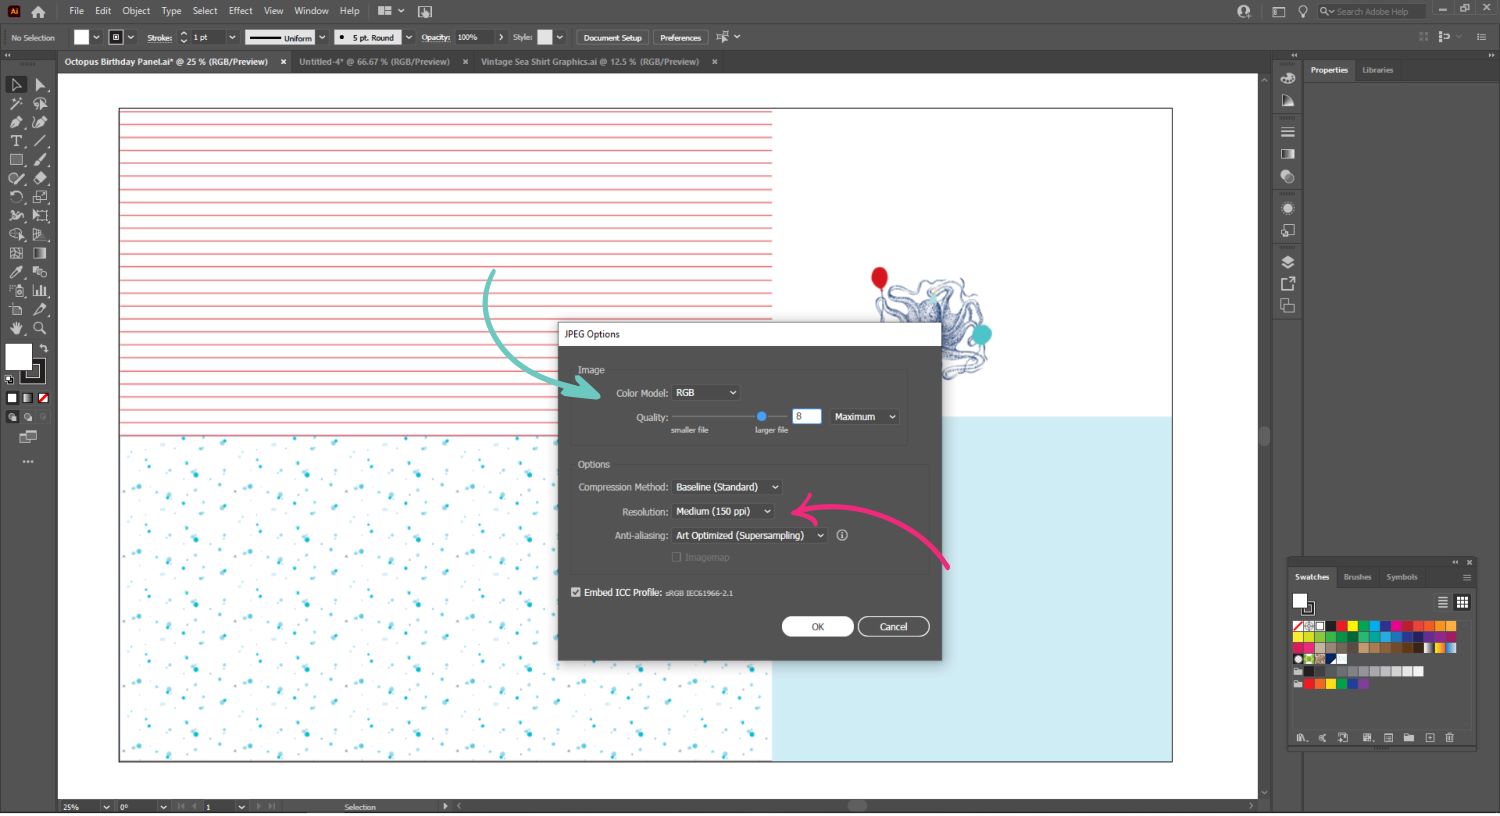
Now we are ready to upload to Raspberry Creek! If you’re not sure how to do that, check out the amazing how to videos under the Custom Printing section of the website!
Fabric is ordered, and now we wait (maybe not so) patiently for it to arrive!!
Of course, I was way too excited to receive my custom designed panels, so I completely forgot to take a picture of just the fabric, all printed out exactly to my carefully calculated specifications! Rest assured that everything printed beautifully, and measured exactly as I expected.
Because my boy is still so little, I had plenty of fabric left to make a second pair of shorts and a tee with the rest of the red stripes and bubbles.
With careful placement, you can get a lot out of a single yard, making custom printing much more economical!
Can’t wait to see what you make!!!
September 27, 2023
I use Photoshop, not Illustrator, but I cannot get my file size small enough to upload. any ideas?
Comments will be approved before showing up.
December 16, 2024
October 01, 2024
Kathleen Senical
September 27, 2023
Wow thank you so much that was an amazing tutorial for custom printing for a panel and other fabric all on a yard! So awesome! This is awesome knowledge and I appreciate it so much! Thanks again you guys are the best! 💜💜💜