
- Gifts & Goods
-
Wallpaper
Luxury Peel and Stick Wallpaper
![]()

- Gift Card
- Gifts & Goods
- Gift Card
Luxury Peel and Stick Wallpaper


Hi all! I have a really fun tutorial to share today that can work with any of your favorite hoodie or t-shirt patterns. I originally made one of these for my oldest son for the release of the Spring prints. We both loved the result so much that I thought I would share how I achieved it.
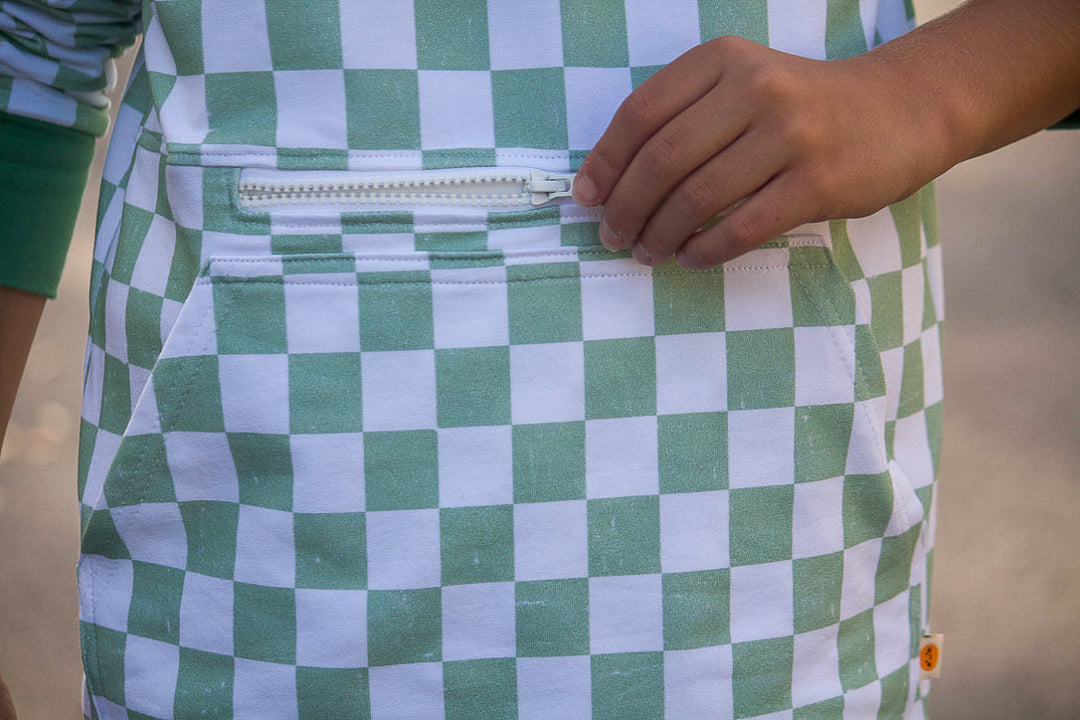
My kids received sweatshirts like this as a gift last year and since then, we’ve noticed them everywhere. The double pocket is creative, handy and adds new interest to a plain sweatshirt. My kids have used the zipper pocket for hiding snacks, trading cards, and even gaming controllers. They love that it is large and secure with the zipper while still leaving another pocket open for their hands. For this one, I used the Sage Green Large Checker print in French Terry and the Deep Sage solid French Terry for cuffs and hoodie lining. I think the print is absolutely perfect for this hoodie style.
Let’s get started, shall we? Here are some additional items you will need to add a zipper pocket to your pattern of choice::
-Your favorite hoodie’s front pattern piece (I am using the Switch Crew Sweater by Misusu)
-A sports zipper at least as long as your desired pocket opening. It can be longer and you can cut the remainder off after installing. I like it just a tad shorter than the top of my kangaroo pocket.
-Extra knit fabric for the inside pocket lining. While I have used French Terry for this one, it is much less bulky to use the cotton spandex jersey.
-Interfacing
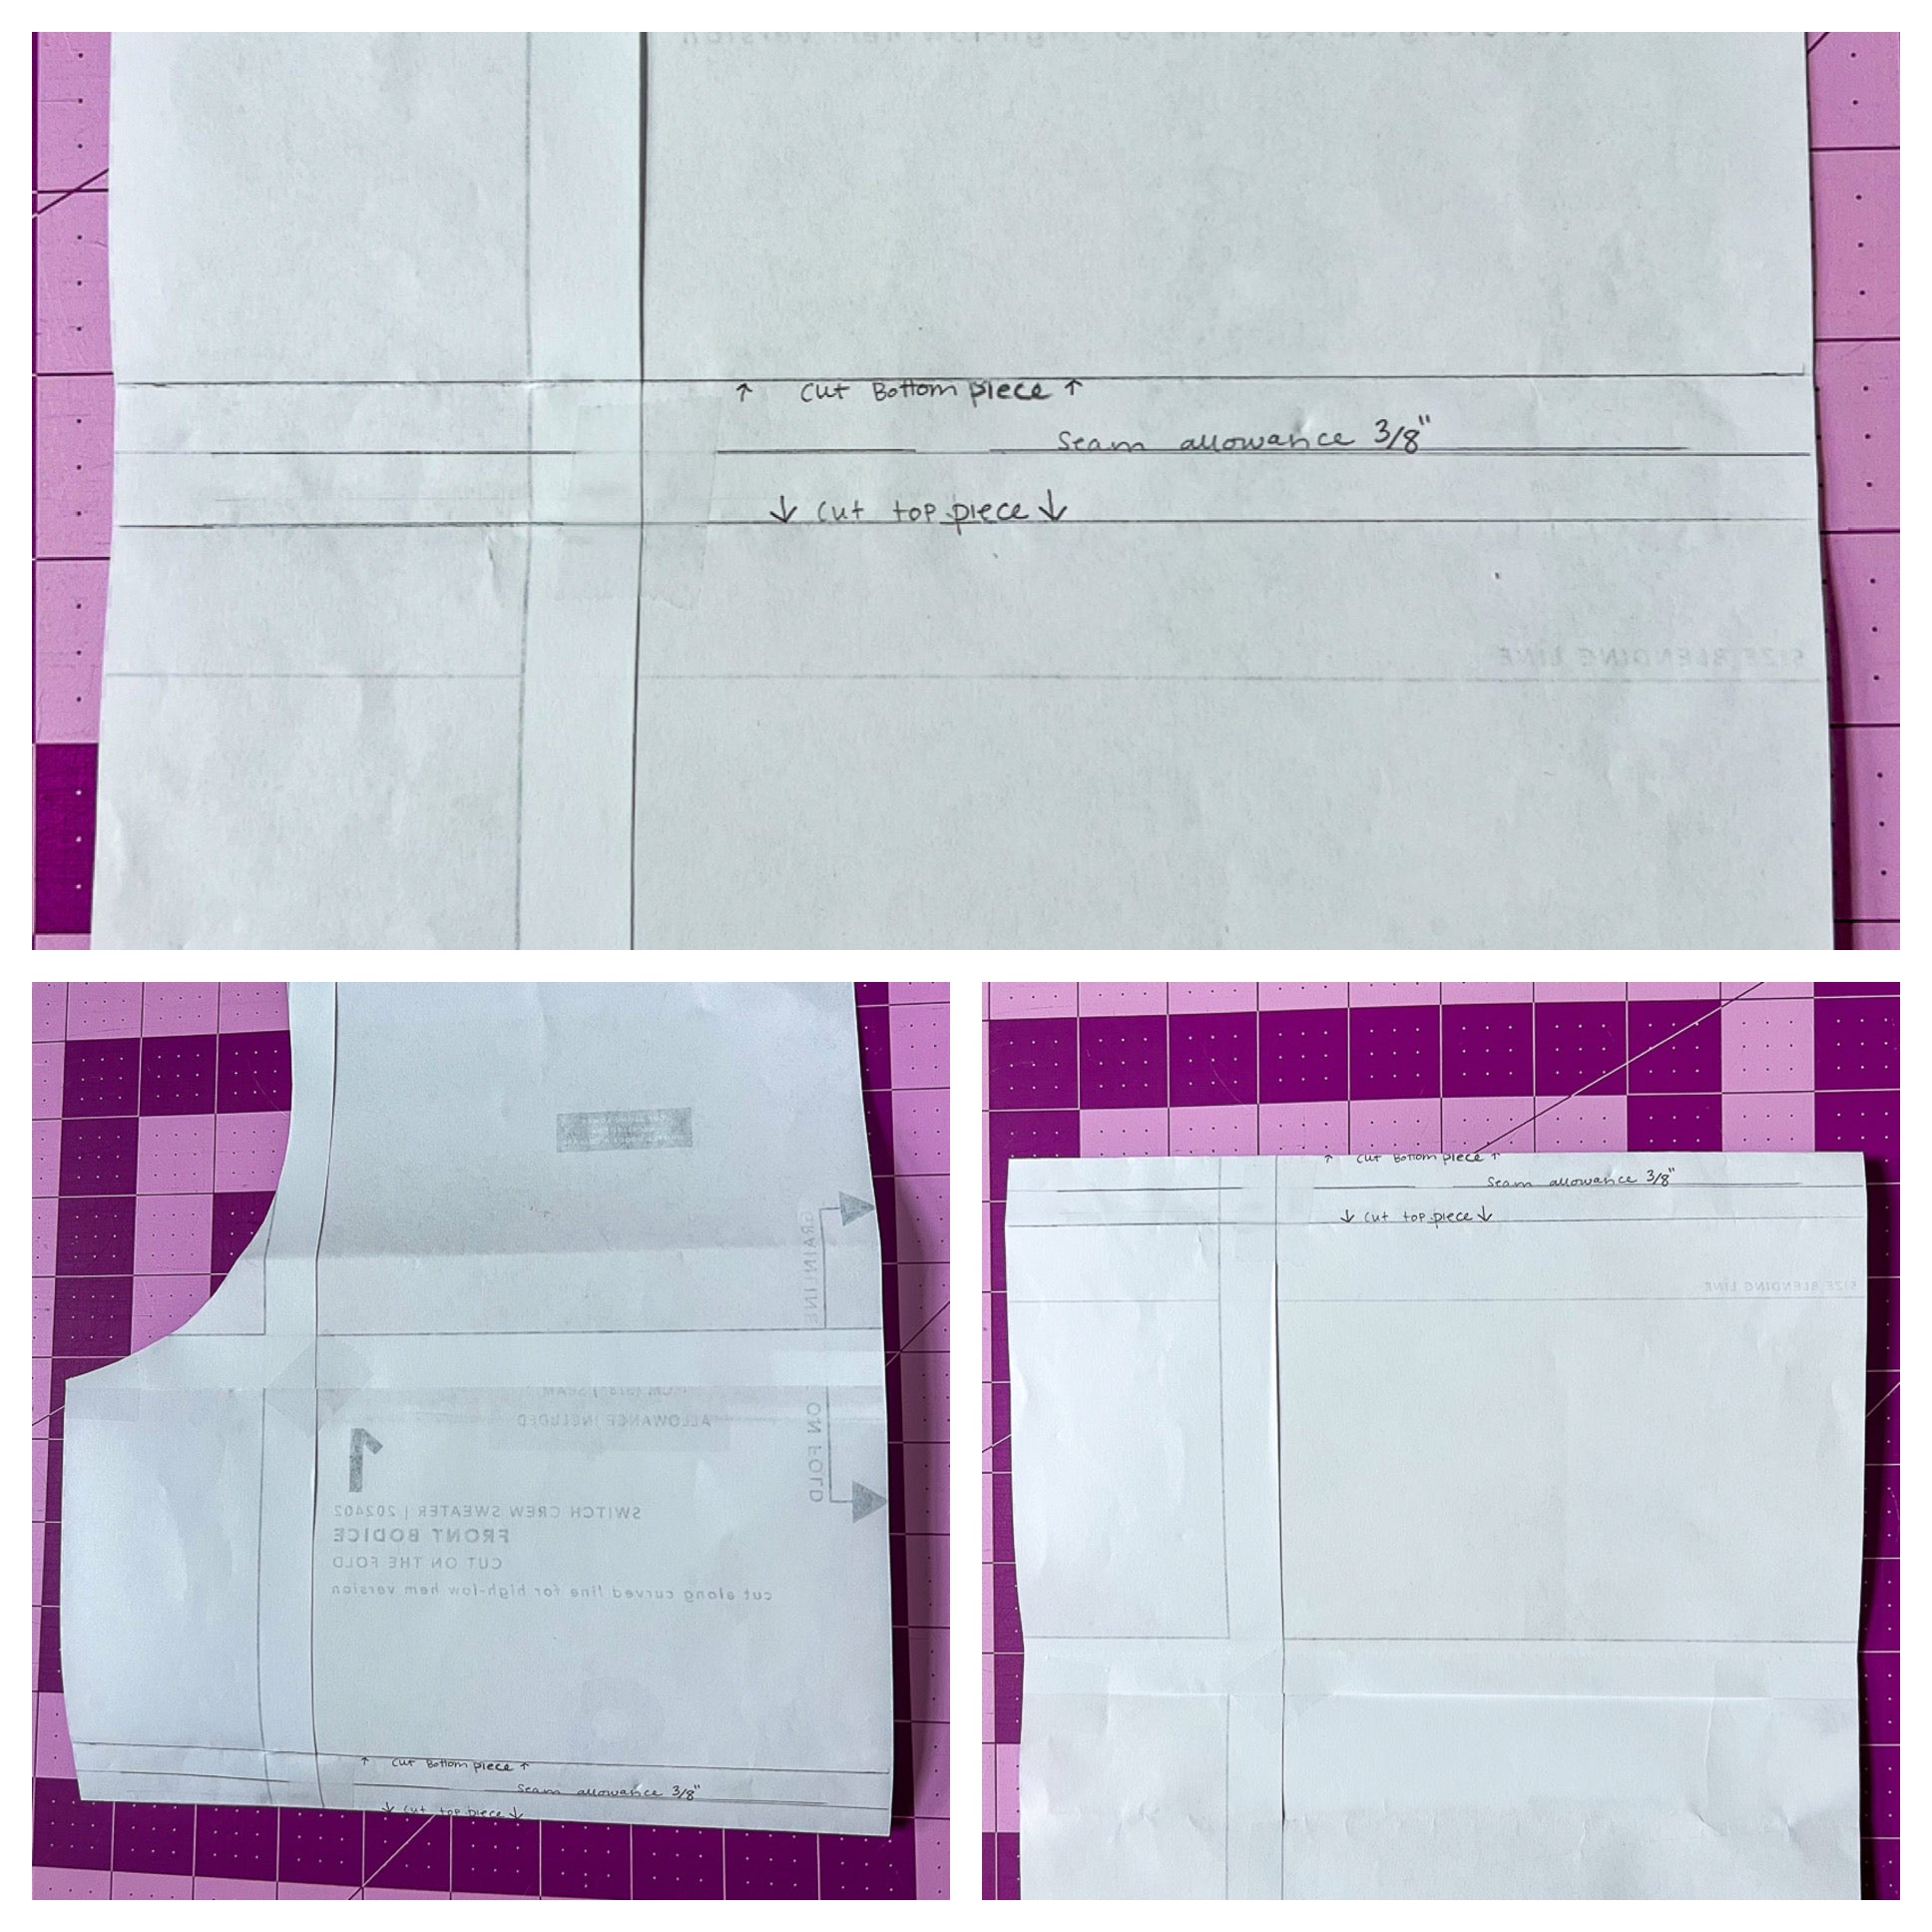
We will start by slashing the pattern piece as if we were going to color block it horizontally across the ribs. If you will be using a kangaroo pocket as well, lay out your pattern pieces and measure how tall and wide the top of the kangaroo pocket is. You will want your color block seam at least an inch or so above the top of the finished kangaroo pocket. I like to draw the line directly onto my pattern piece and then mark a line above and below for the seam allowances (I’ll be using 3/8”). Then, when cutting my fabric, I can just fold the pattern piece at each line. You will have a top piece and a bottom piece each with an added 3/8” seam allowance where they join.
Cut 2 pocket lining pieces the same height as your main bottom pattern piece, but bring in the sides to reduce bulk in the side seams. I trimmed off about 1 1/2” from each side.
The measuring & math for your zipper get a little confusing here. I’ll try to simplify it as much as I can, but I also want to show you how I got each measurement in case your zippers are larger or smaller than what I used. These are my formulas for deciding the sizes of my interfacing and two templates for the zipper opening. Stay with me here, lol!
Interfacing width: If you have a 3/8” seam allowance at the top of your pattern piece, you want a 1/2” opening for the zipper to peek through and use a 1/4” seam allowance around your zipper, you would want a piece of interfacing at least 1 3/8” wide.
Interfacing length: Length would be the length of your zipper including the stopper (mine was 8”), plus 1”. This gives you 1/4” seam allowances and a margin on each side.
So, my interfacing pieces are 1 3/8” x 9”. Cut 2 of these.
Next, we need to make some templates to trace onto the back of our interfacing, the math is as follows:
Template #1 width: 3/8” top seam allowance plus 1/2” opening
Template #1 length: zipper length (8”) plus a 1/4” seam allowance on each side = 8 1/2”
So, my Template #1 is 7/8” x 8 1/2”. Cut this out of something sturdy like cardstock so it is easy to trace onto your interfacing.
Template #2 is just used to cut away some excess fabric before preparing the zipper opening. It is just Template #1 minus the 1/4” seam allowances on the bottom and sides. So, Template #2 is 5/8” x 7 1/2”
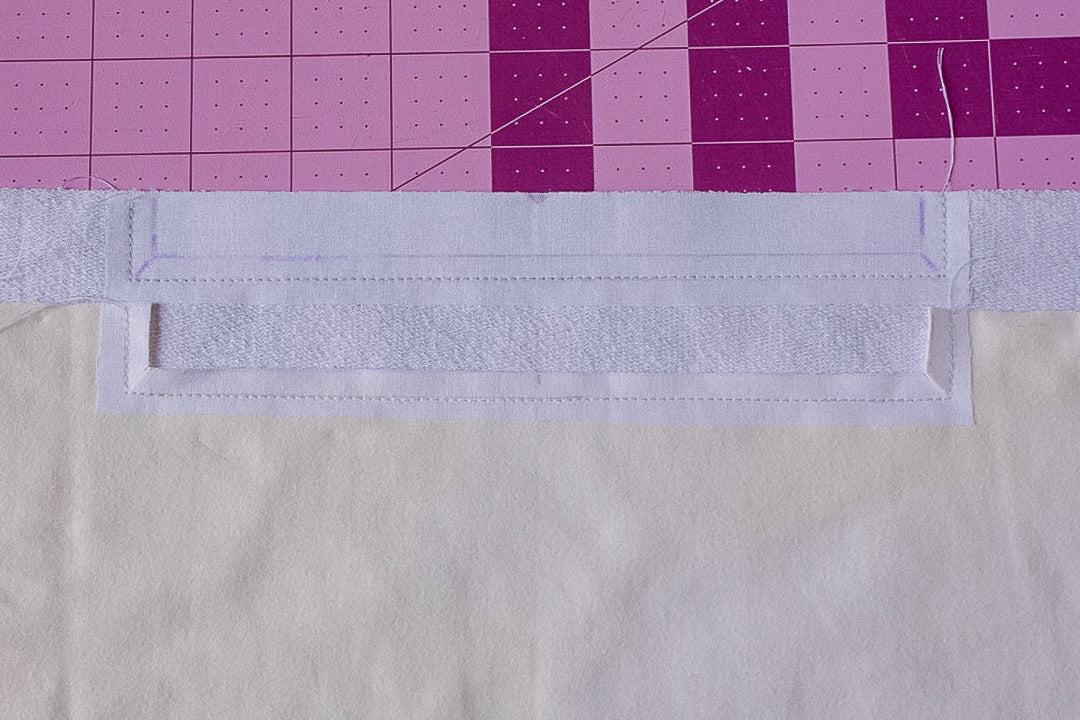
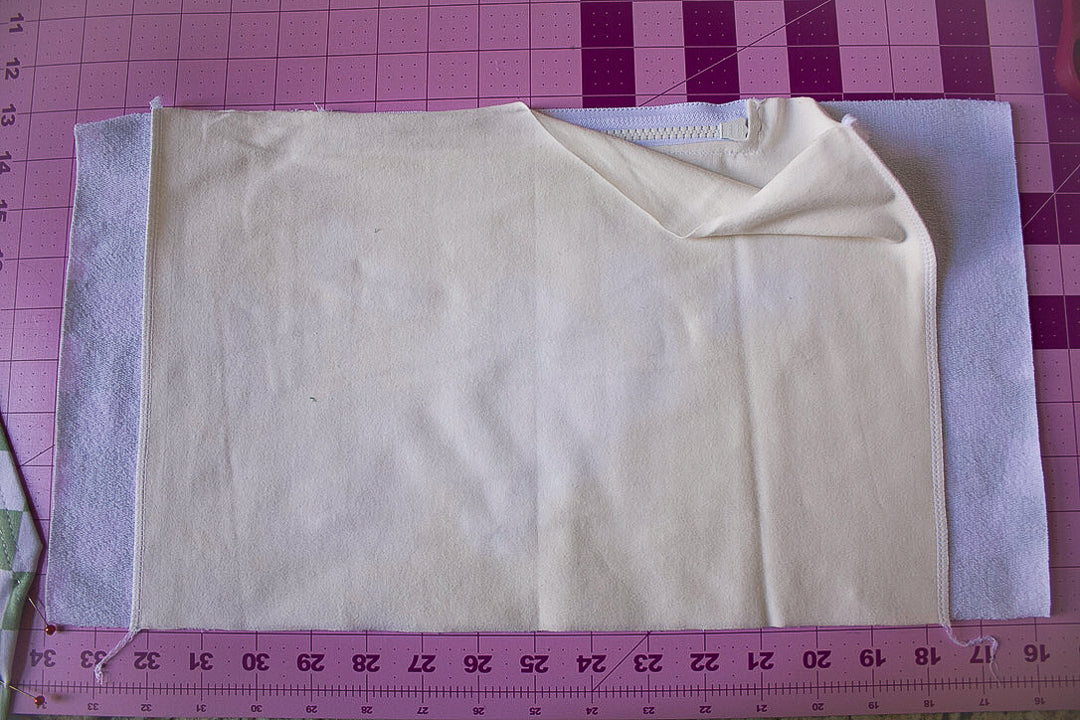
Okay. Phew! Now that we have all the math and cutting finished, let’s begin sewing. Grab your bottom main fabric piece and one of your pocket lining pieces. Center your interfacing pieces to the top wrong side of each one and iron on. Next, trace Template #1 onto the wrong side of your interfacing, aligning the top center. On both pieces, sew a stay-stitch directly onto the markings pivoting at the corners.
Trace Template #2 onto the interfacing aligning top centers. This is your cut line. Cut out this rectangle. It should be 1/4” inside your sewing lines. On the bottom corners, clip a small diagonal line out to your sewn corners, making sure not to cut through the thread. Now you can fold under the seam allowances using your stitches as the folding guides. This is the opening for your zipper.
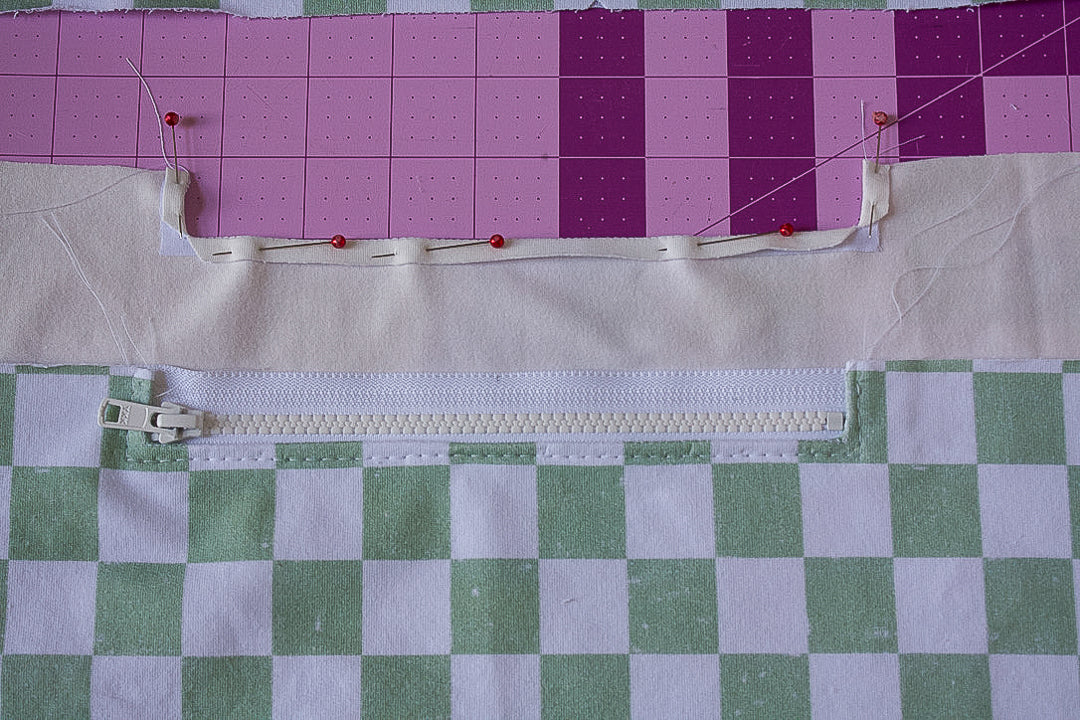
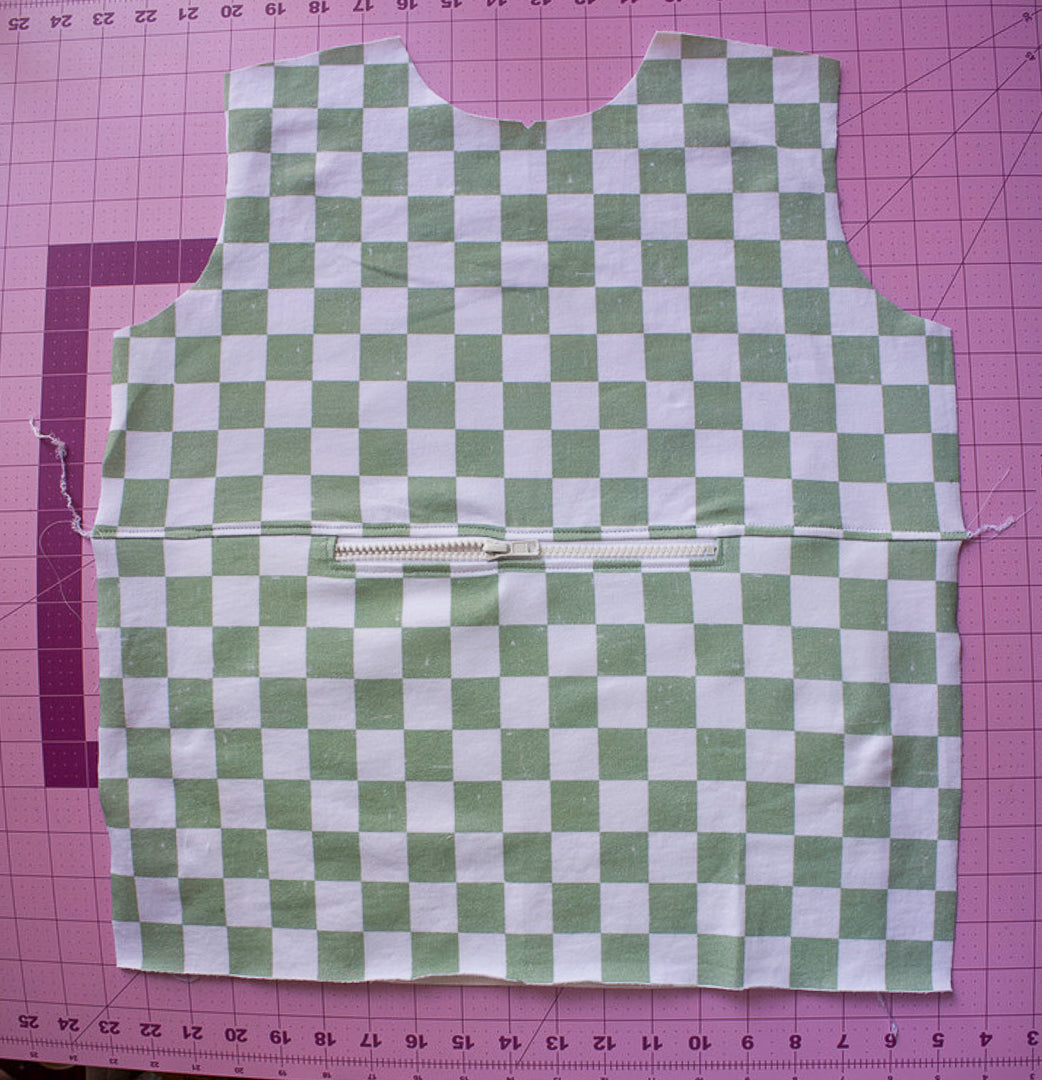
Next, lay your top front main on top of your bottom piece/zipper. Sew this with a 3/8” seam allowance catching the tops of the zipper and pocket linings. Press the seam allowance up and top-stitch across the bodice.
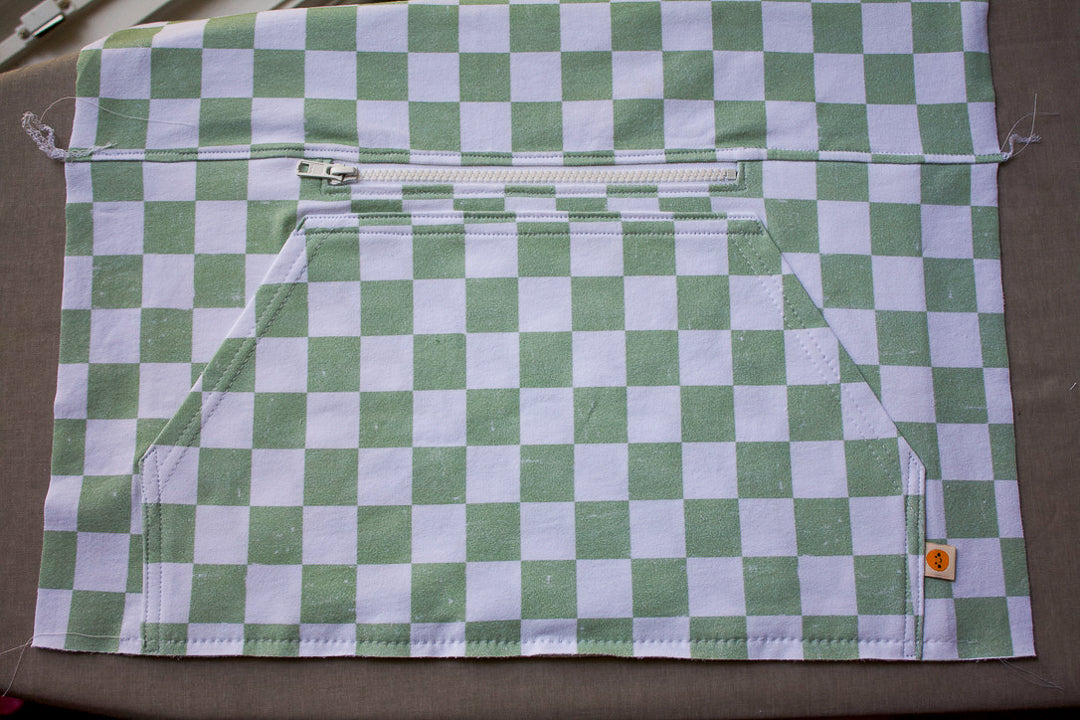
The final thing you will want to make note of is to catch the bottom edge of the pocket linings into your bottom band or hem.
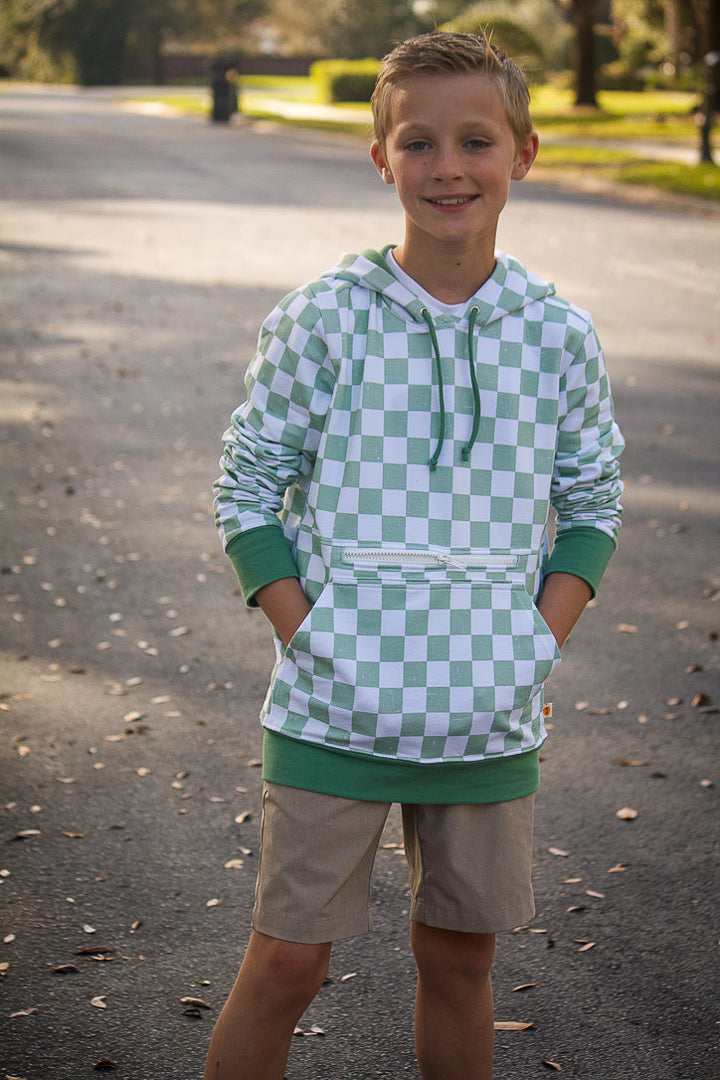
Tadah! You now have a new really cool hoodie that I hope you and your kids love! Please tag me if you make one. I would love to see how everyone personalizes this.
Follow Emily at All My Spare Time
Comments will be approved before showing up.

Maggie joins us today to show us how she used a couple of border prints to create new dresses for her daughter.

Elizabeth is here to show a couple of things she has recently made with our boardshort and swim knit. At the end of the post she adds inspiration for other uses for this versatile fabric!

Today Maggie shows us how to make a blanket using a faux quilt block print. She chose organic cotton interlock for one side and cuddle minky for the other. Come check out the steps and order your fabric today!


